Mapulus Help Centre
- Support >
- Connecting Shopify and Mapulus with Zapier
Connecting Shopify and Mapulus with Zapier
How Connecting Mapulus and Shopify Can Help Your Business.
Unlocking Location Insights: Connecting Shopify and Mapulus with Zapier
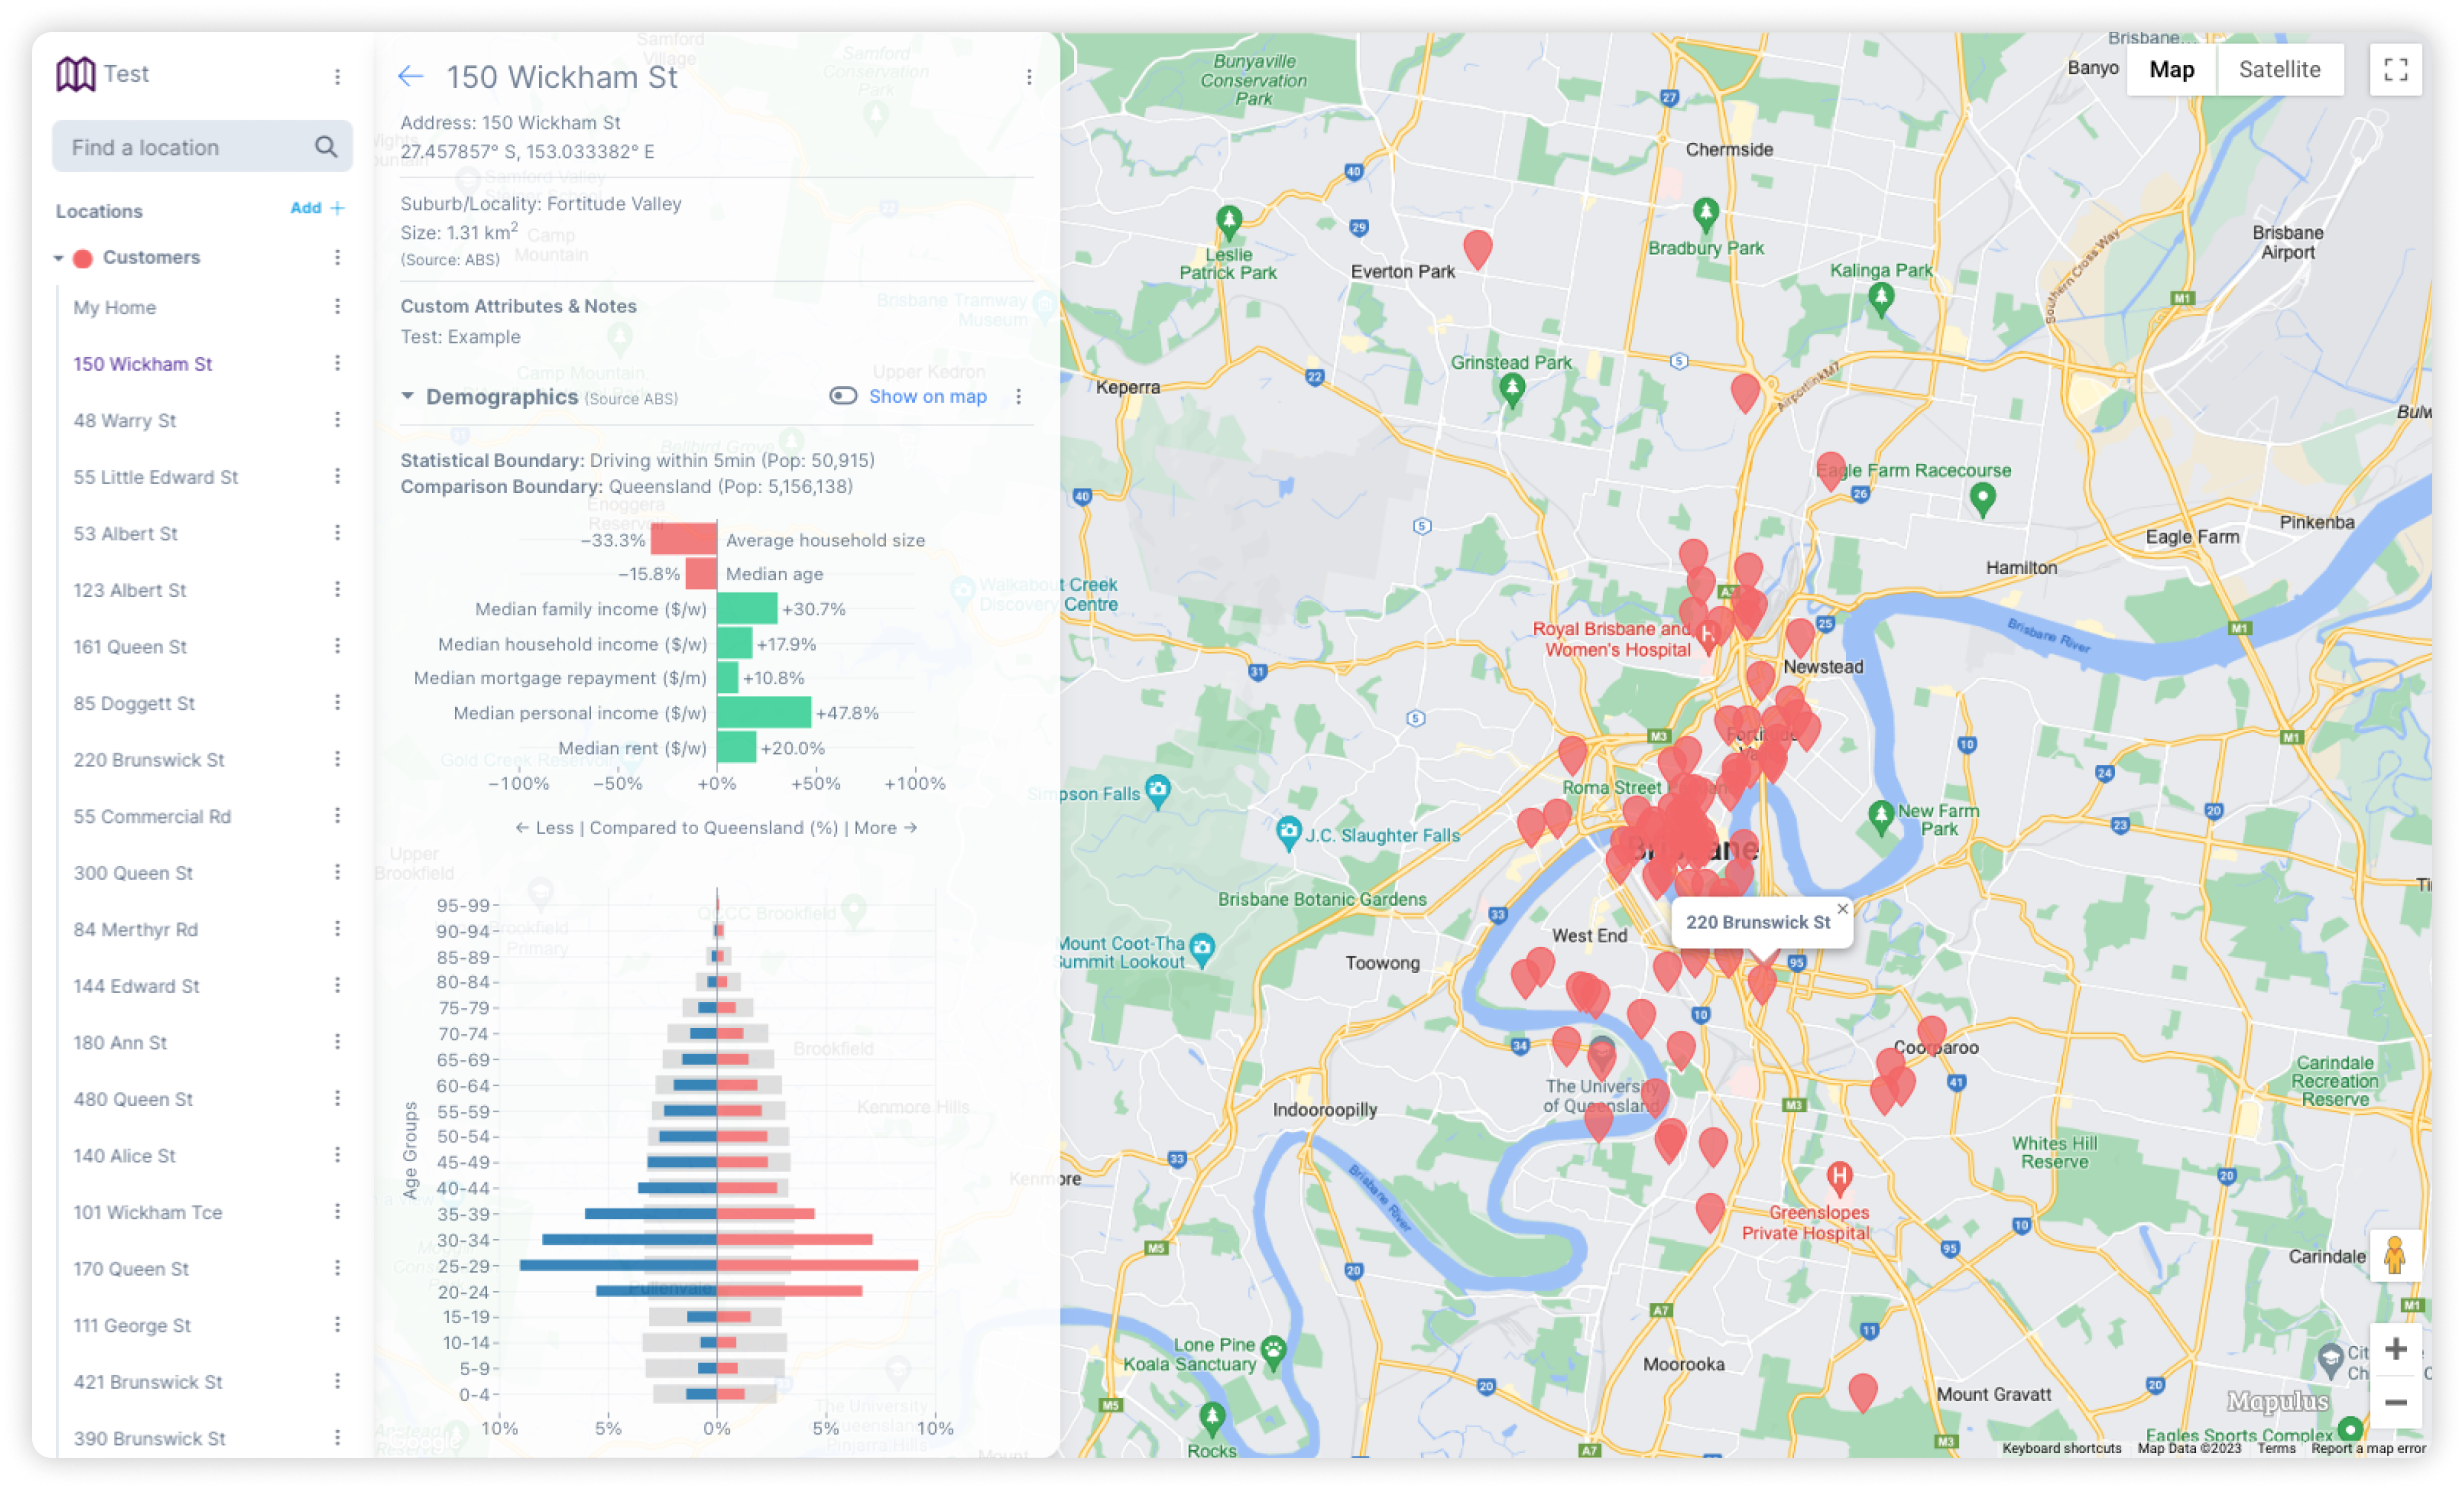
With the help of Zapier, businesses can seamlessly connect Shopify with Mapulus, unleashing a new realm of spatial analysis for sales and customer relationship management. For instance, with a basic setup, you can configure a Zap to automatically create or update a location in Mapulus whenever a new customer is added or updated in Shopify. The geographic analysis offered through Mapulus can serve as a vital tool for market segmentation, sales planning, territory management, targeted advertising, logistic planning, and much more. This guide will walk you through the steps to set up this integration and get started with a couple of Zap templates to ease your setup.
If you’d like to set up a custom Zap with a different trigger, check out our supprt article to get you started. We’ve also created a number of Zapier templates to intergrate with popular applications. You can check them out on our Zapier intergrations profile.
Generate an API Key in Mapulus
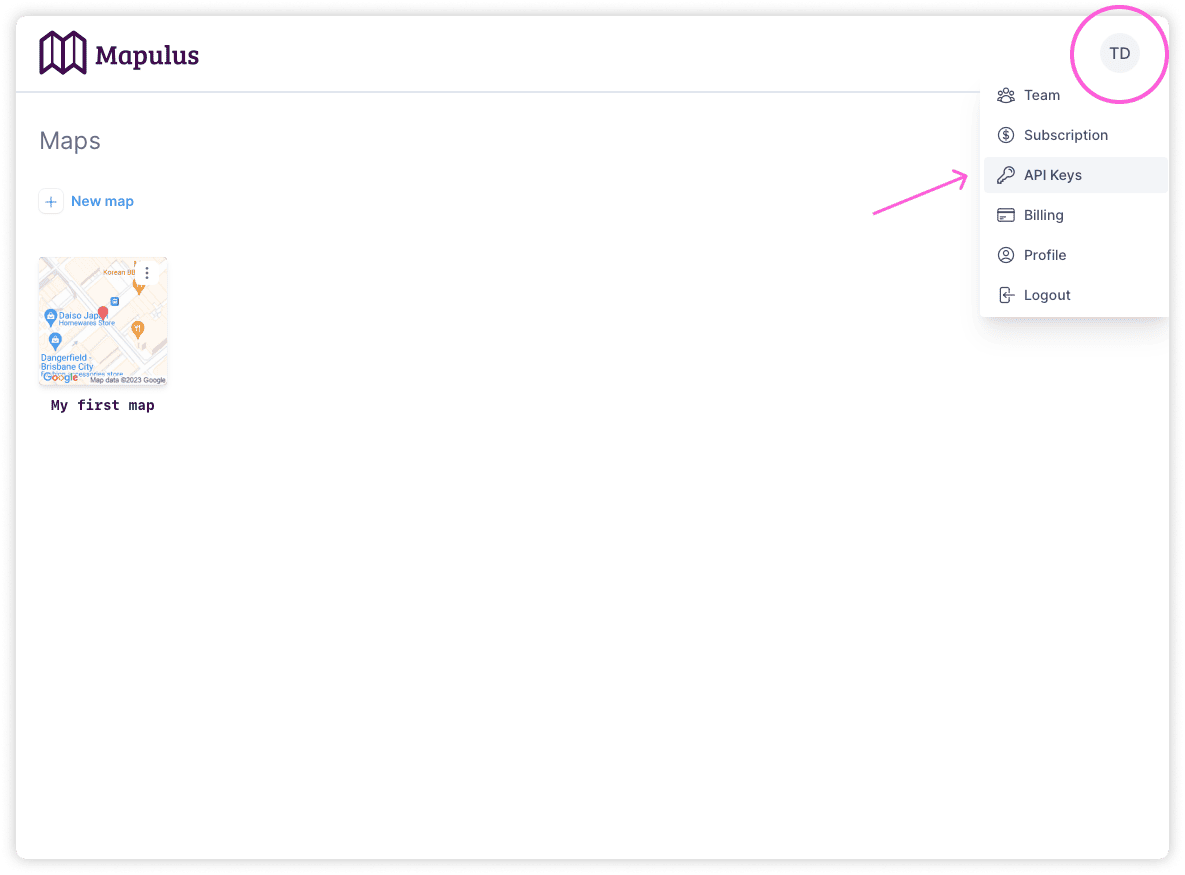
First off, you’ll need to generate an API key from your Mapulus account and set it up in your Zapier account. Follow the steps outlined in the Mapulus-Zapier blog post to get this done.
Zapier Integration Templates
To ease your setup, we’ve crafted several Zapier templates to integrate with popular applications, including Shopify. Check them out on our Zapier profile. In this guide, we are using the “Create Mapulus Locations for New Shopify Customer”, and “Update Mapulus Locations for Modified Shopify Customer” templates. These templates will help you keep your Mapulus map in sync with Shopify and visualize the locations of your customers’ addresses.
Step 1: Using the Mapulus/Shopify templates
Start by creating a Zap using the “Create Mapulus Locations for New Shopify Customer” template. This will lay the groundwork for what you need.
Step 2: Connect Zapier with Shopify
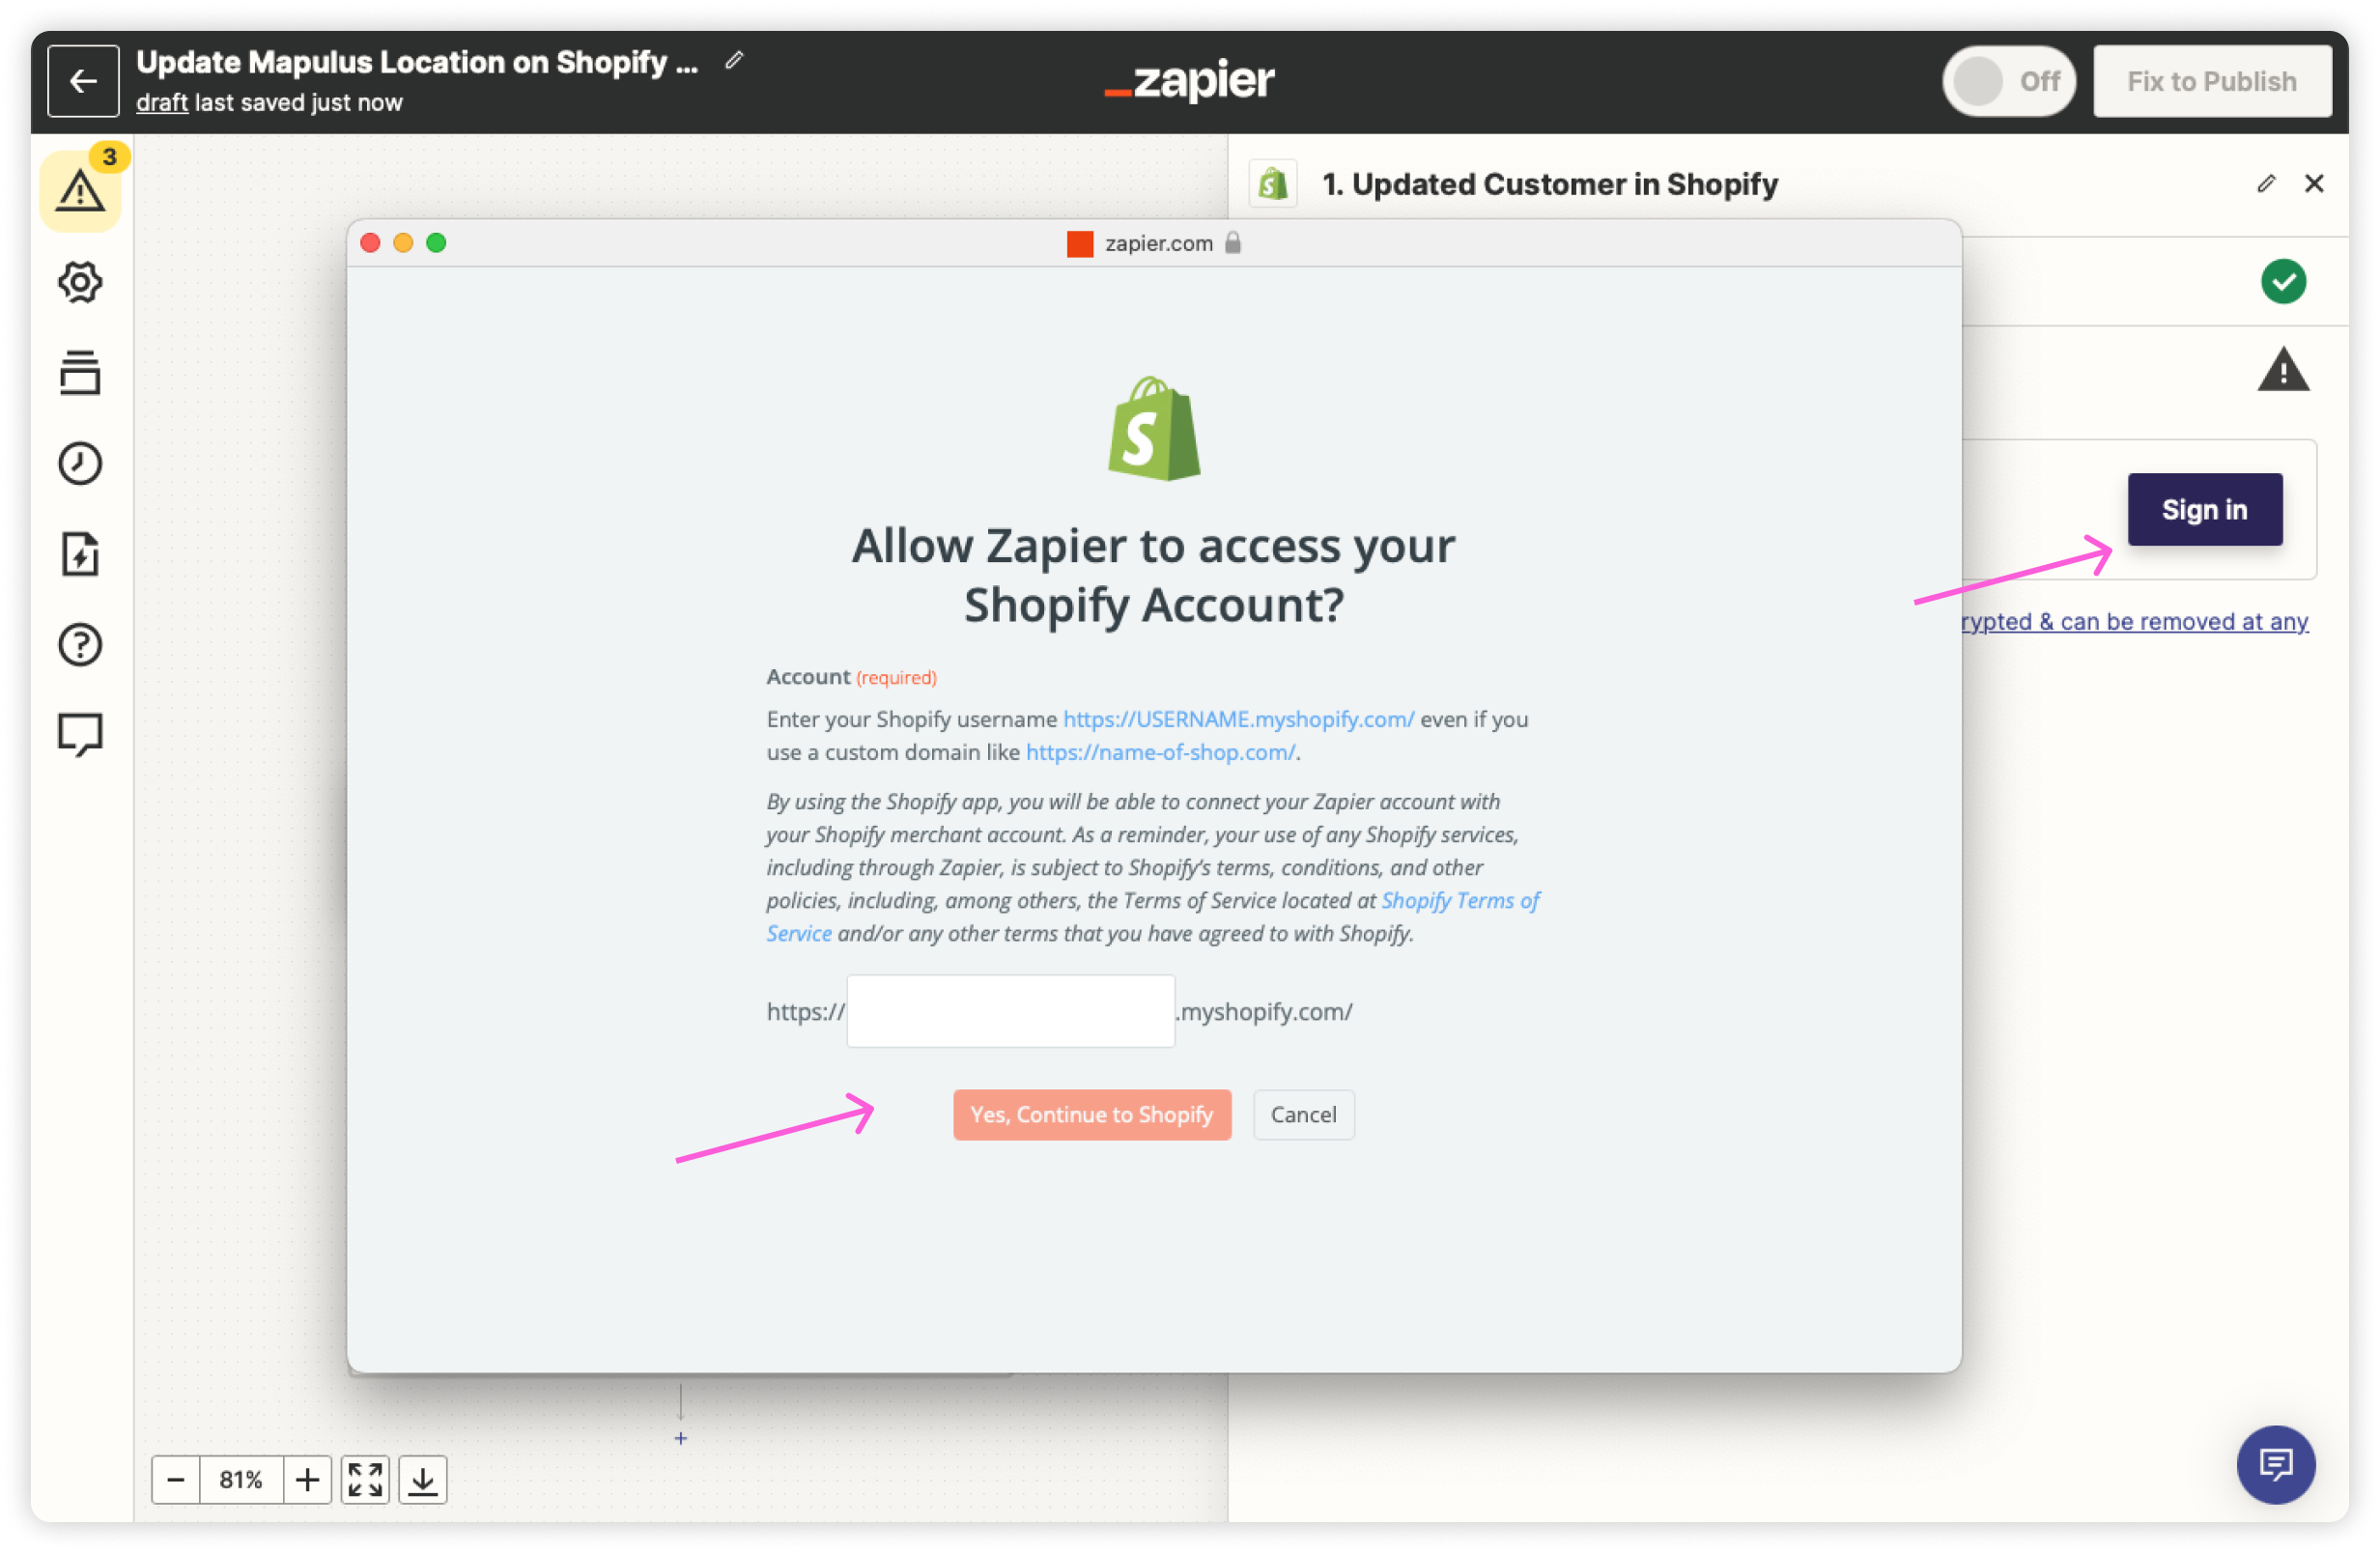
Click on the Shopify step in your new Zap. If you haven’t already connected a Shopify account, you’ll be prompted to sign in. Follow the steps outlined in Zapier to connect your Shopify account.
Step 3: Connect Zapier with Mapulus
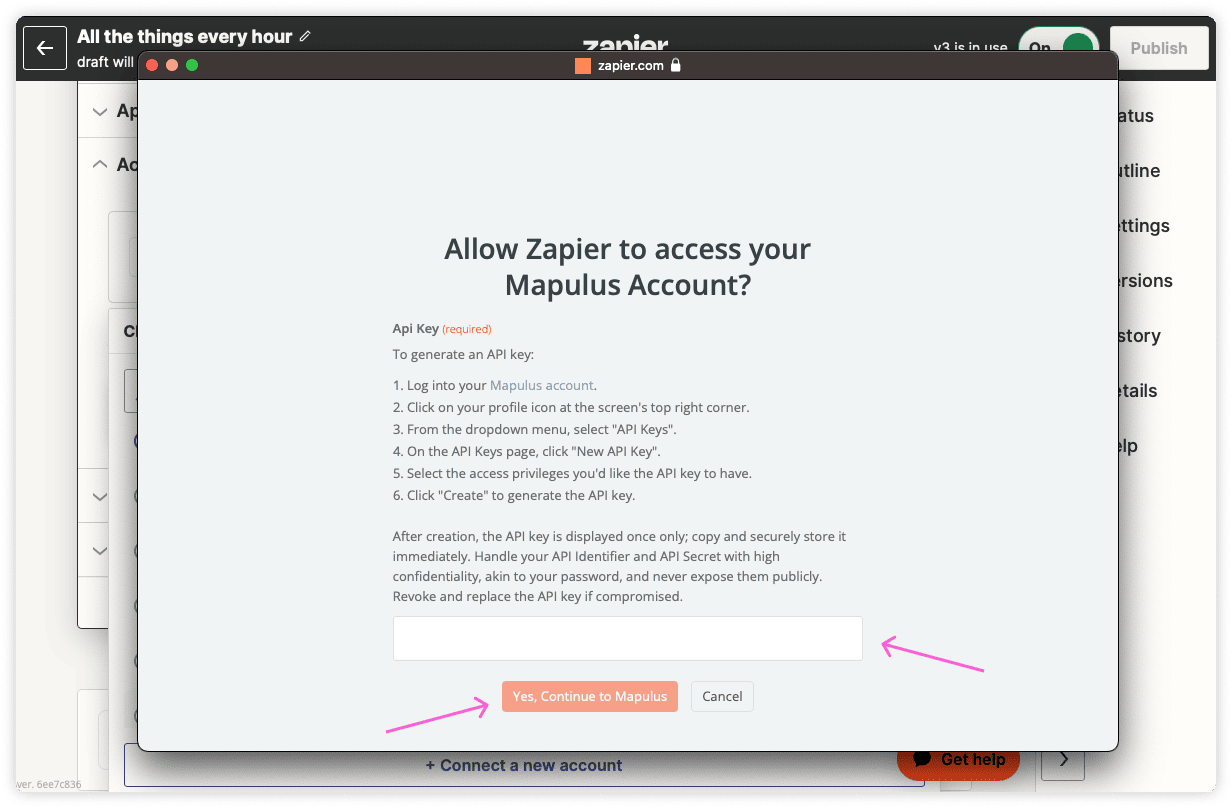
Now, click on the Mapulus step. If you haven’t already connected a Mapulus account, you’ll be prompted to sign in. Follow the steps outlined in Zapier to connect your Mapulus account by adding your API key.
Step 4: Select the Mapulus Map layer you want the locations to appear
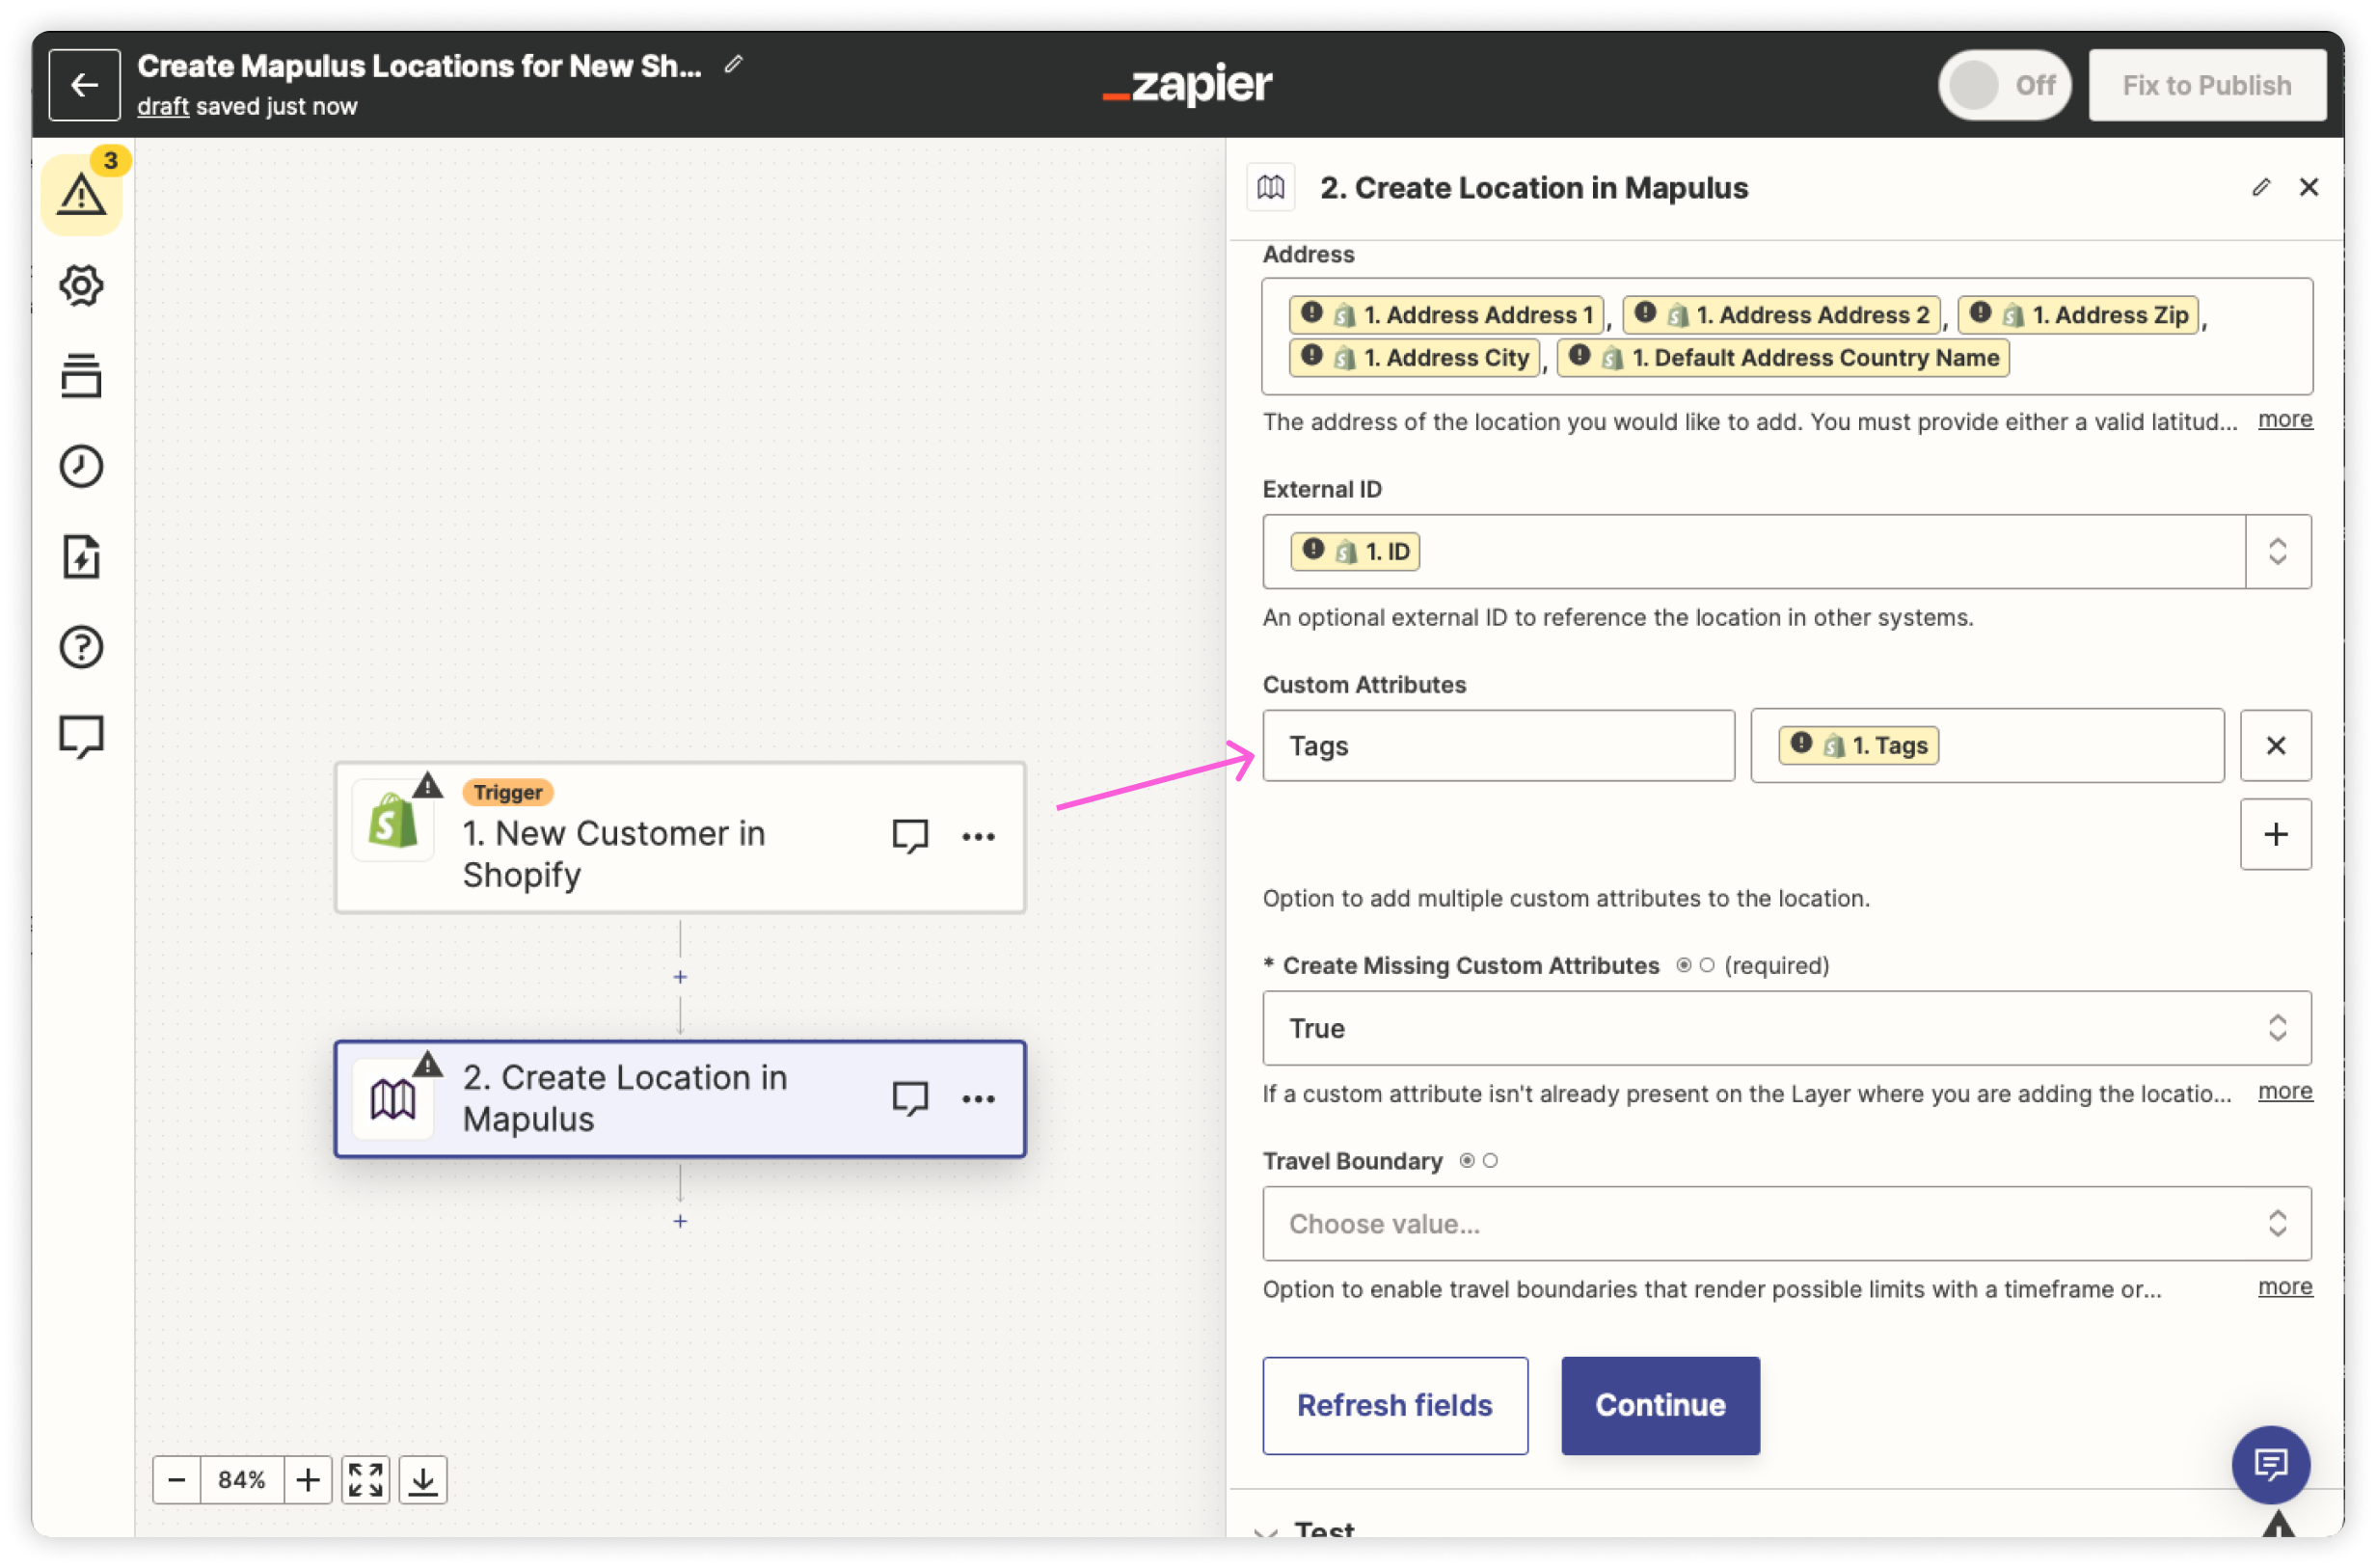
To let Mapulus know which map and layer the locations should appear on, in the Mapulus step, under the Layer attribute, select the Layer you want the locations to be created on. If you want to add customers to different layers in the map based on custom attributes in Shopify, you can use a custom attribute to select the correctly named Layer. Ensure you create the layer on the map in Mapulus first, or the Zap will fail.

Step 5: Review the custom attribute mapping in the Mapulus step
The template comes with some custom attribute mapping in place. You can add any number of custom attributes to appear in Mapulus, so you have that additional information on hand. Review the custom attributes and adjust them to fit your needs.
Step 6: Complete Your Zap
Once you’ve set up your triggers and actions, name your Zap, test it, and publish it. Zapier will automatically act whenever the trigger event occurs and add new customer locations to your Map. Note: It’s crucial to have well-structured addresses in Shopify so Mapulus can accurately geocode the address.
Additional Steps: Using the “Update Mapulus Locations for Modified Shopify Customer” Template
By setting up this additional Zap, you ensure that changes in your Shopify customer data (such as address modifications) are seamlessly updated in Mapulus. Here’s how to do it:
Step 1: Choose the Update Template
Go to the Zapier profile for Mapulus and select the “Update Mapulus Locations for Modified Shopify Customer” template.
Step 2: Set the Shopify Trigger
- Choose the trigger event in Shopify. For this template, it should be something like “Updated Customer”.
- If you haven’t already connected your Shopify account with Zapier, you’ll be prompted to do so. Follow the on-screen instructions and give Zapier the required permissions.
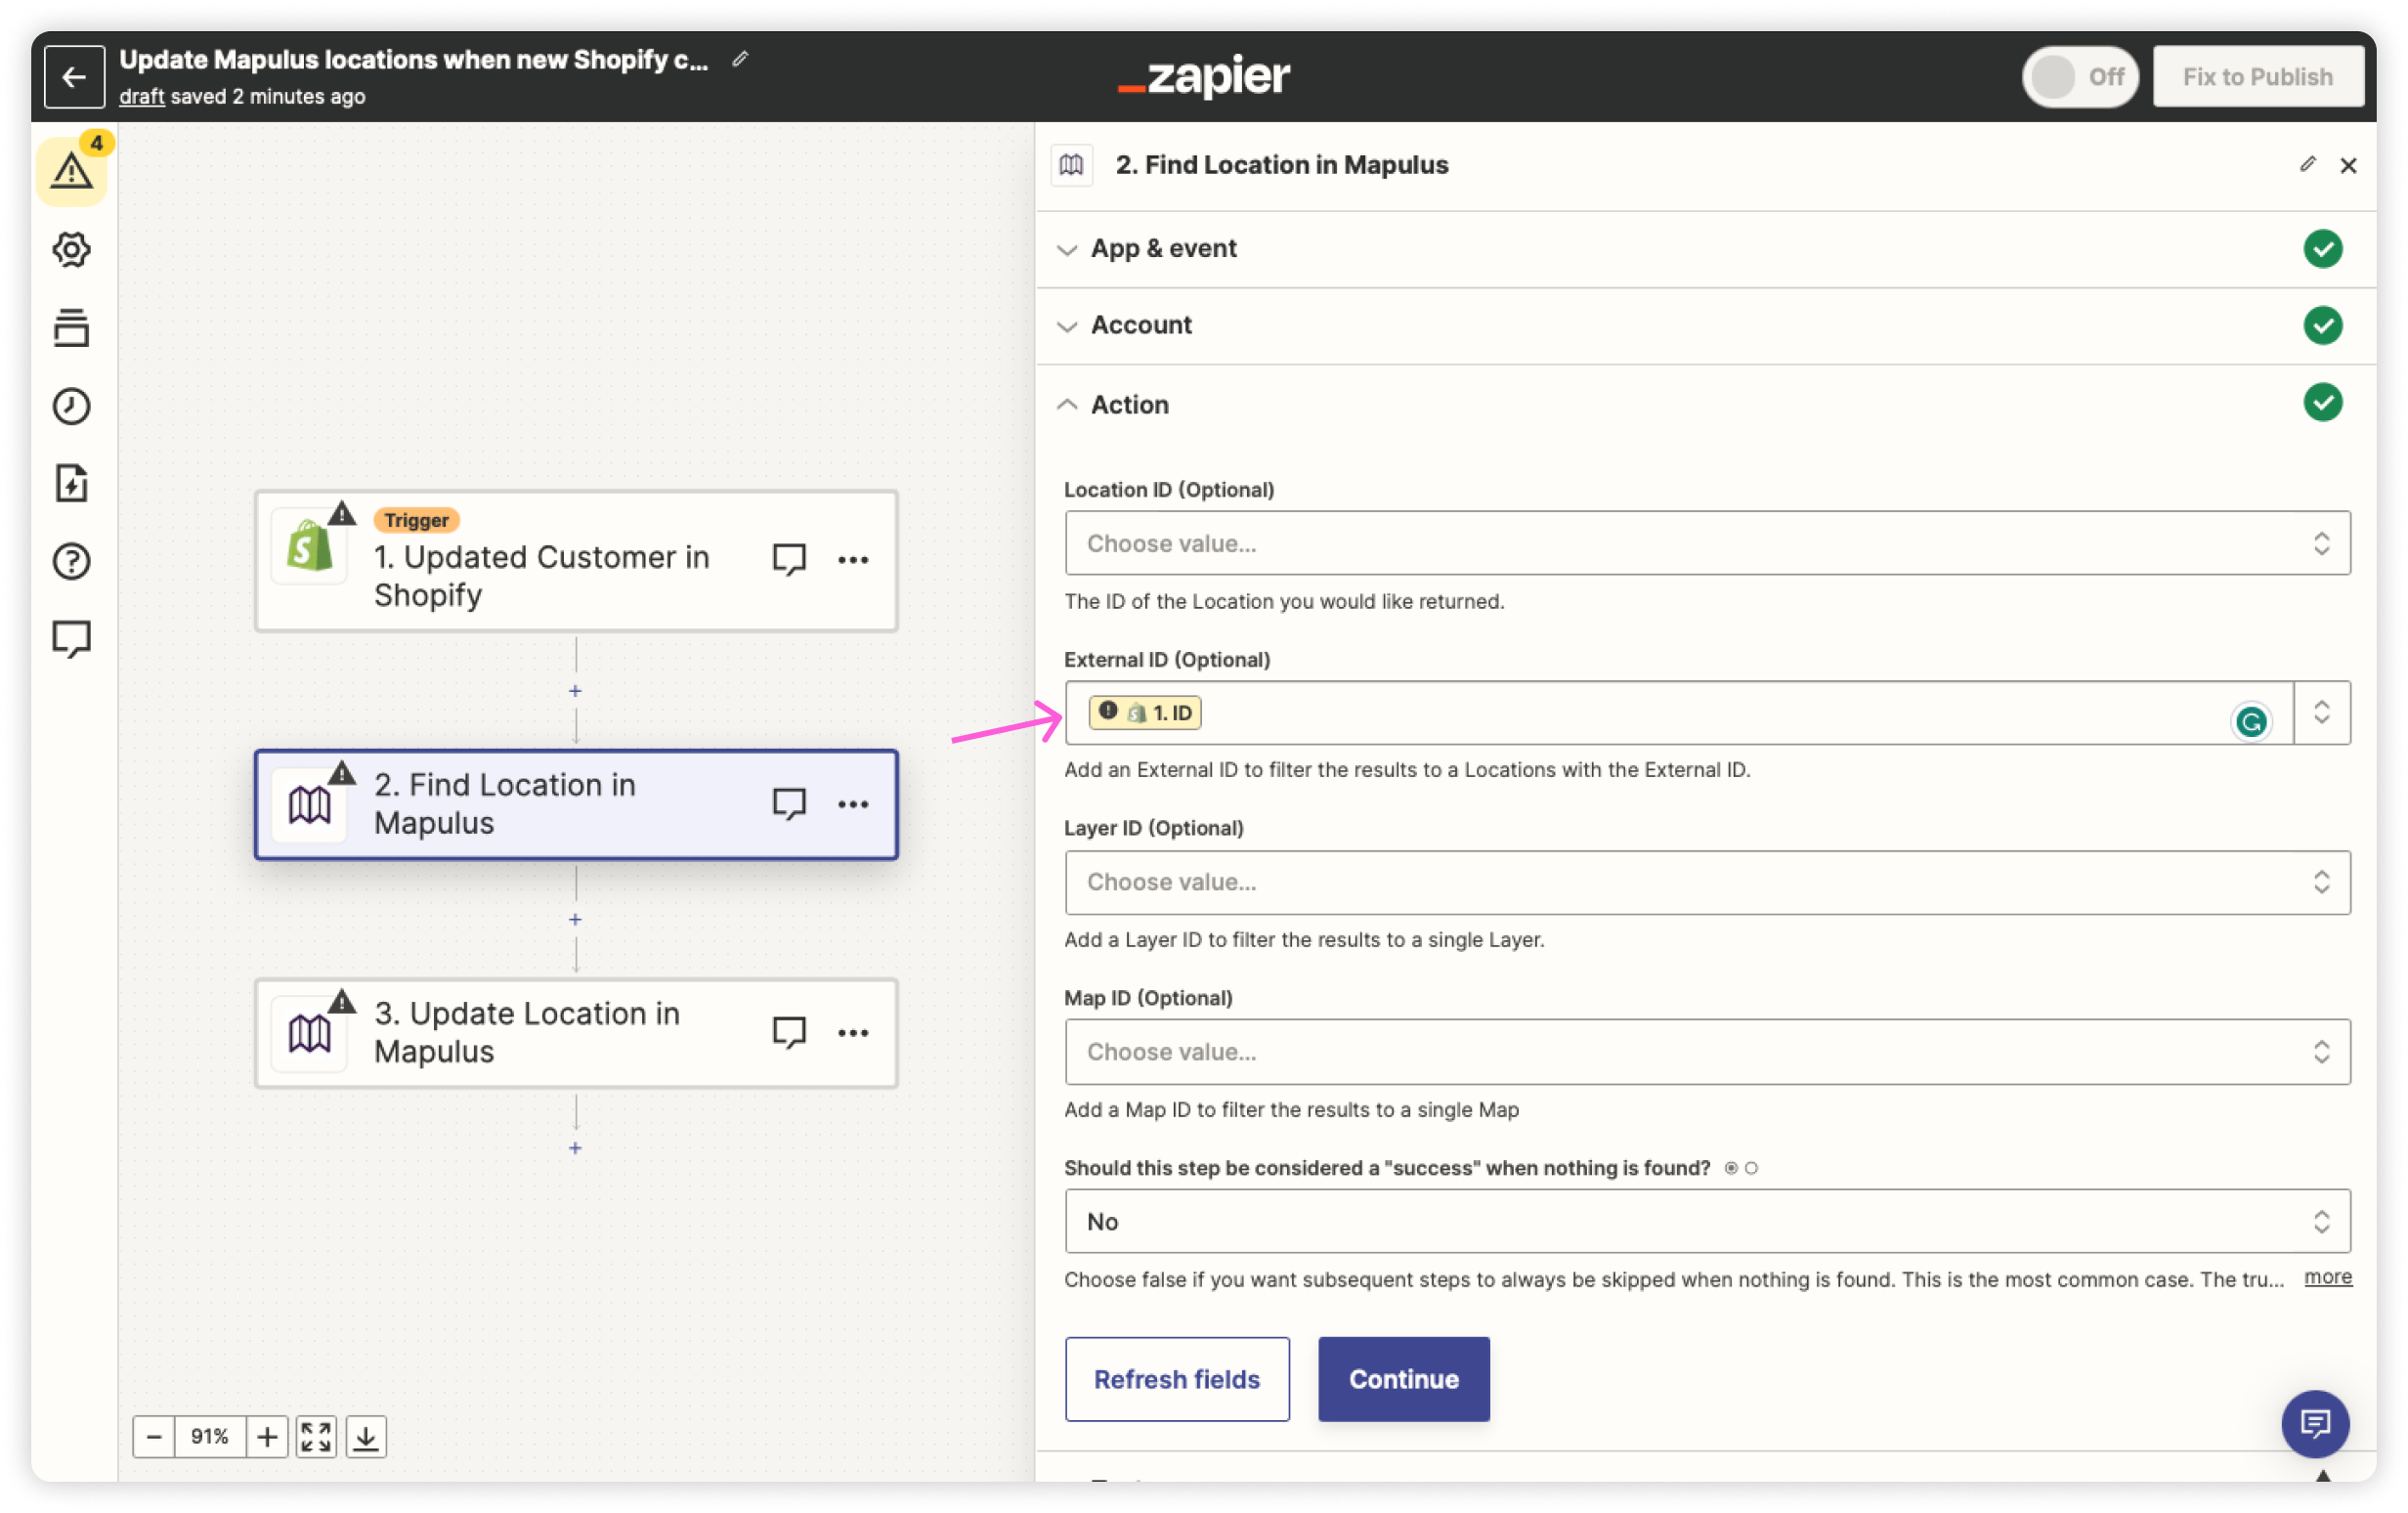
Step 3: Search for the Existing Location in Mapulus
Before you can update a location in Mapulus, you first need to identify the right location.
- Choose the “Find Location in Mapulus” action.
- Use the Shopify customer’s unique ID or email address as the External ID to search for the corresponding location in Mapulus.
Make sure you choose ‘No’ for ‘Should this step be considered a “success” when nothing is found?’; otherwise, the Zap will keep retrying to find the location.
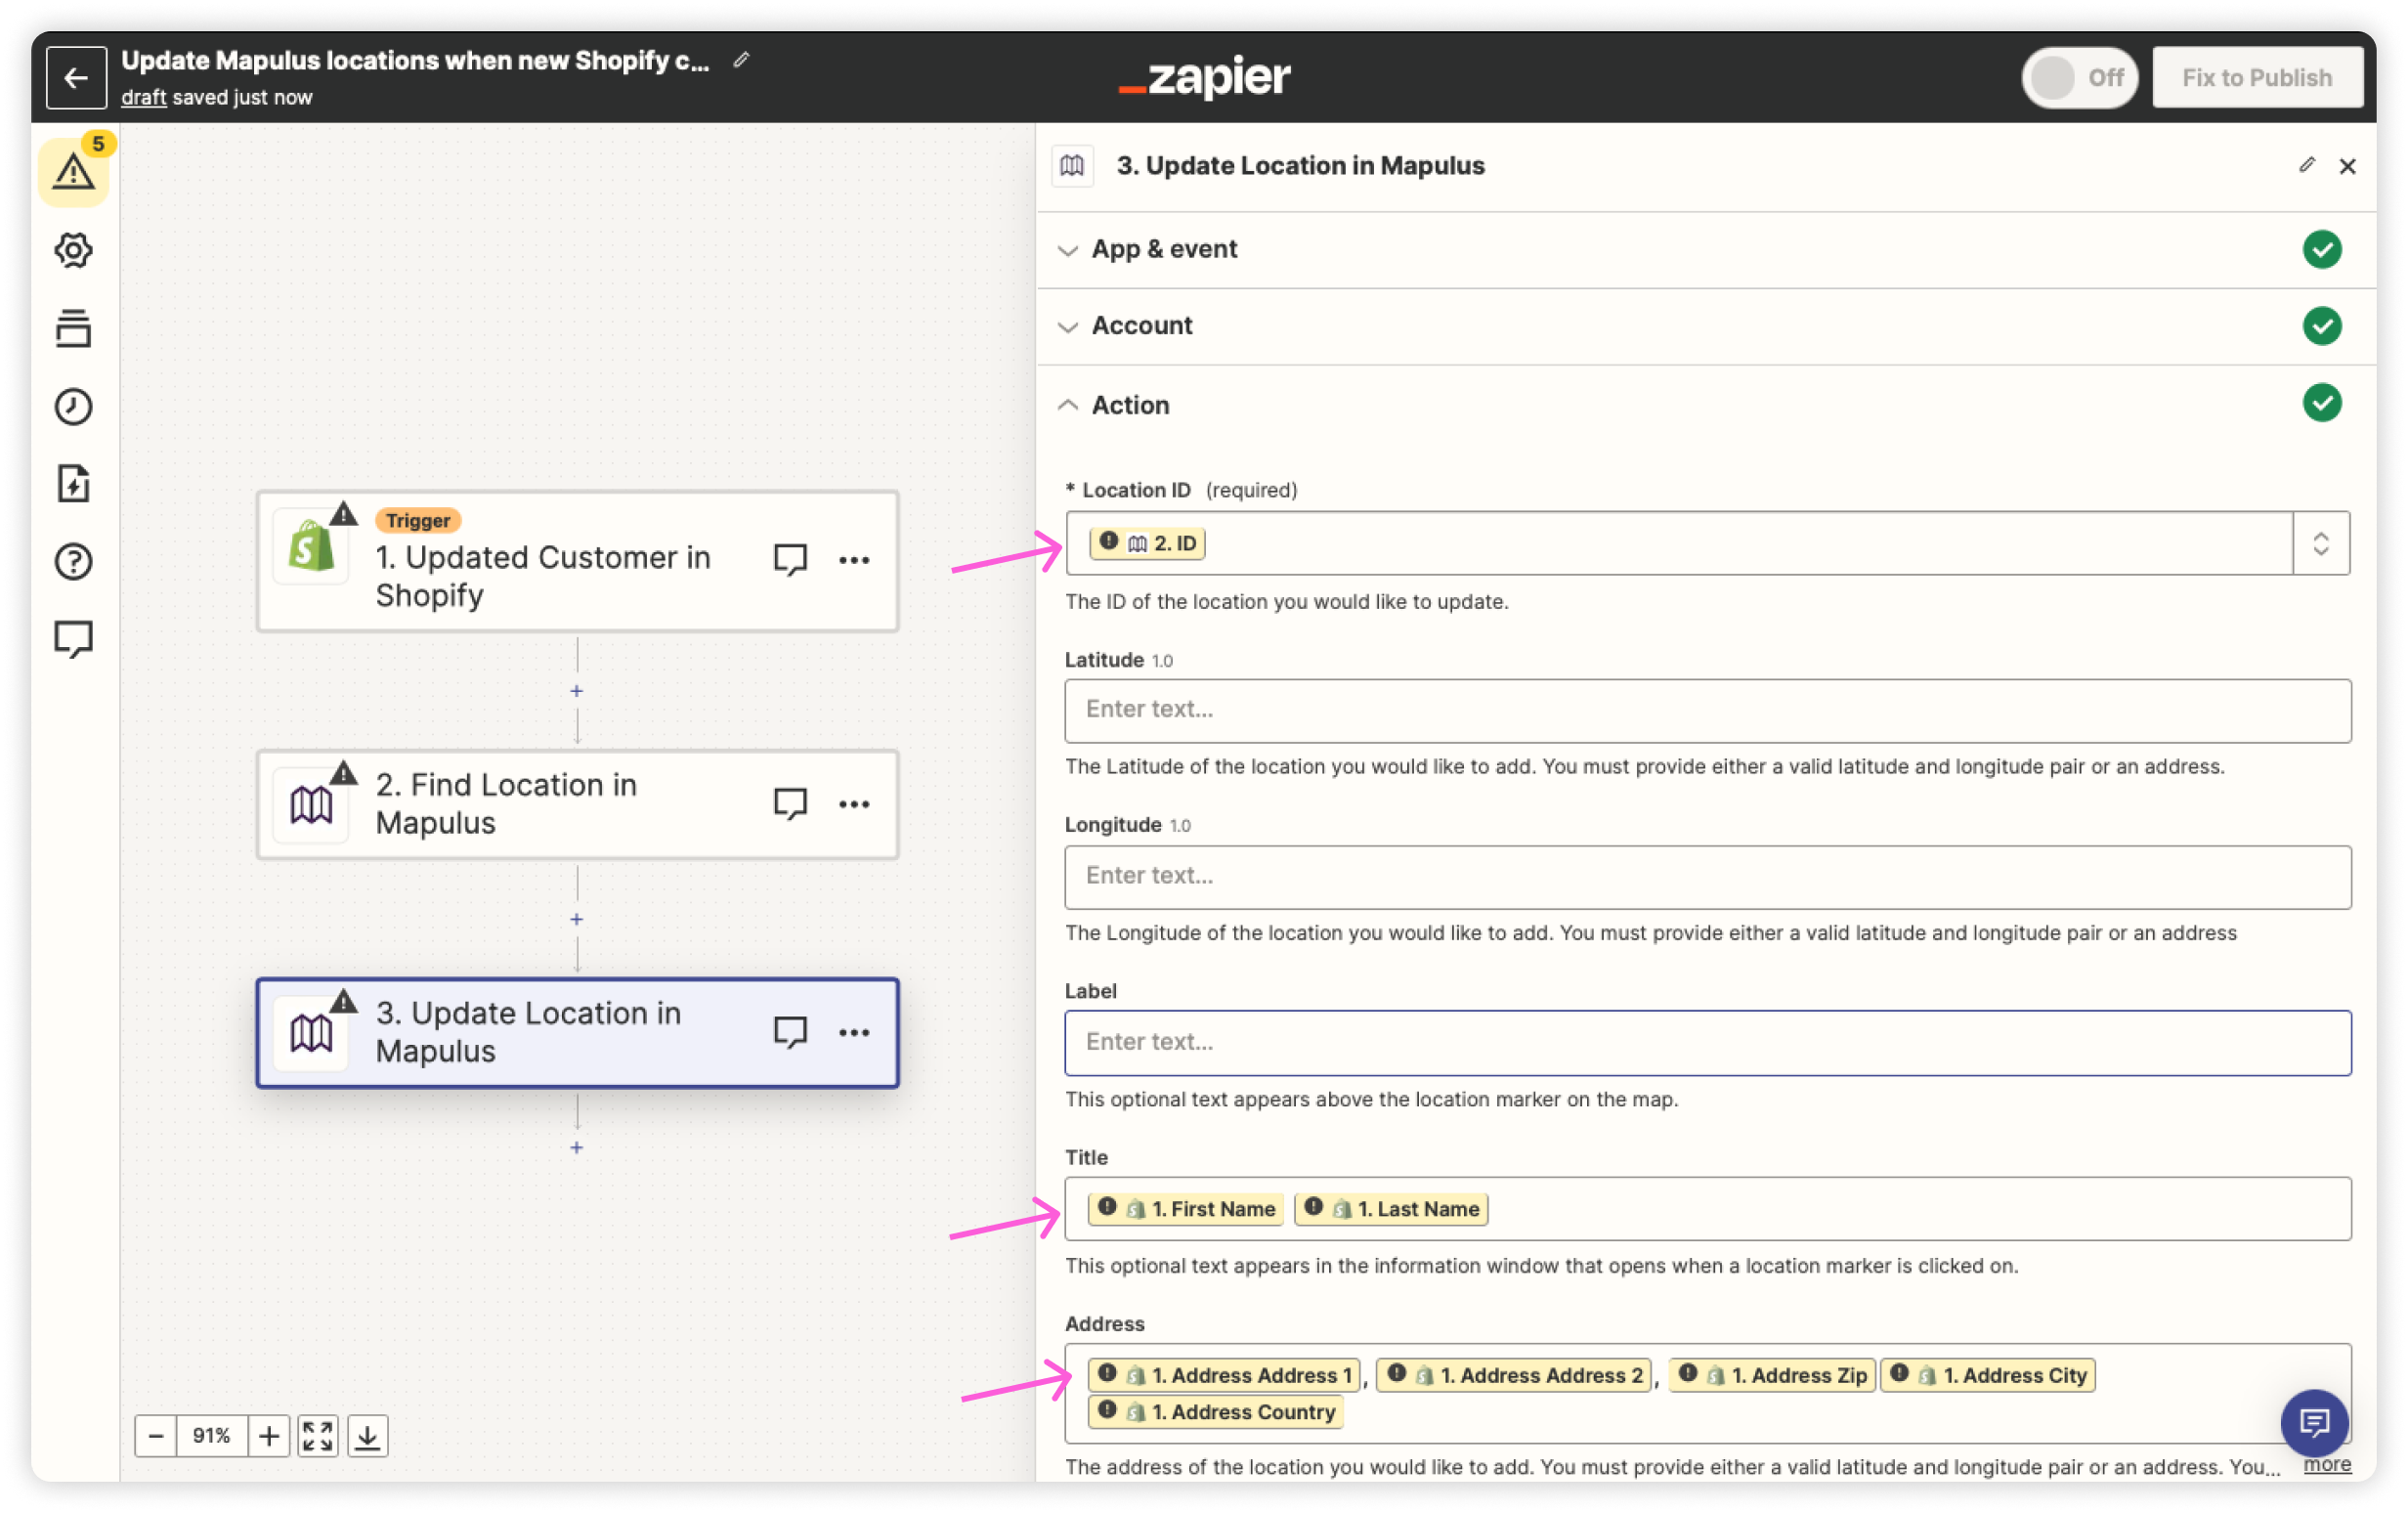
Step 4: Update the Location in Mapulus
- Now, choose the “Update Location in Mapulus” action.
- Map the location ID from the found location in the previous step.
- Ensure you map all the necessary fields like customer name, address, etc., from Shopify to the corresponding fields in Mapulus.
Step 5: Review and Testing
Once you’ve set up the trigger and actions:
- Name your Zap something recognisable like “Update Mapulus Location for Modified Shopify Customer”.
- Test the Zap to ensure everything works as expected. You can do this by updating a customer’s information in Shopify and checking if the changes are reflected in Mapulus.
- If the test runs successfully, you’re ready to activate the Zap.
Step 6: Activate the Zap
Turn on your Zap. Once activated, changes to customer locations in Shopify will automatically update the corresponding locations in Mapulus.
By integrating the “Update Mapulus Locations for Modified Shopify Customer” template, you have set up a robust system that ensures any modifications made to customer data in Shopify will be automatically mirrored in Mapulus. This maintains the accuracy and relevance of your location data, providing you with an up-to-date and clear spatial representation of your customers.