Mapulus Help Centre
- Support >
- How to Set Up Zaps to Sync Locations in Mapulus With Zapier
How to Set Up Zaps to Sync Locations in Mapulus With Zapier
This article describe the create, update, and delete Zaps required to keep locations in sync on your Mapulus map with Zapier.
Discover the power of automation by setting up Zaps in Zapier to sync your locations in Mapulus effortlessly. This article will guide you through creating three distinct Zaps for creating, updating, and deleting locations in Mapulus. By following these steps, you can automate your location management, ensuring that your Mapulus map remains up-to-date with the latest changes from your data sources.
Prerequisites:
- A Zapier account. If you don’t have one, you can create one for free at www.zapier.com.
- An active Mapulus account with an API key. Sign up for free at app.mapulus.com if you don’t have an account.
Step 1: Preparing Your Mapulus Account
Before diving into Zapier, ensure an API key is generated in your Mapulus. You can follow the steps outlined in the Connecting Zapier to Mapulus article.
Step 2: Creating Your Zaps
You will need to create three Zaps to allow your map locations to be fully synced. One to create the Location in Mapulus, one to update the locations, and if needed, one to delete the location.
To get started, log into your Zapier account and click on “Make a Zap” at the top of the page. Search for and select the trigger app that your locations will be sourced from. For example, this could be a Google spread sheet or a CRM like HubSpot. Next select the ‘Mapulus > Create Location’ action.
Create Location Zap:
- Trigger: Set up a trigger from the application of your choice. For instance, whenever a new row is added in Google Sheets or a new Company is created in a client relationship tool (CRM) like HubSpot.
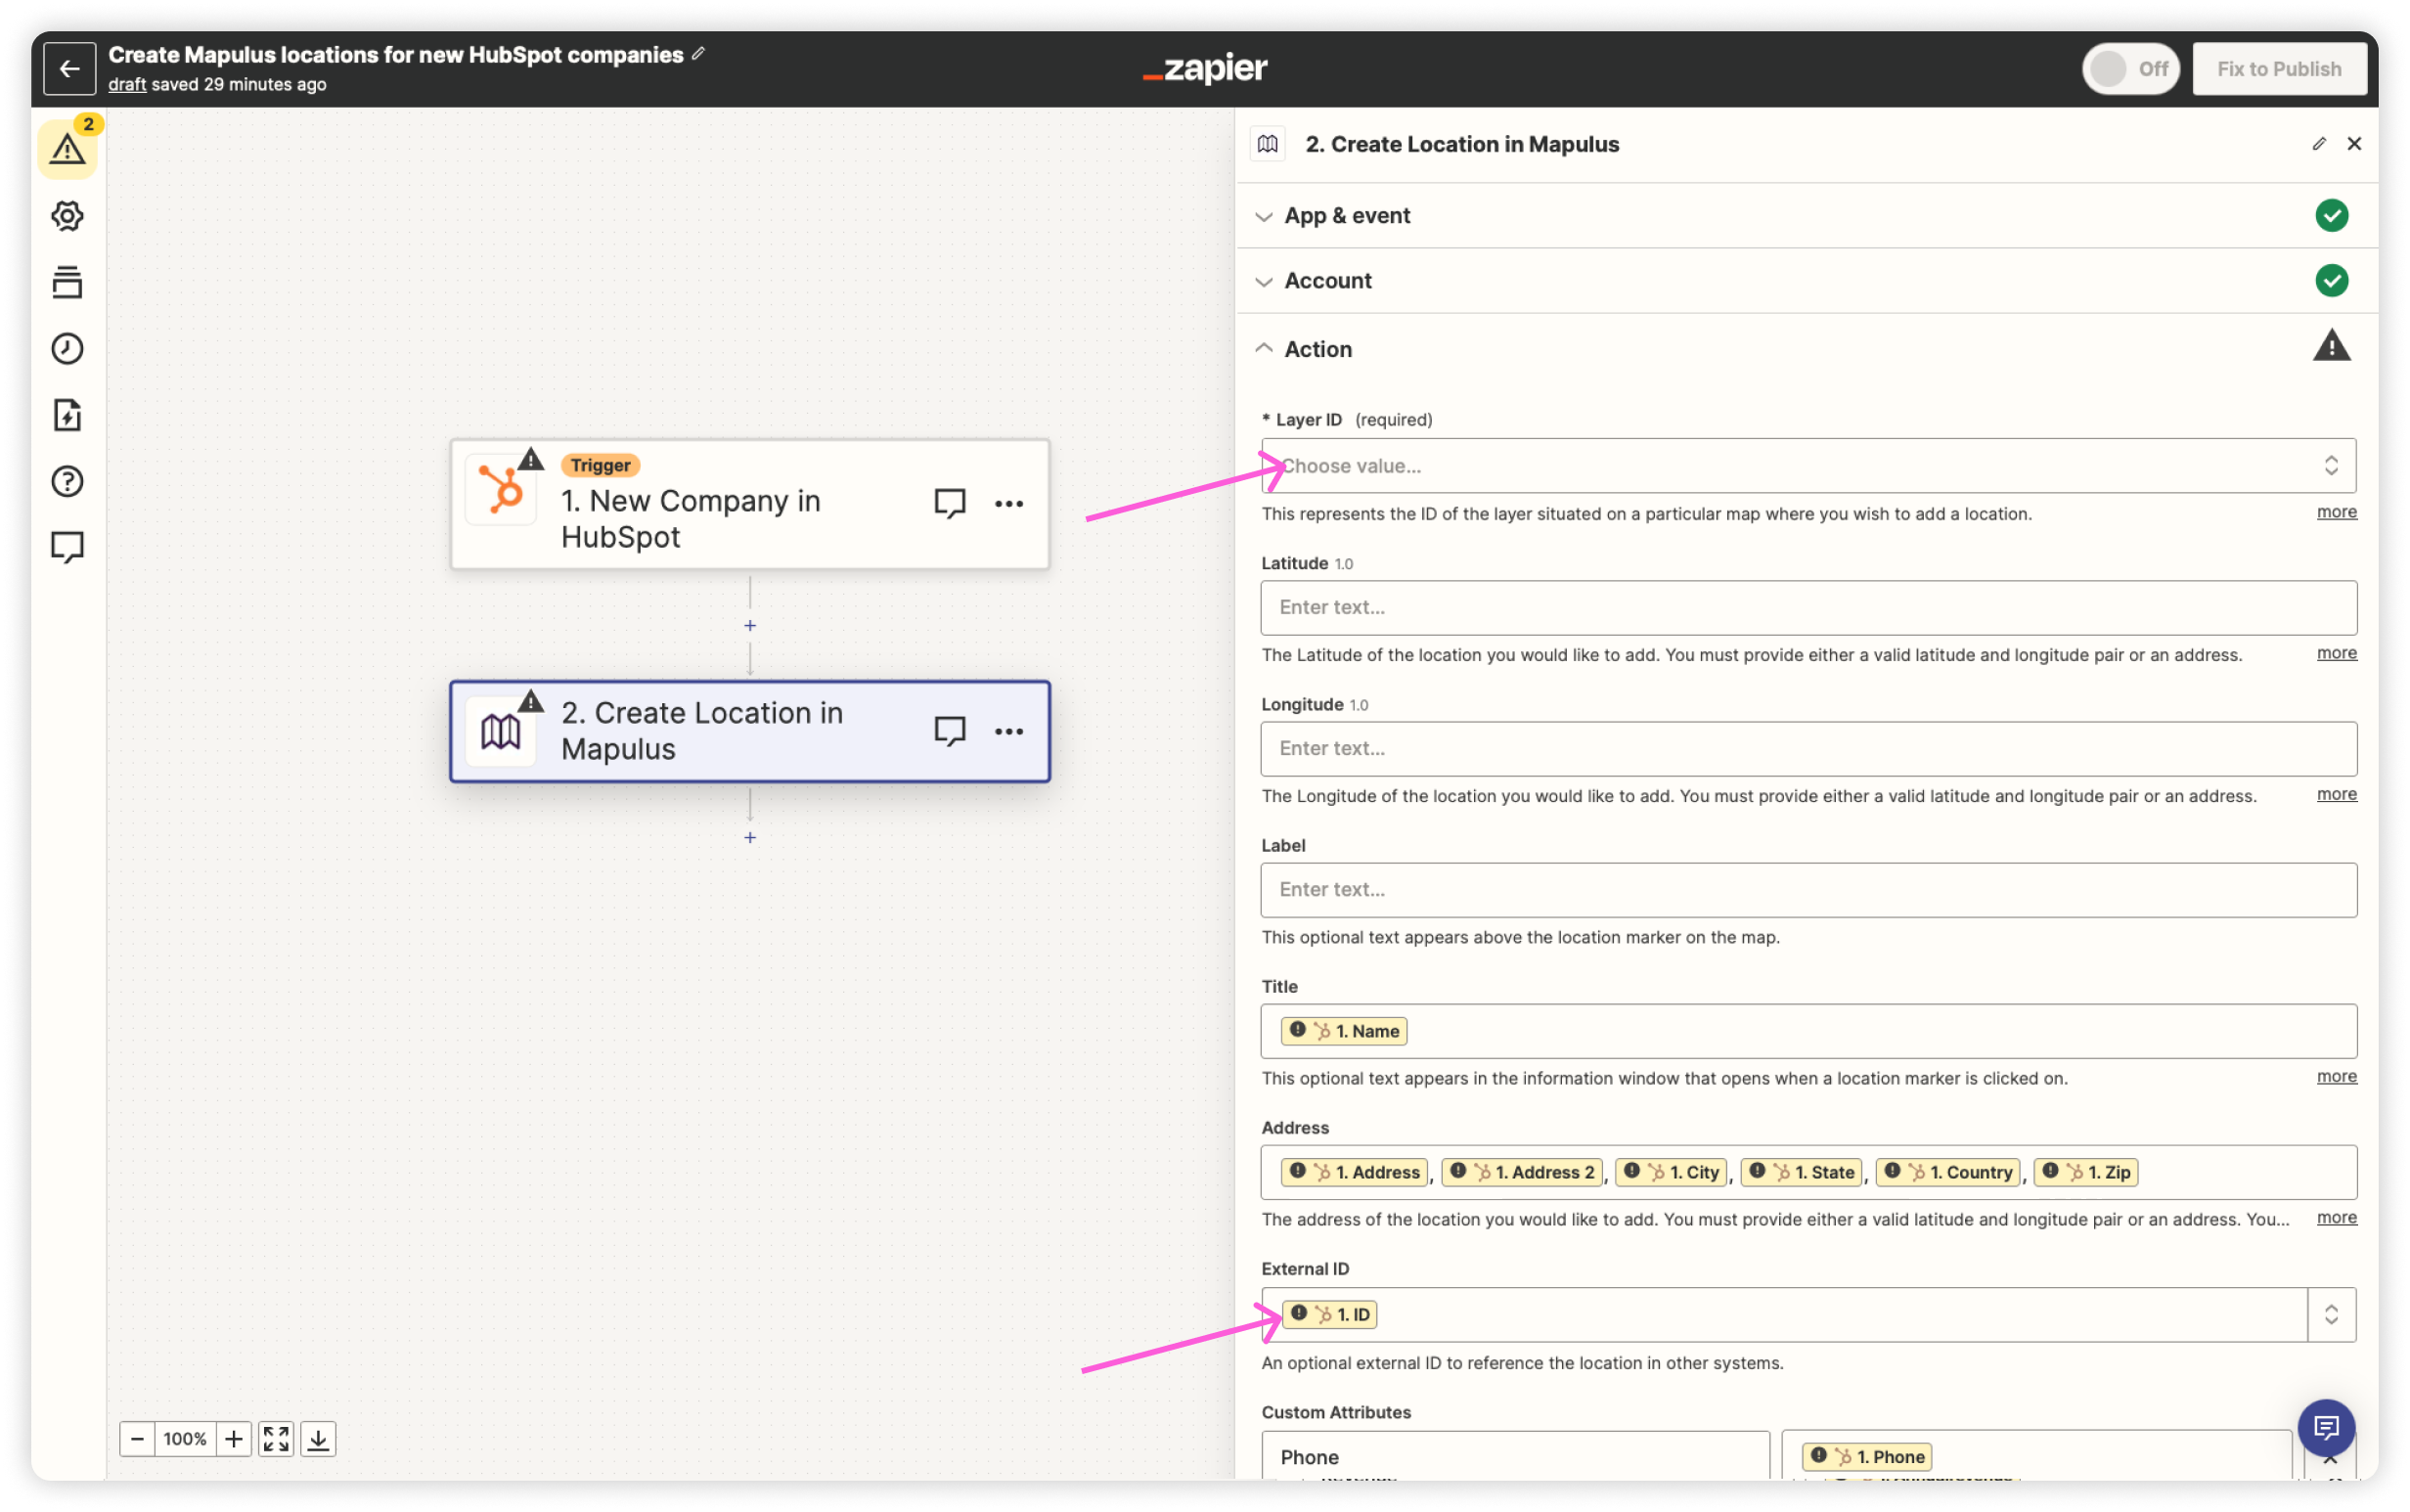
- Action: Select Mapulus > Create Location. Fill in the necessary fields.
In the Mapulus Create action, ensure you find and select the Layer on which you want the locations to be created. You must create the map layer in Mapulus first, or the Zap will fail.
Ensure you fill in the External ID field to have a unique identifier for each location. This will be crucial in the following Zaps so the system can look up the location to be updated. You can create a unique ID on your spreadsheet, or even use an email – as long as it’s unique per location. If the data is coming from another system, you can use the ID from that system. For example, you could use the Company ID from Hubspot as the external ID in Mapulus.
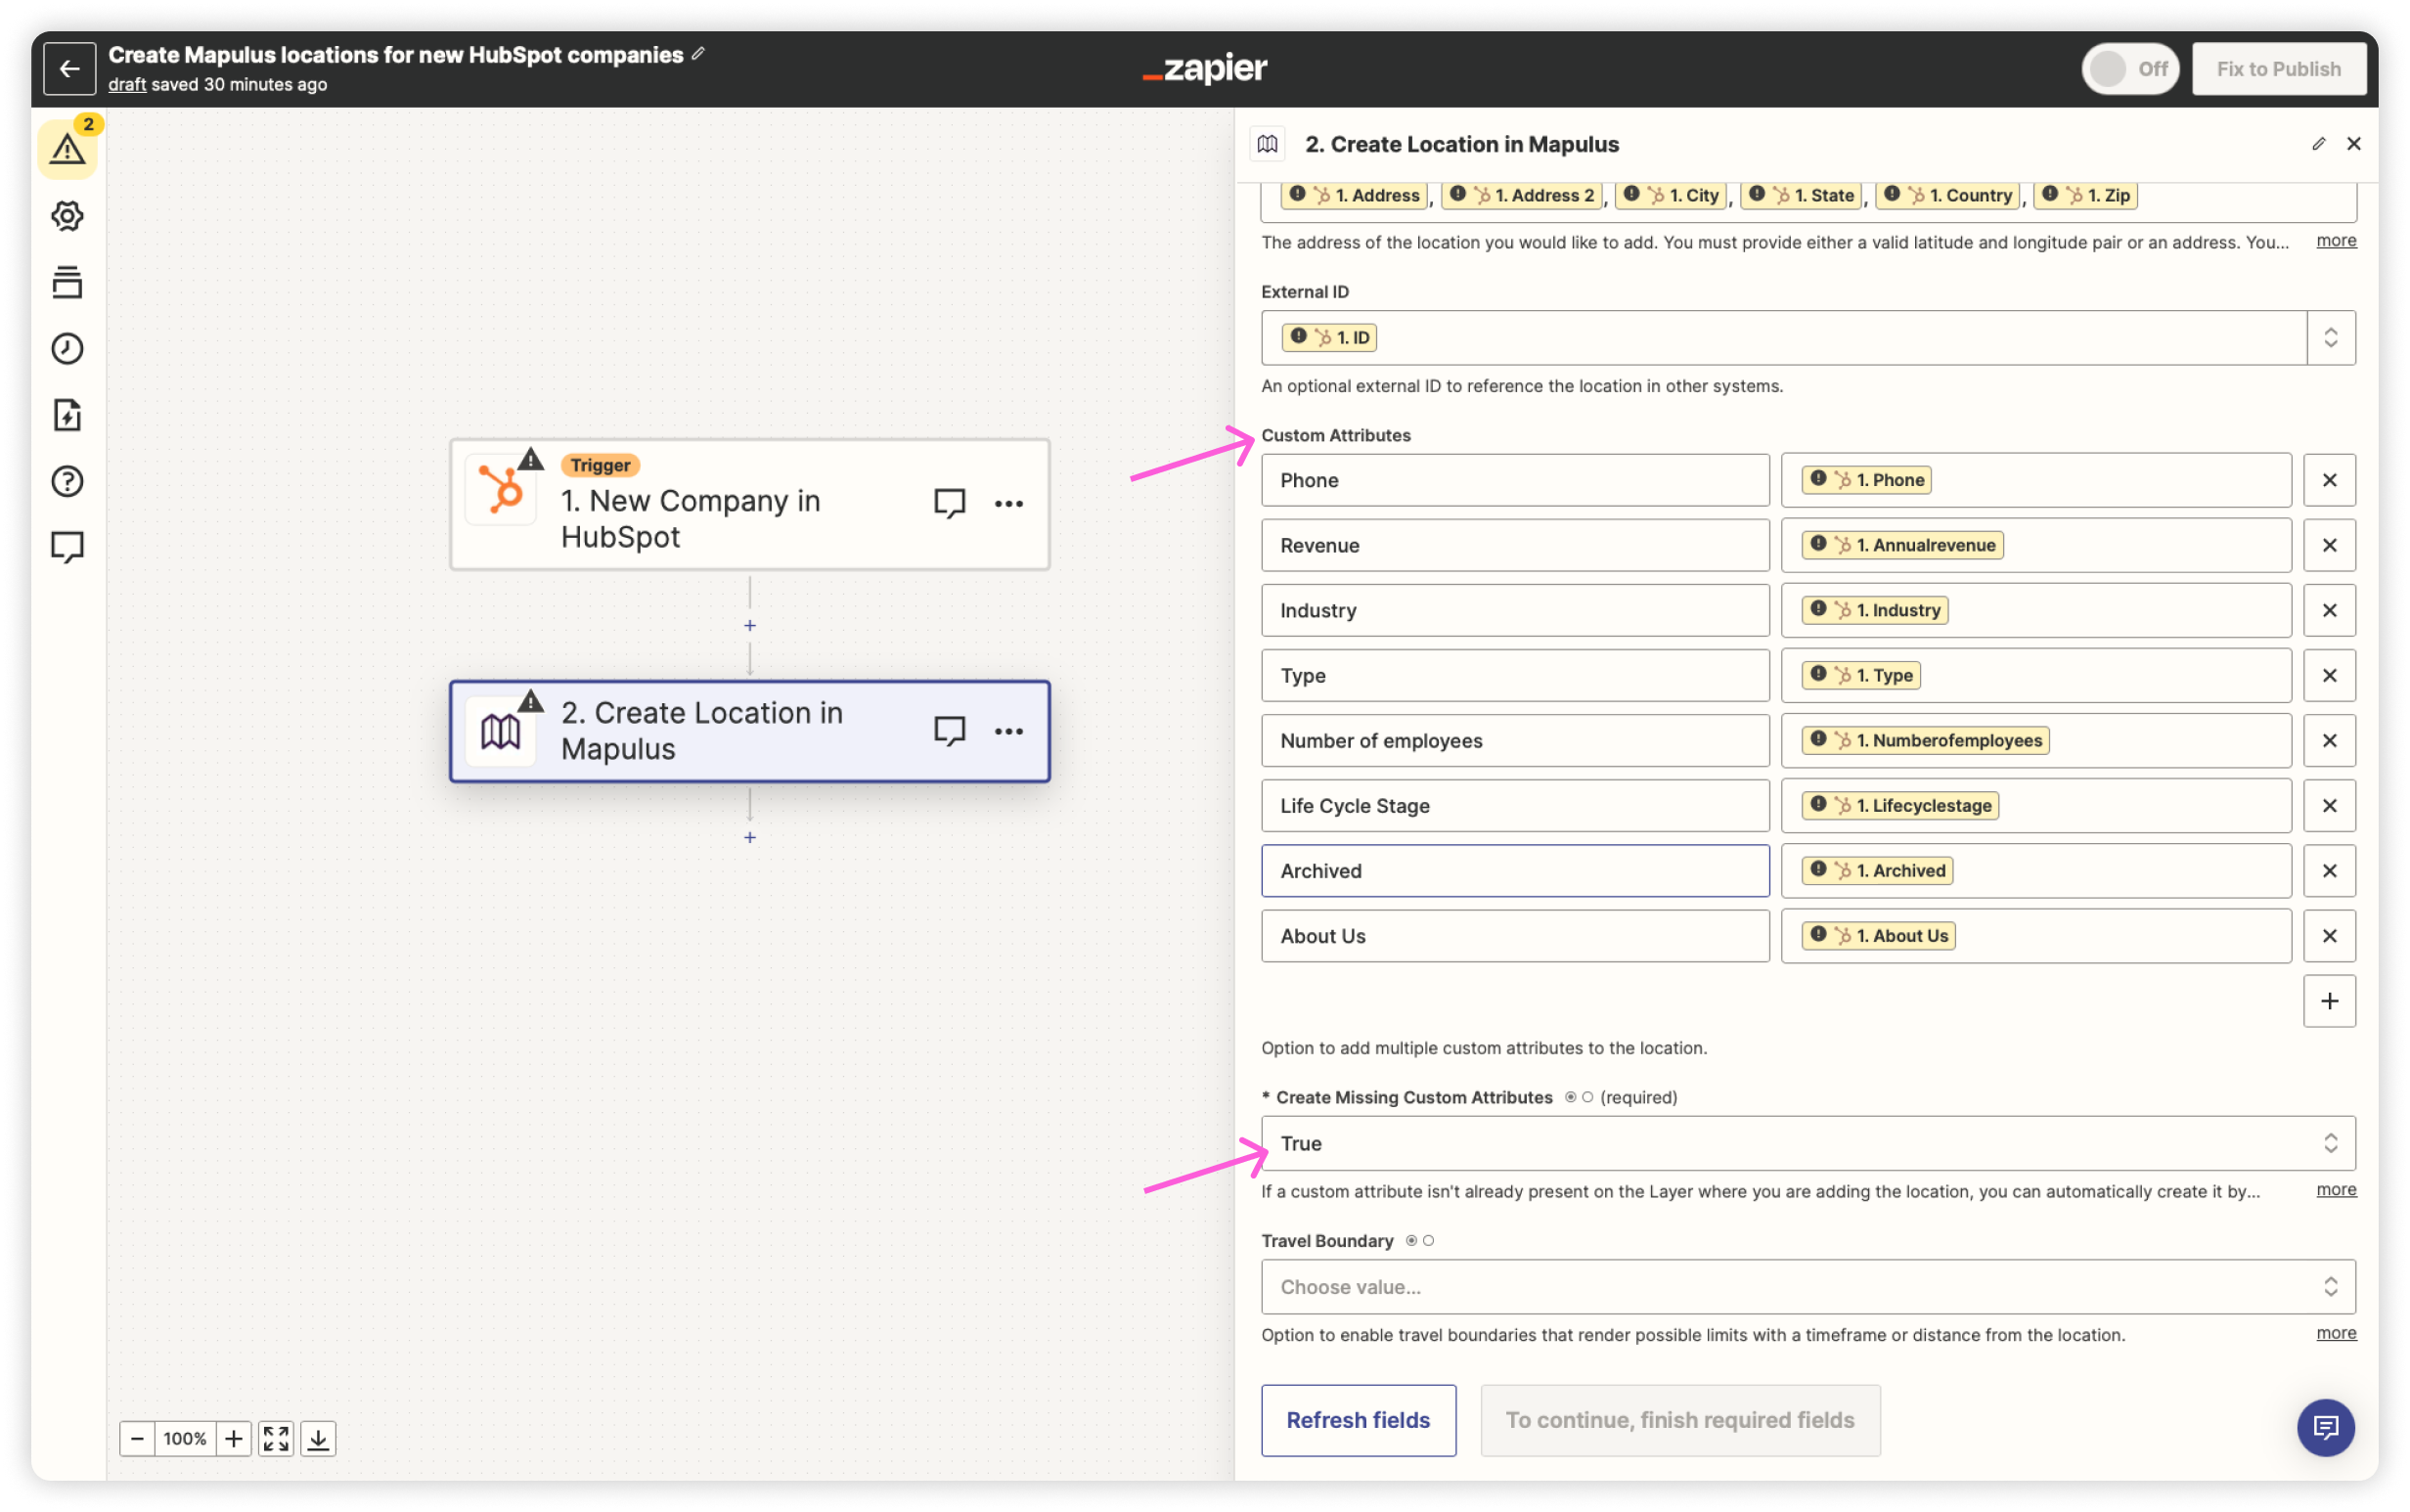
You can add any number of custom attributes to appear on a location in Mapulus. If a custom attribute isn’t already defined in Mapulus, you can automatically create it by setting the ‘Create Missing Custom Attributes’ parameter to true. This allows for the dynamic addition of new attributes as needed. If you want new custom attributes to be ignored and not created, set this to false.
Update Location Zap:
The Update Zap has two actions after the source data trigger. One to find the location to update using the External ID you added when you created the Location, and one to update the location if it’s found.
- Trigger: Determine a trigger, like modifying a row in Google Sheets or updating a company in your CRM.
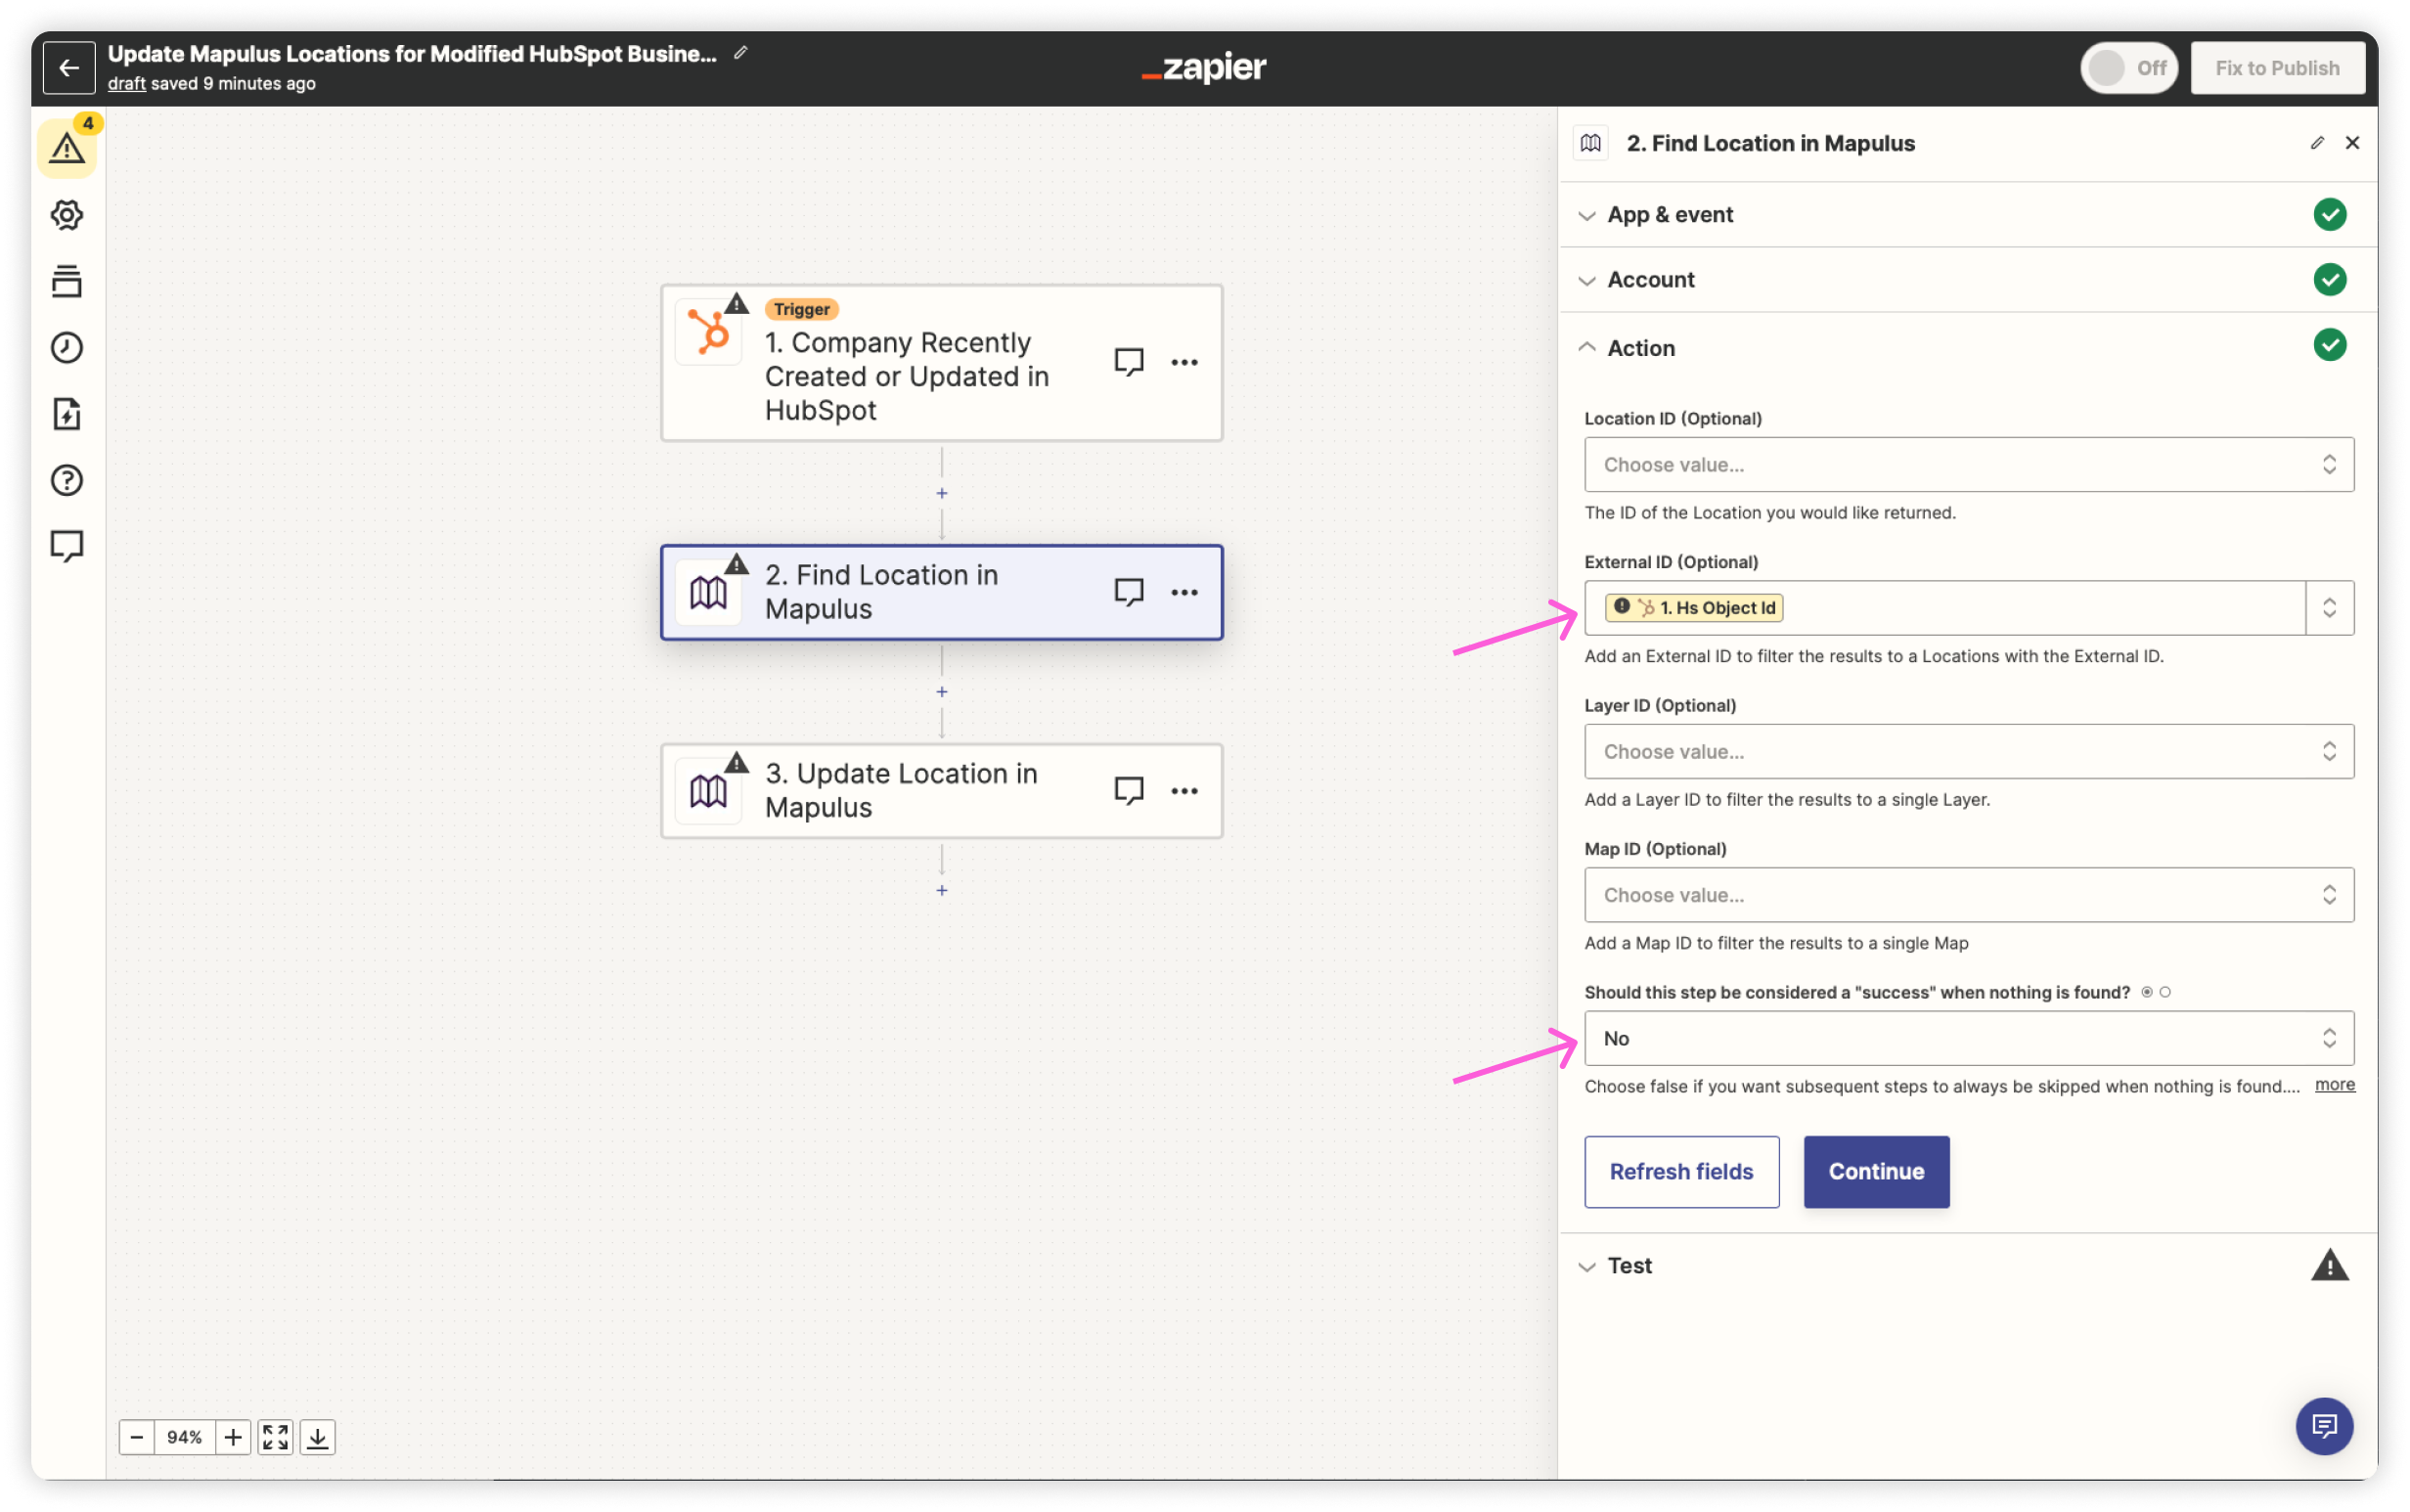
- Action: Select Mapulus > Find Location in Mapulus.
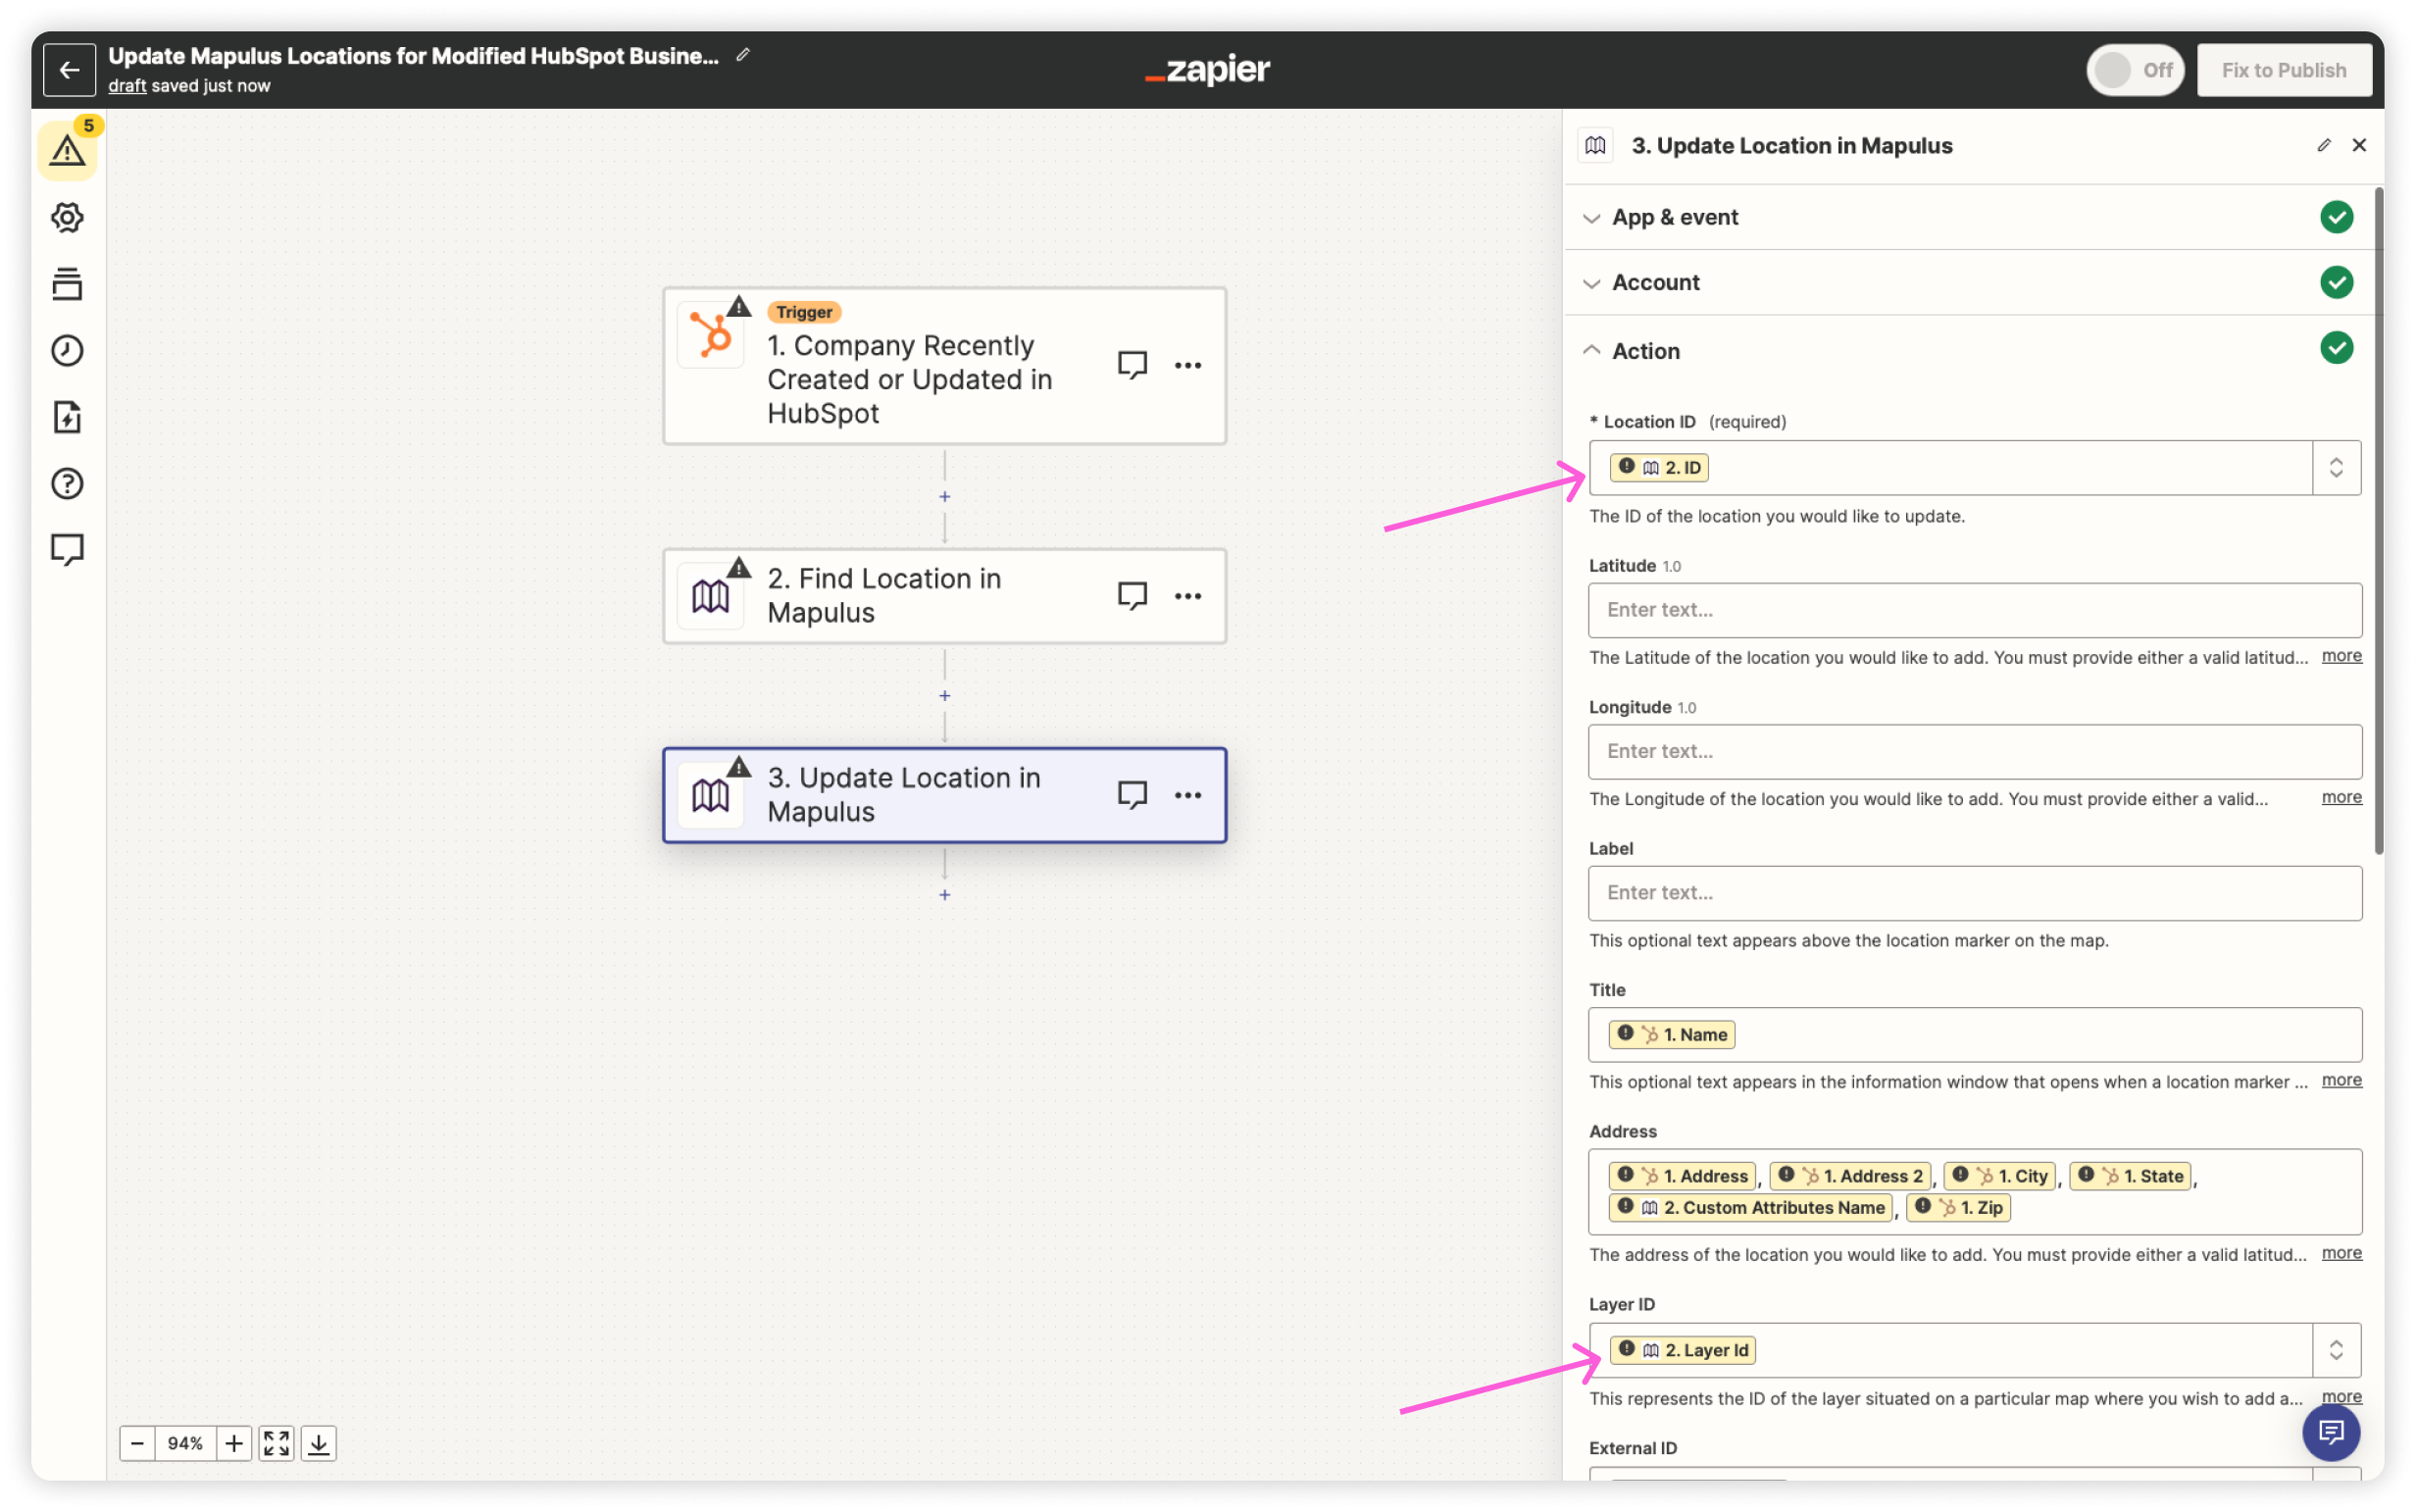
- Action: Select Mapulus > Update Location in Mapulus.
You can use the External ID to find the location to be updated. Make sure you choose ‘No’ for ‘Should this step be considered a “success” when nothing is found?’; otherwise, the Zap will keep retrying to find the location.
On the final ‘Update Location in Mapulus’ step, assign the location ID from the location found in the previous ‘Find a Location in Mapulus’ step. Map the attributes as you did in the Create zap to keep the location data consistent.
Delete Location Zap:
It can be useful to have a way to remove locations from Mapulus if they are deleted or archived from the source system. This Zap has three actions after the trigger.
- Trigger: Set a trigger, like deleting a row in Google Sheets or updating a Company to ‘Archived’ in HubSpot.
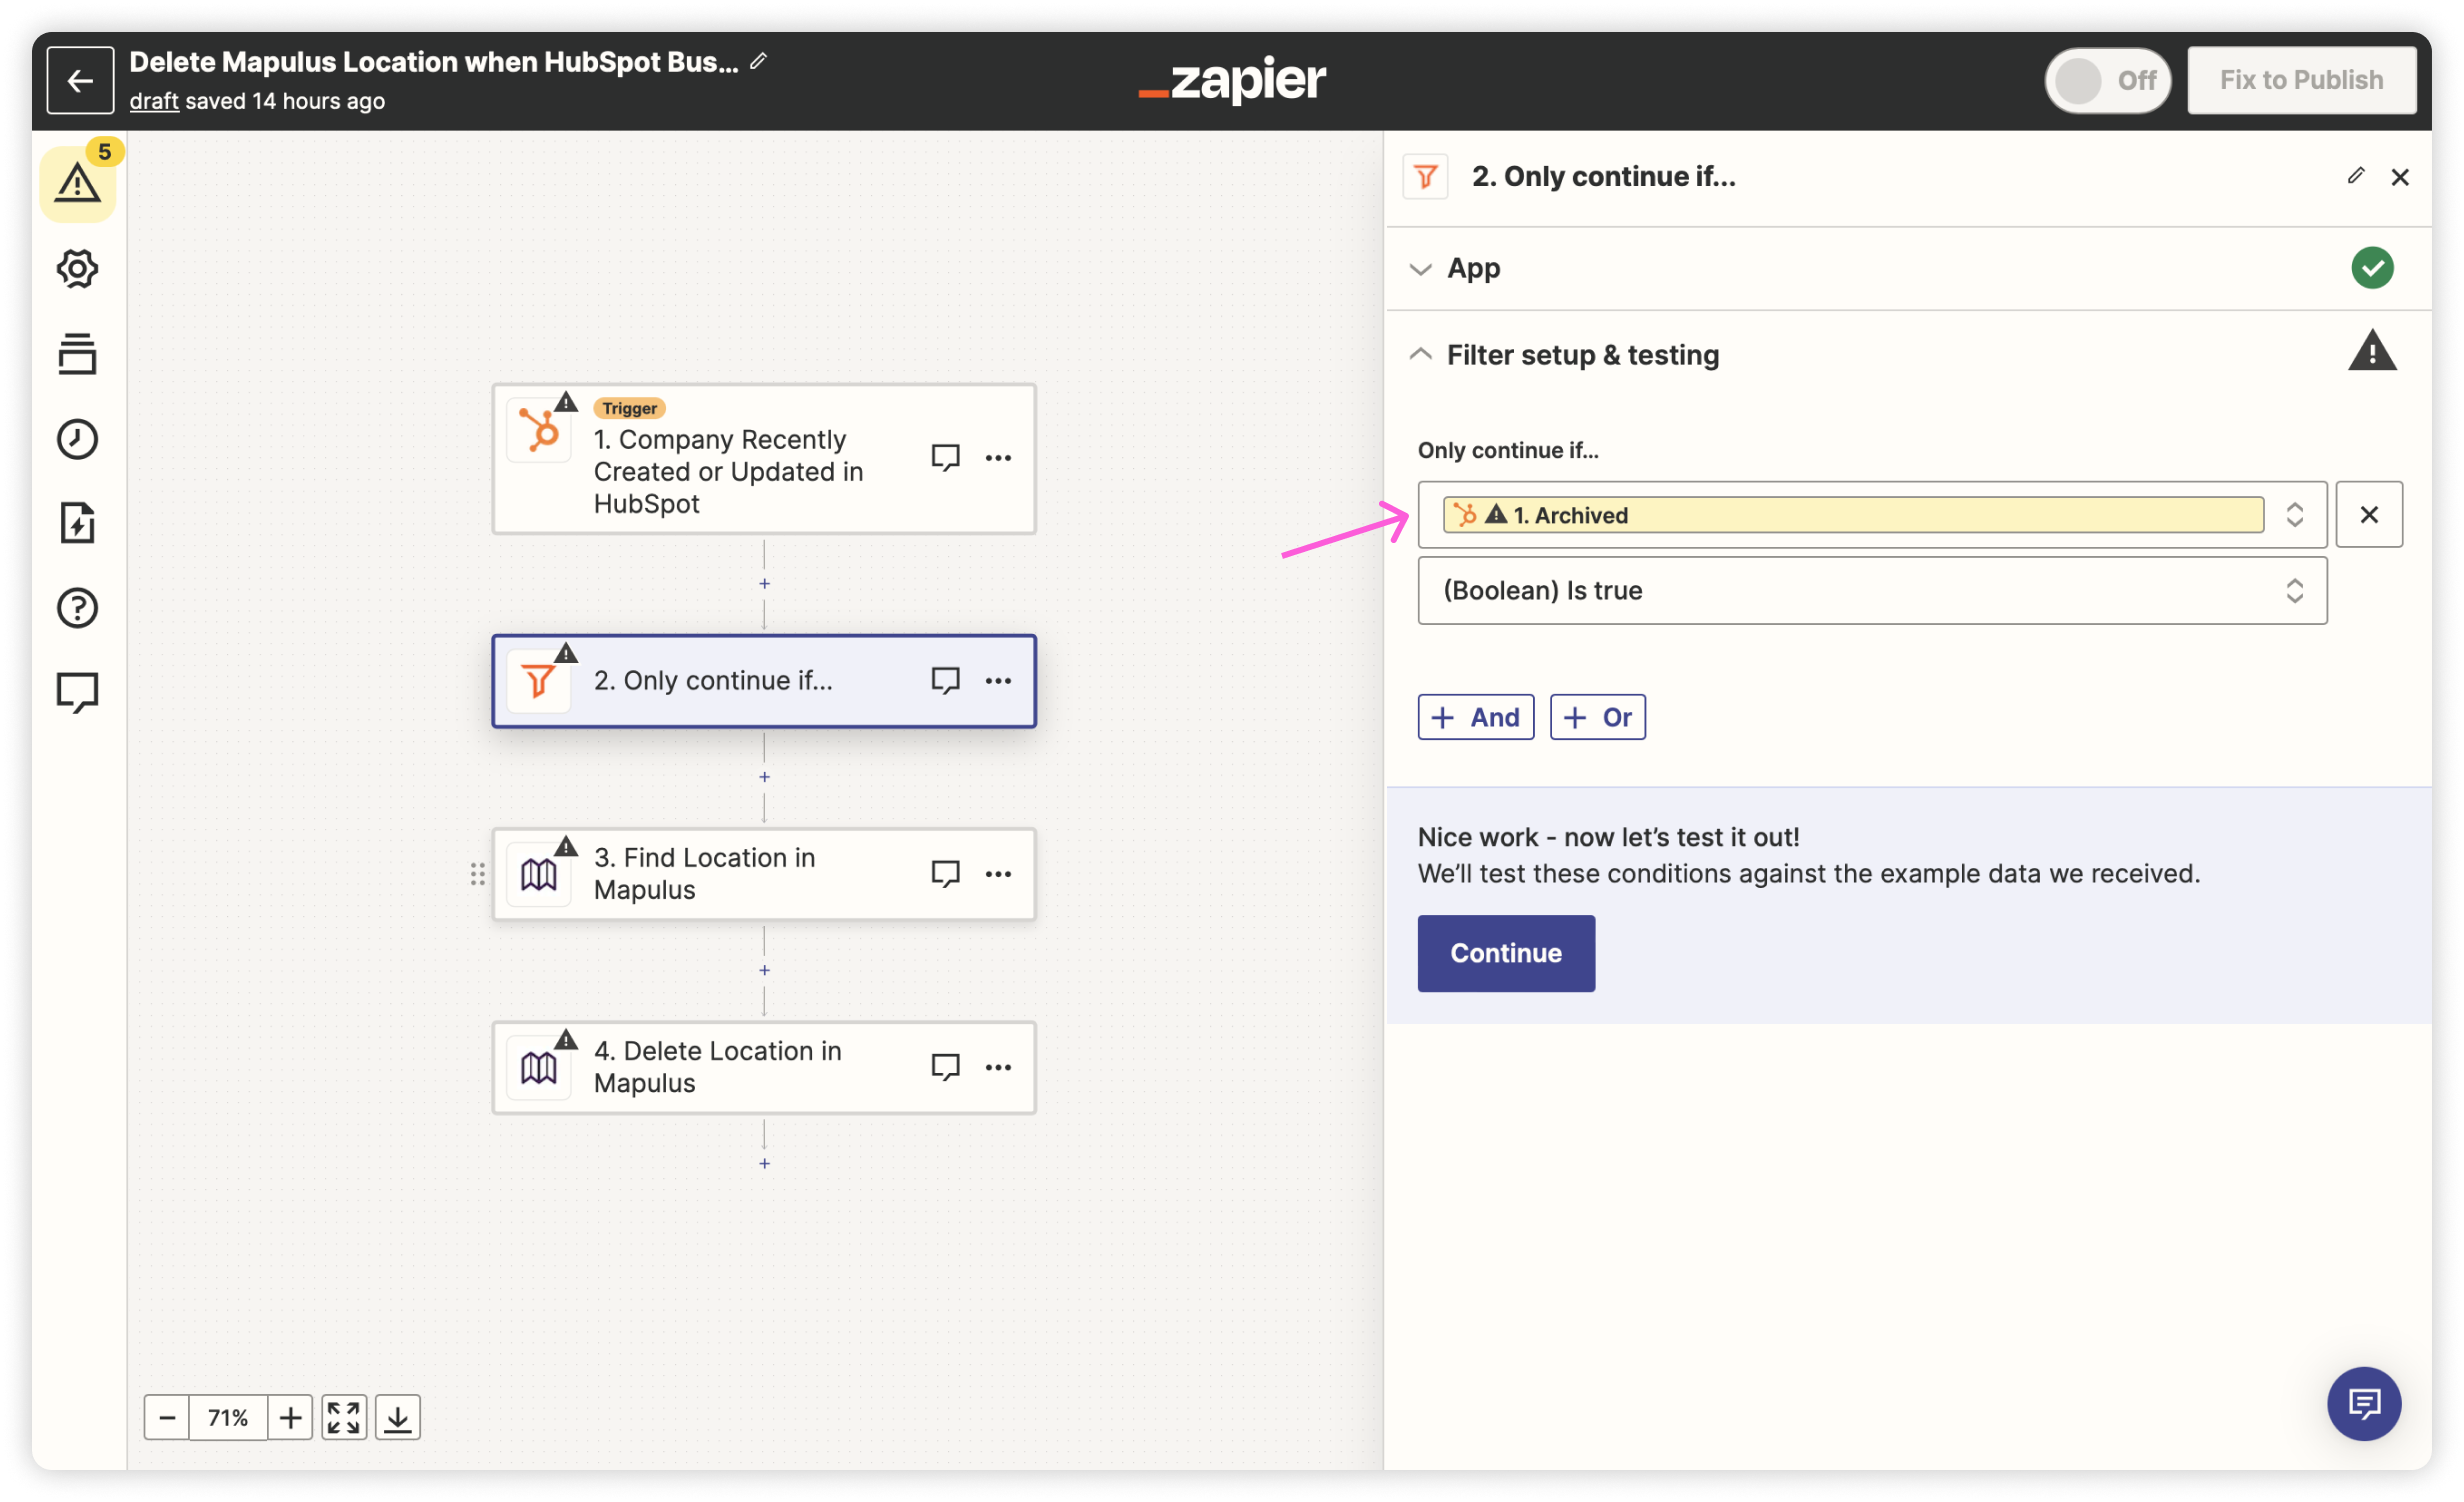
- Action: Set filter (if required) to determine if the update is an archive or deletion.
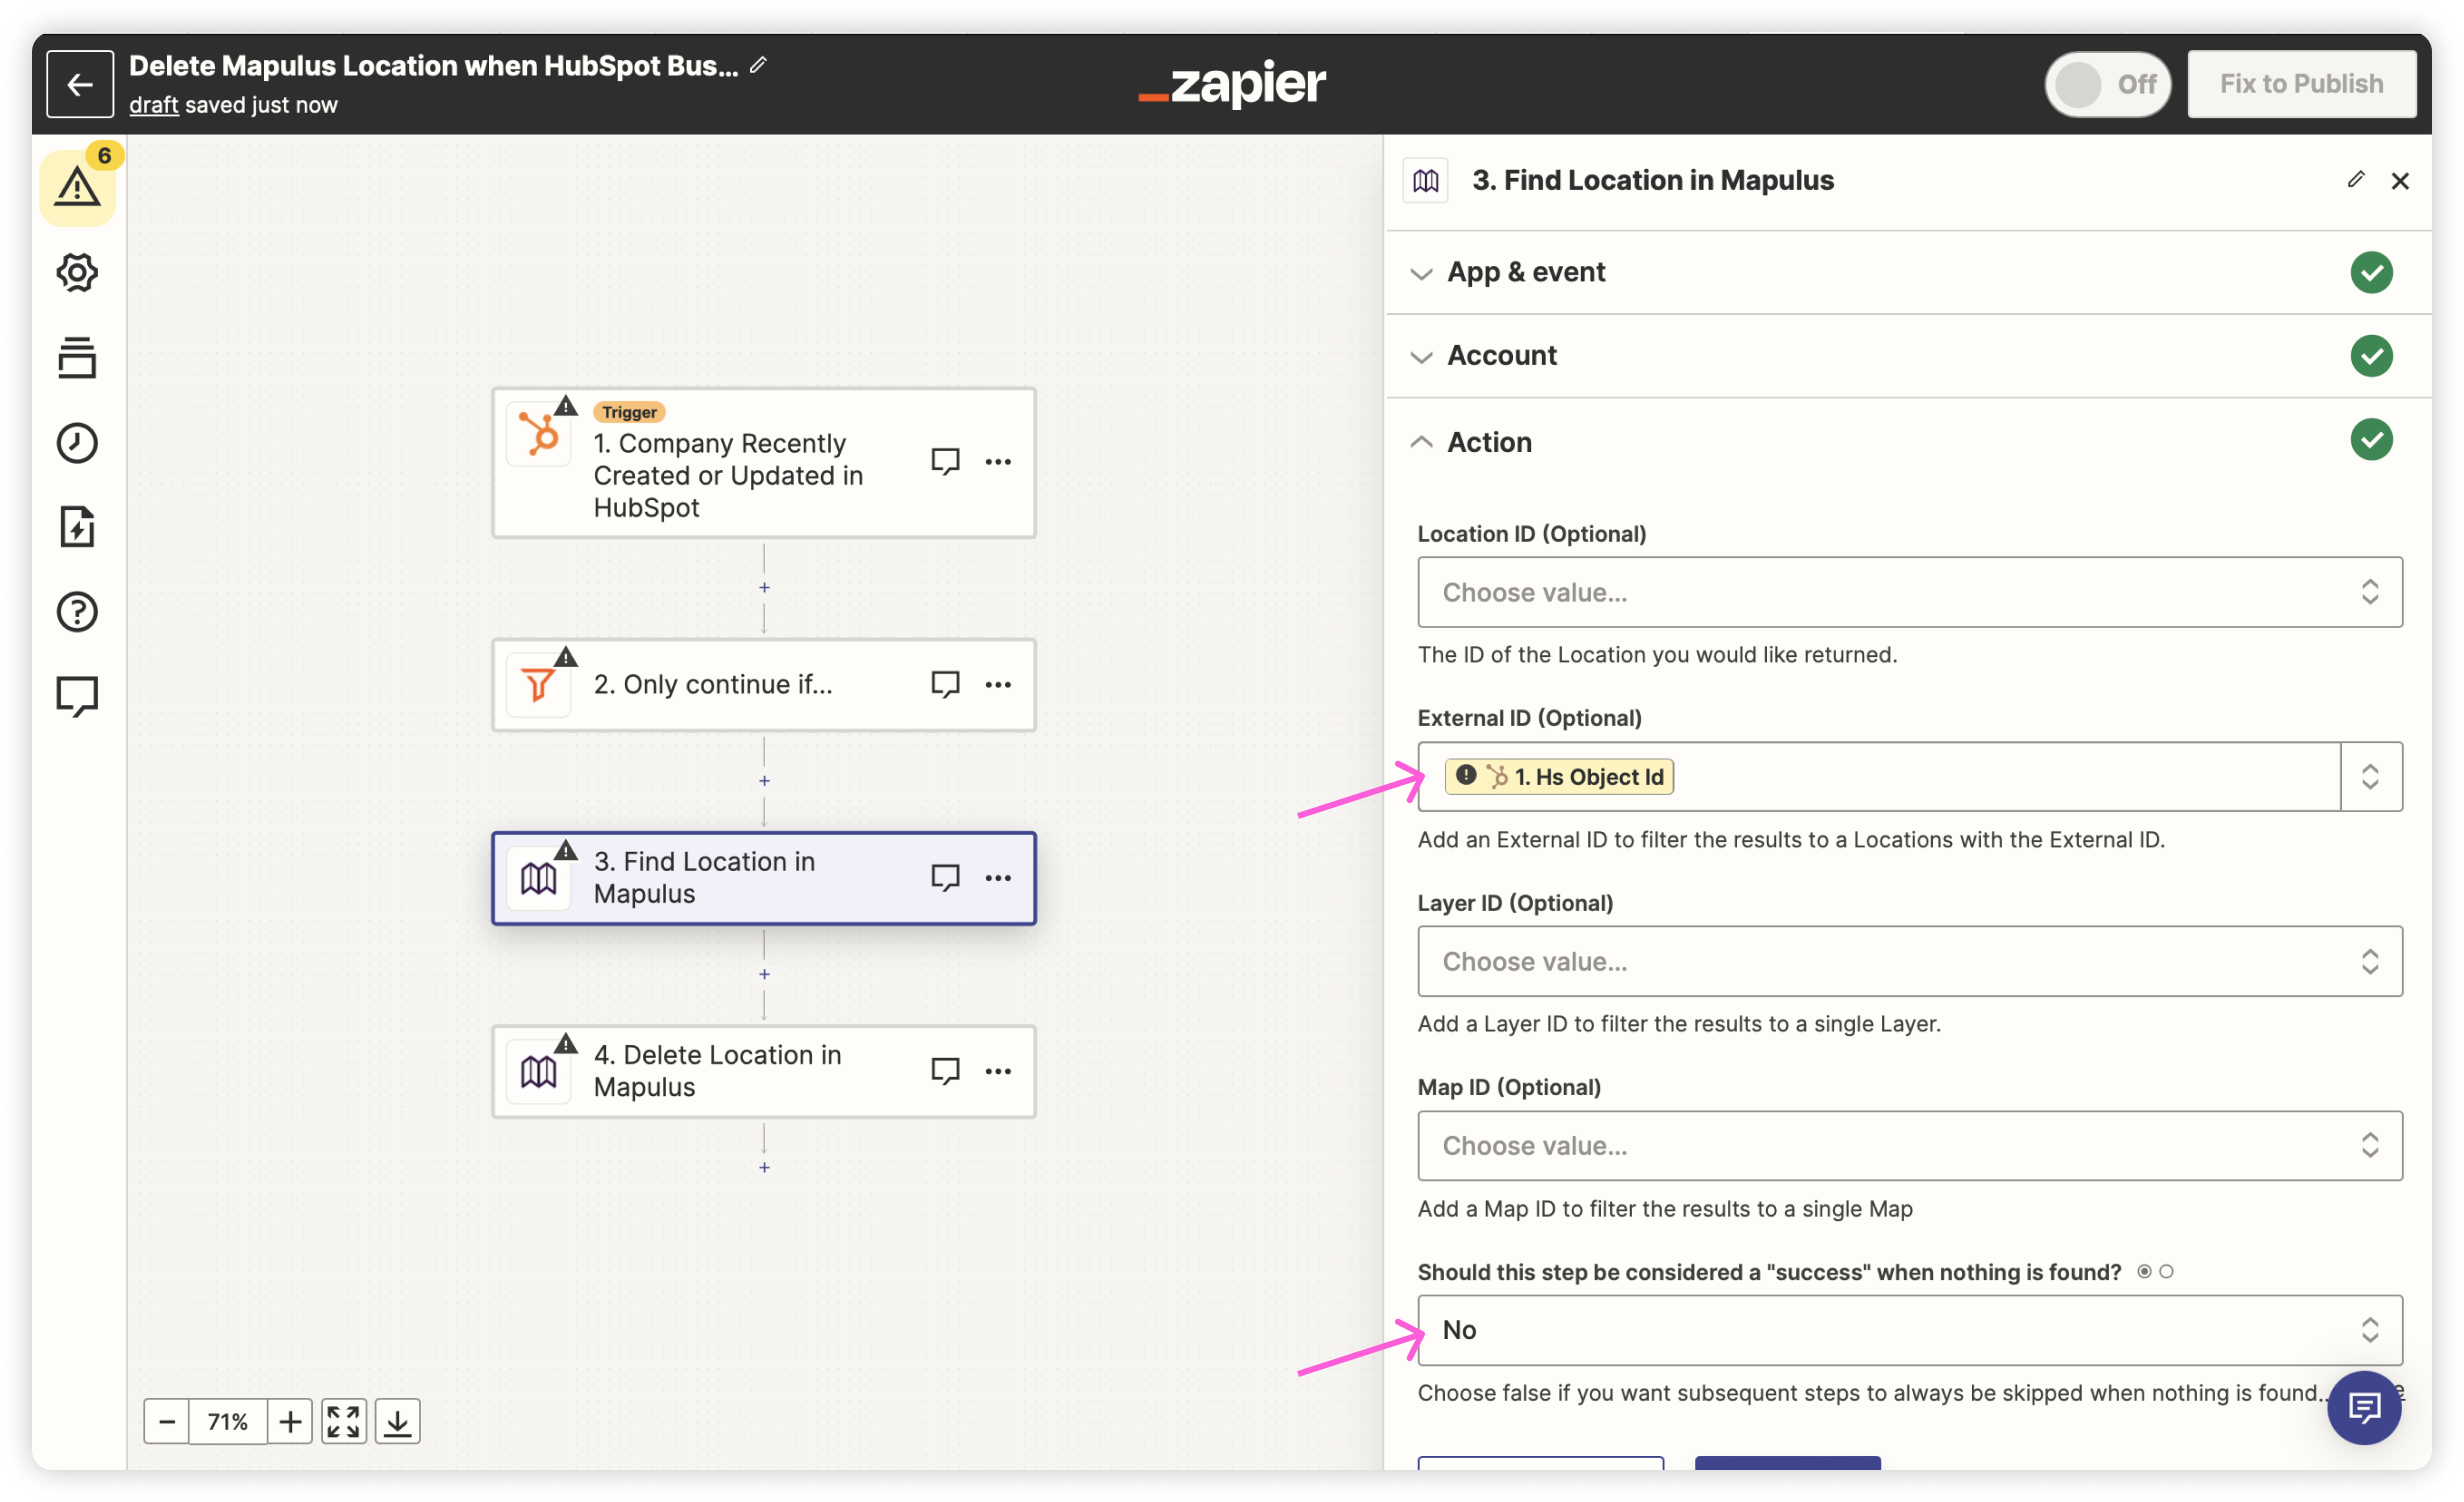
- Action: Select Mapulus > Find Location in Mapulus.
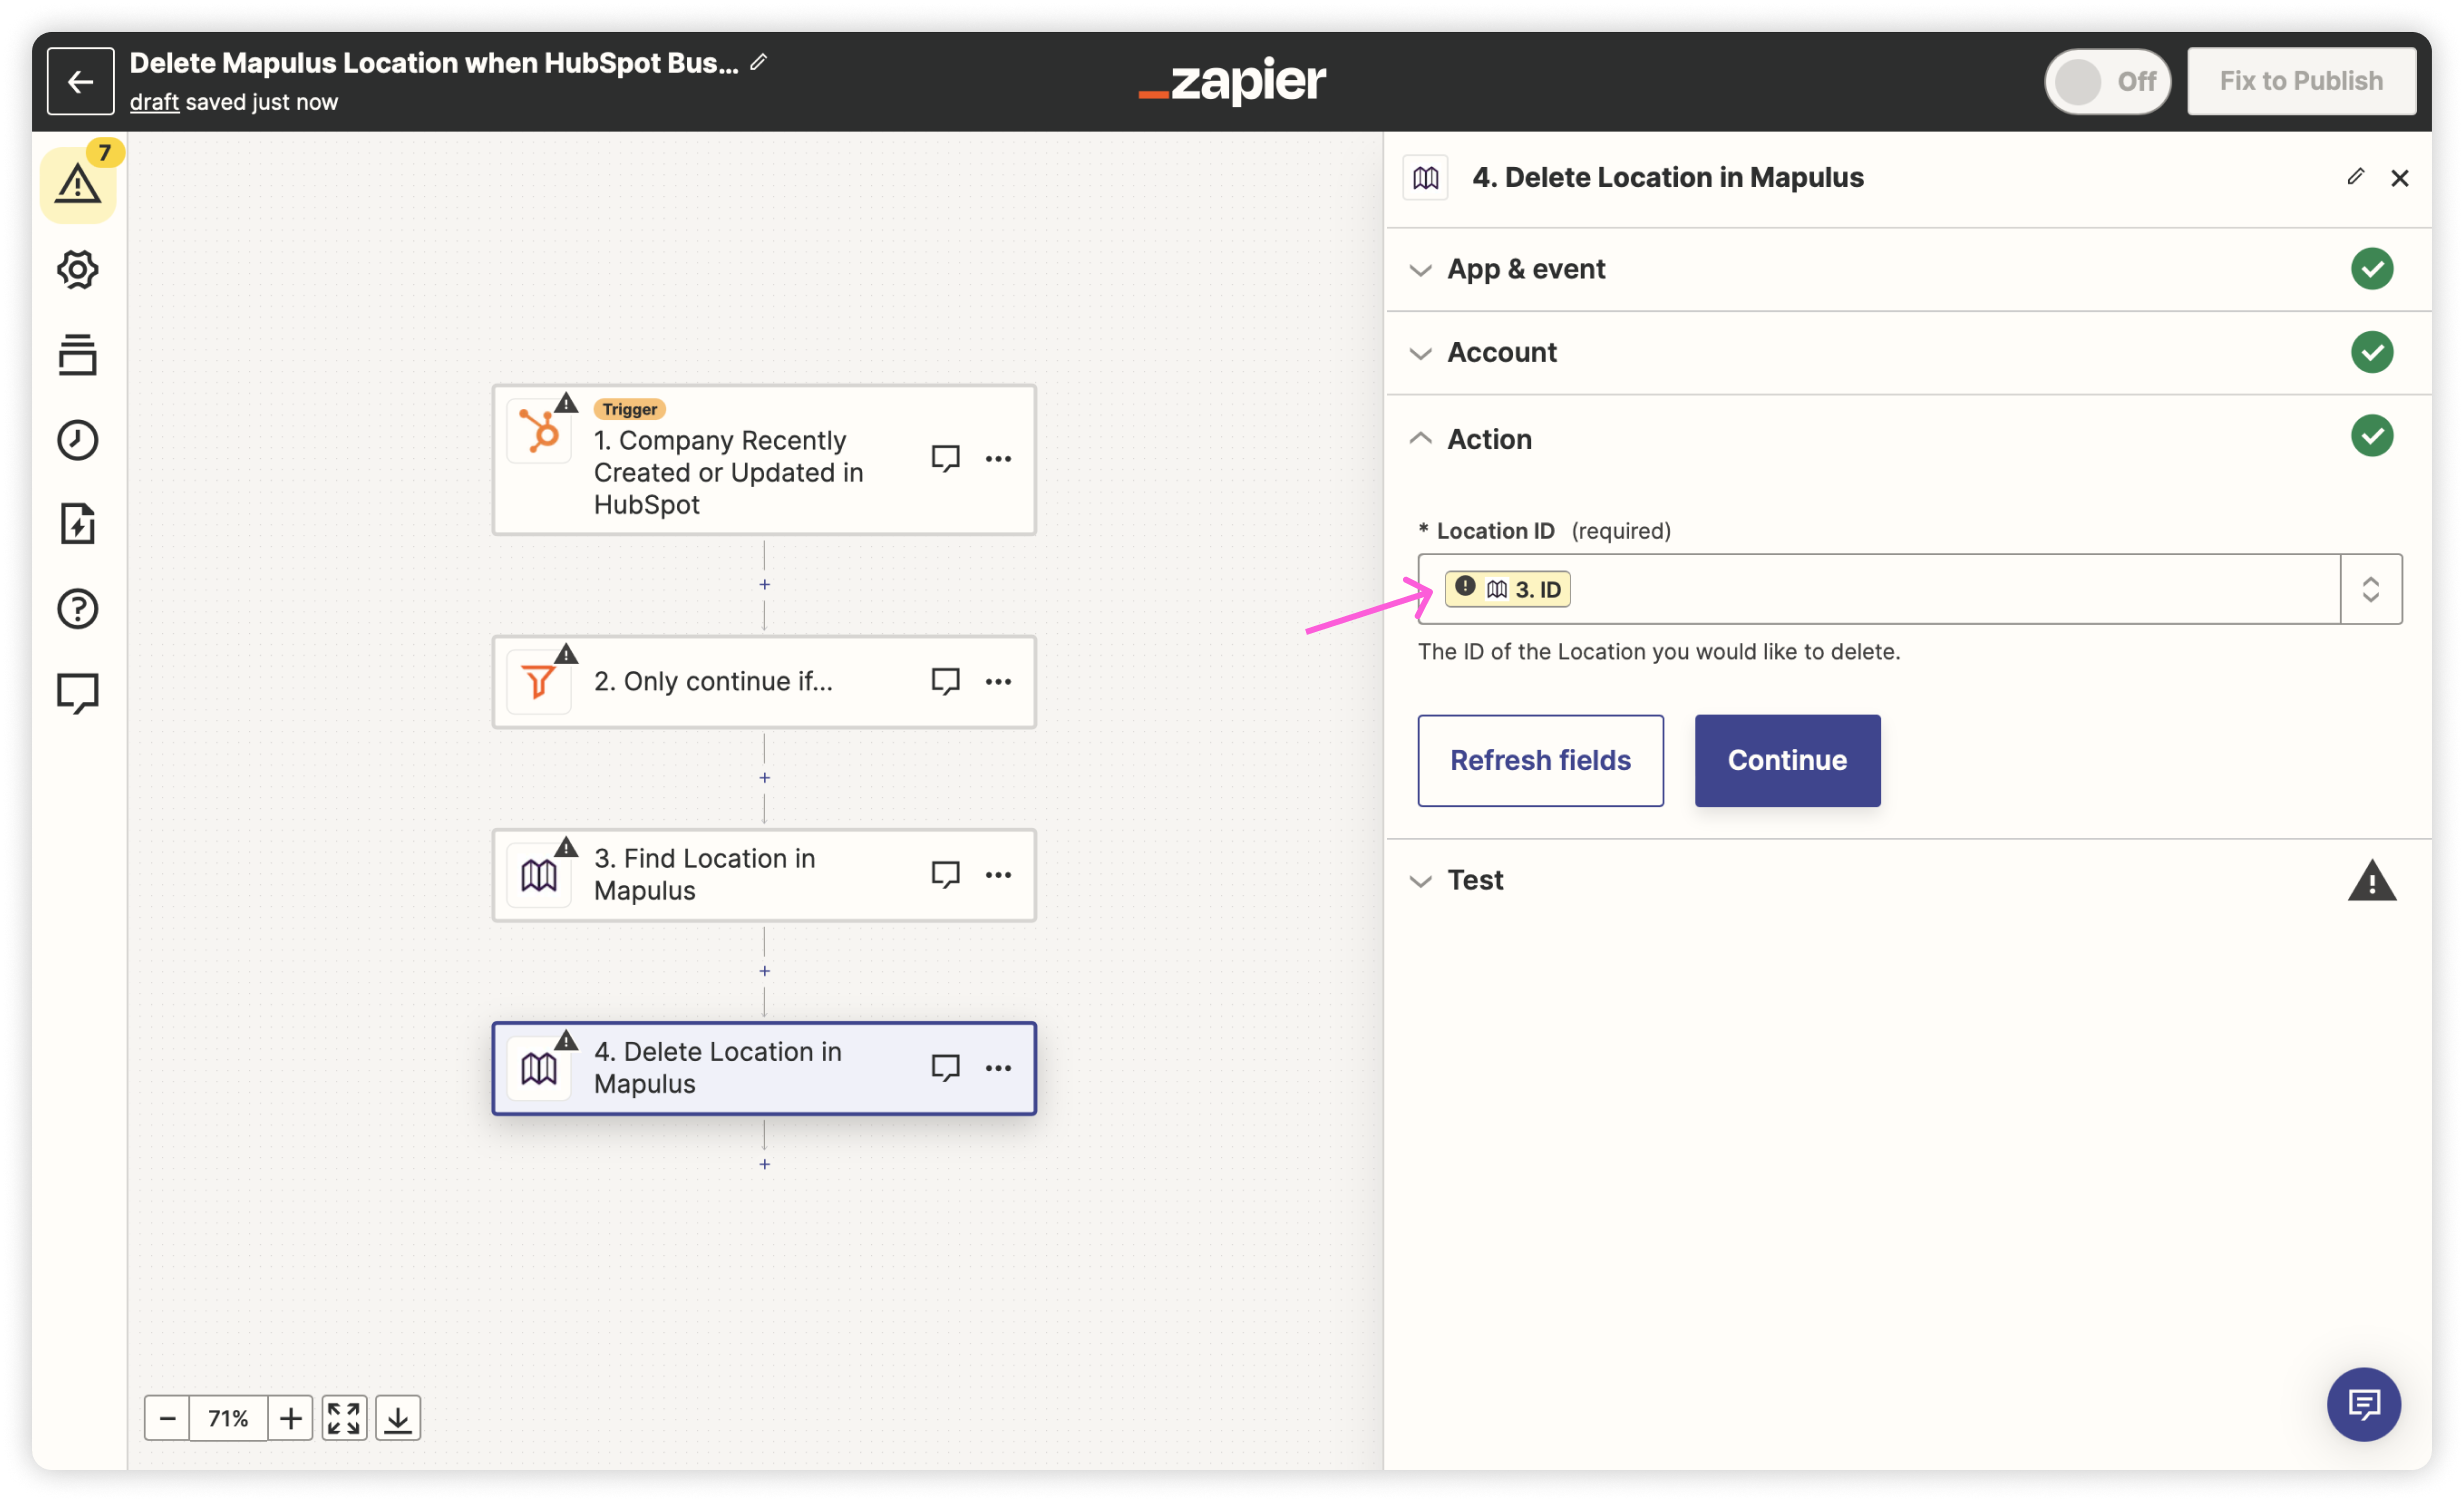
- Action: Select Mapulus > Delete Location in Mapulus.
The first action after the trigger is optional, depending on the system that’s triggering the Zap. Before continuing, you might need the Zap to check that the trigger is a delete or archive event.
You can use the External ID to find the location to be updated. Make sure you choose ‘No’ for Should this step be considered a “success” when nothing is found? Othersie the Zap will keep retrying to find the location.
On the final ‘Delete Location in Mapulus’ step, assign the location ID found in the previous ‘Find a Location in Mapulus’ step.
Step 3: Naming and Activating Your Zaps
Once configured, name your Zaps distinctly, like “Create Location in Mapulus”, “Update Location in Mapulus”, and “Delete Location in Mapulus”. Activate them, and they will run whenever the specified trigger events occur.
Step 4: Monitoring and Adjusting
Regularly monitor the performance of your Zaps, especially in the early stages, to ensure they are executing as desired. Feel free to adjust the Zaps to suit your needs better.
By setting up these Zaps, you’ve unlocked a new level of automation in managing your Mapulus locations. Now, whenever data changes in your chosen application, your Mapulus account will reflect these changes automatically, keeping your location data updated and accurate.
For further assistance or inquiries, feel free to reach out.