Blog > Connecting Zapier and Mapulus

David Herse | June 07, 2023
Unlock Geographic Insights: How Connecting Mapulus and Zapier Can Help Your Business.
Zapier is known for its ability to automate tasks between different web applications, and connecting it to Mapulus allows you to automate various tasks related to location insights. For example, you can set a trigger in Zapier to automatically create a location in Mapulus whenever a customer is registerd in your Customer Relationship Management (CRM) system. By incorporating customer locations into Mapulus, businesses unlock a trove of geographical insights. These insights aren’t just data points; they serve as a strategic compass, guiding targeted marketing campaigns, refining logistics planning, and deepening understanding of customer demographics and behaviours. It’s a tool that elevates decision-making and sharpens business strategies.
Here’s how to get started.
Step 1: Generate an API Key in Mapulus
Before you can connect Mapulus to Zapier, you’ll need to generate an API key. This will allow Zapier to access your Mapulus data. If you don’t have a Mapulus account you can create one for free at app.mapulus.com.
- Log into your Mapulus account.
- Click on your profile icon at the screen’s top right corner.
- From the dropdown menu, select API Keys.
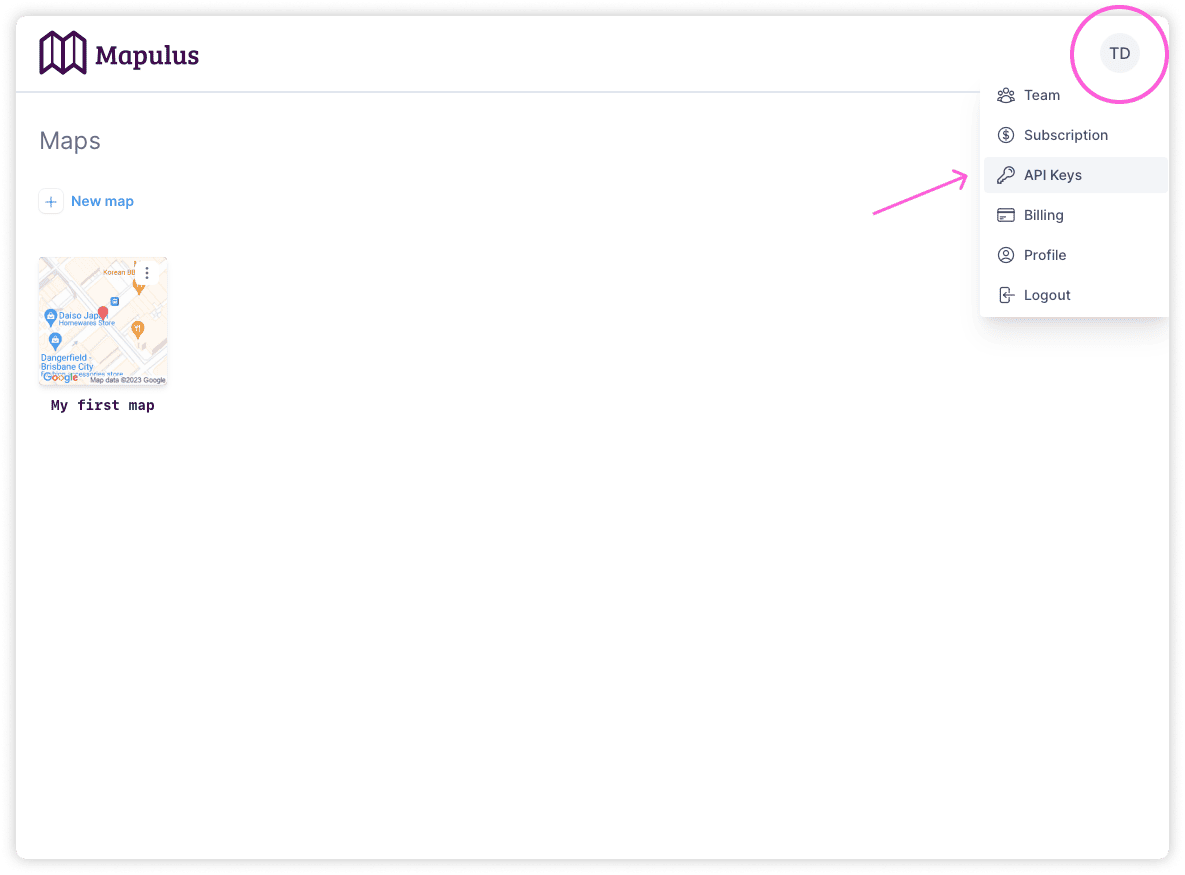
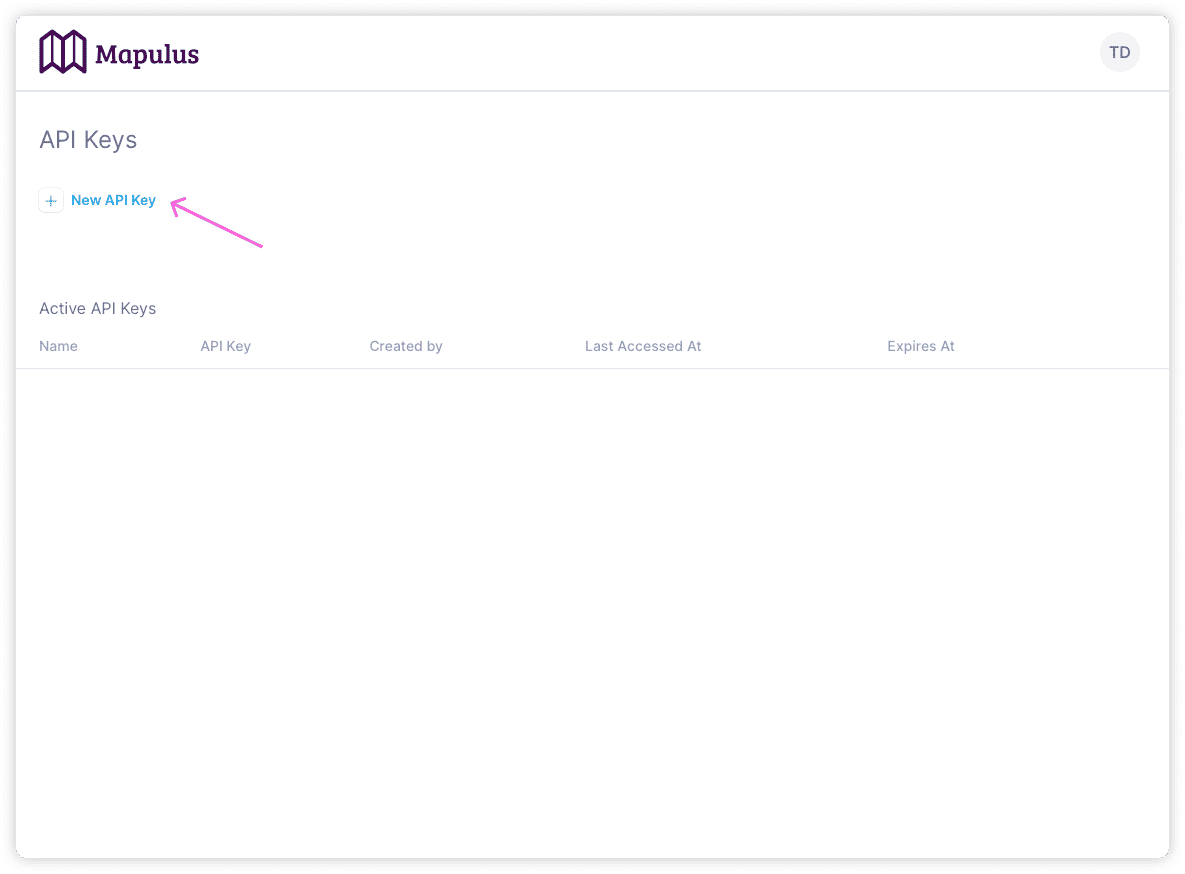
- On the API Keys page, click New API Key.
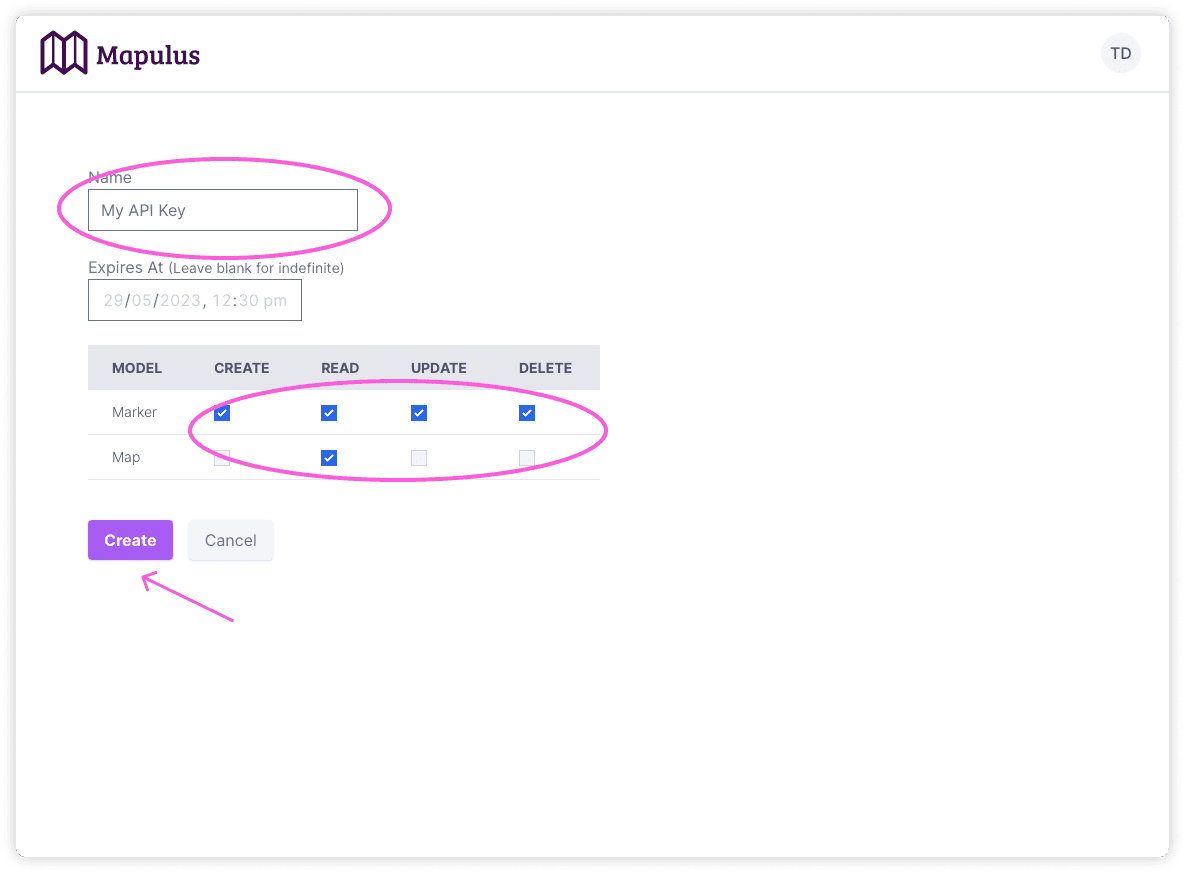
- Name your key so you can recall what it’s used for later. You should consider create a unqiue key for each use case.
- You can define an expiry date to expire the key on a future date. Leave this blank if you want the key to stay active indefinitely.
-
Select the access privileges you’d like the API key to have. In this step, you’re defining what actions the generated API key will have the authority to perform within your Mapulus account. The access privileges can be categorised under four main actions: Create, Read, Update, and Destroy for Locations, and Read for Maps.
- Create allows the API key to create new data within your Mapulus account.
- Read allows the API key to access and read existing data.
- Update enables the API key to make changes to existing data.
-
Destroy grants the API key the ability to delete data.
Consider what your Zapier integration will need to do. Ideally, you should limit the access privileges of the API key to only what is necessary. This is a security best practice known as the principle of least privilege (PoLP), which minimizes the potential damage if the API key is ever compromised.
- Click Create to generate the API key.
- After creation, the API key is displayed once only; copy and securely store it immediately.
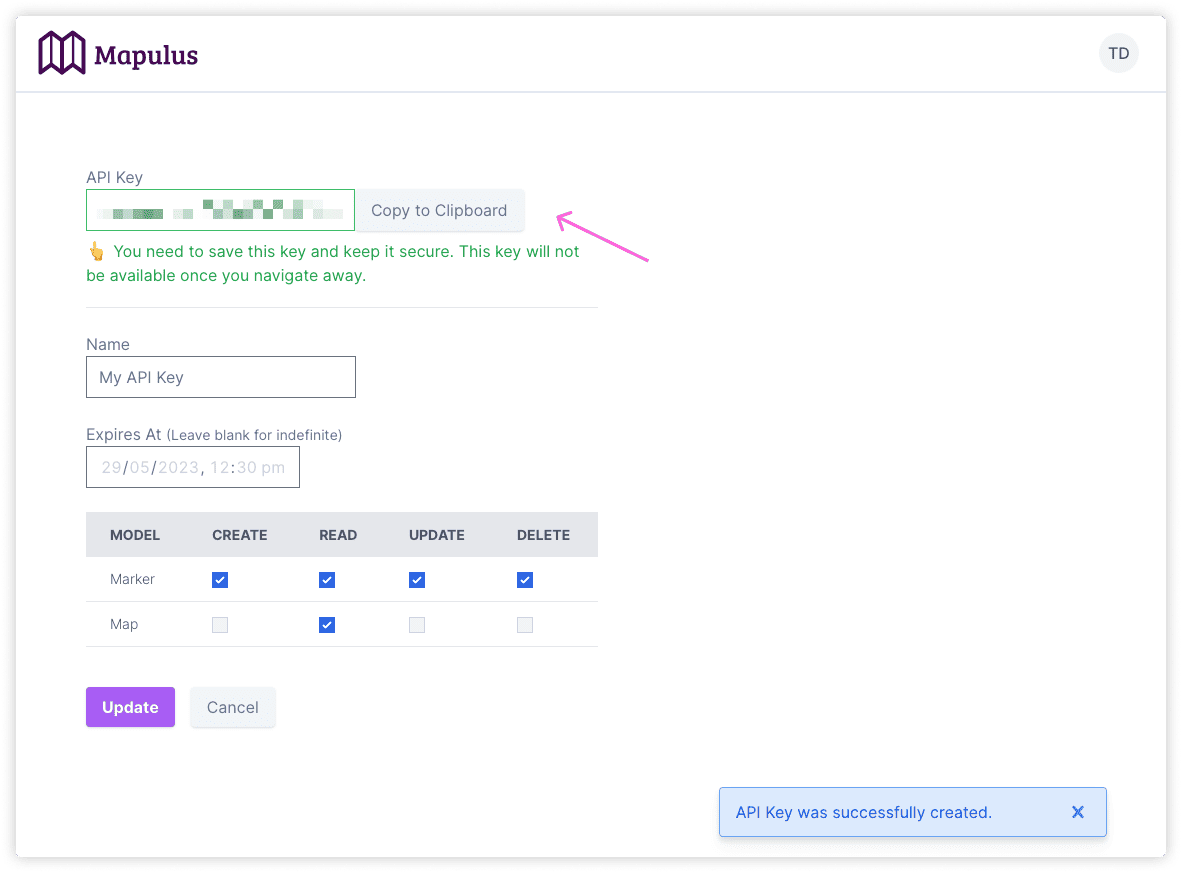
Note: Handle your API Identifier and API Secret with high confidentiality, akin to your password, and never expose them publicly. If you believe your API key has been compromised, revoke and replace it immediately.
Step 2: Connect Mapulus to Zapier
- Log into your Zapier account. If you don’t have an account, you can create one for free at www.zapier.com.
- Once you’re logged in, click on Make a Zap at the top of the page.
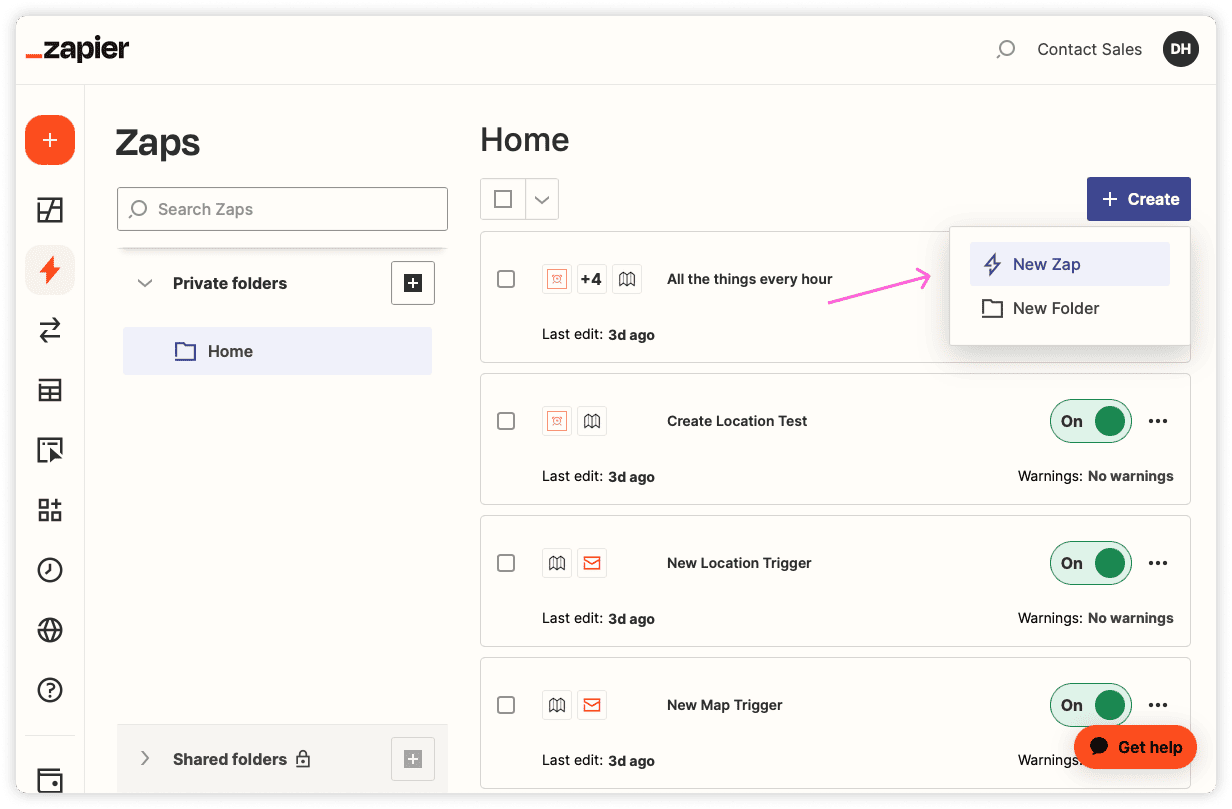
- In the search box under Choose App & Event, search for Mapulus.
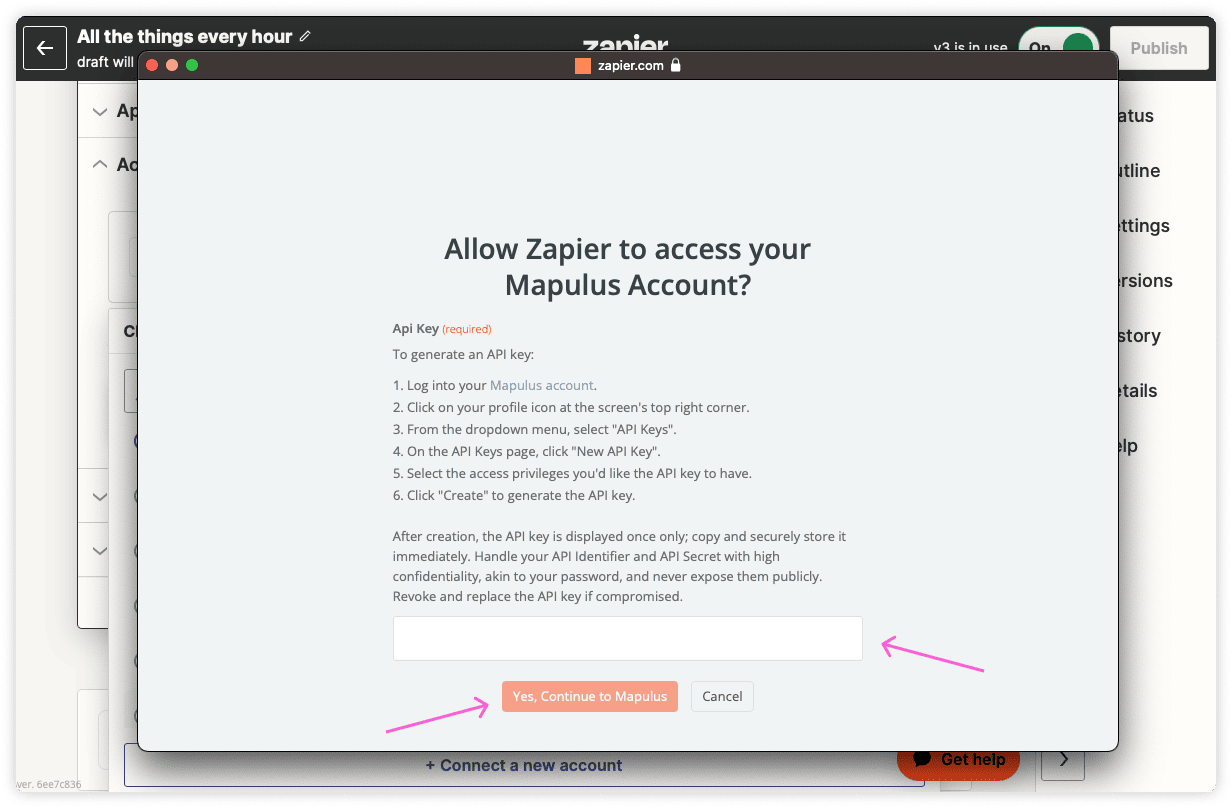
- Once you’ve selected Mapulus, you’ll be asked to sign in to your Mapulus account. Here, you’ll enter the API key you generated in Step 1.
- After entering your API key, click Yes, Continue. This will connect your Mapulus account to Zapier.
Step 3: Set Up Triggers and Actions
Once your accounts are connected, you can set up triggers and actions. Triggers are events in one app that start a sequence of automated actions. Actions are the steps Zapier takes after a trigger occurs.
Triggers
Here are the available triggers for Mapulus:
- New Location: This trigger fires when a new Location is added to a Map.
- New Map: This trigger fires when a new Map is created.
Note: These are polling triggers so it may take a little while for the Zap to trigger.
Zapier Actions
Here are the available actions for Mapulus:
- Create Location: This action creates a Location on a Layer.
- Update Location: This action updates a Location in the system.
- Delete Location: This action deletes a Location in the system.
- Find Map: This action finds a Map in the system.
- Find Location: This action finds Locations in the system.
You can read more about actions and triggers on the Zapier Website .
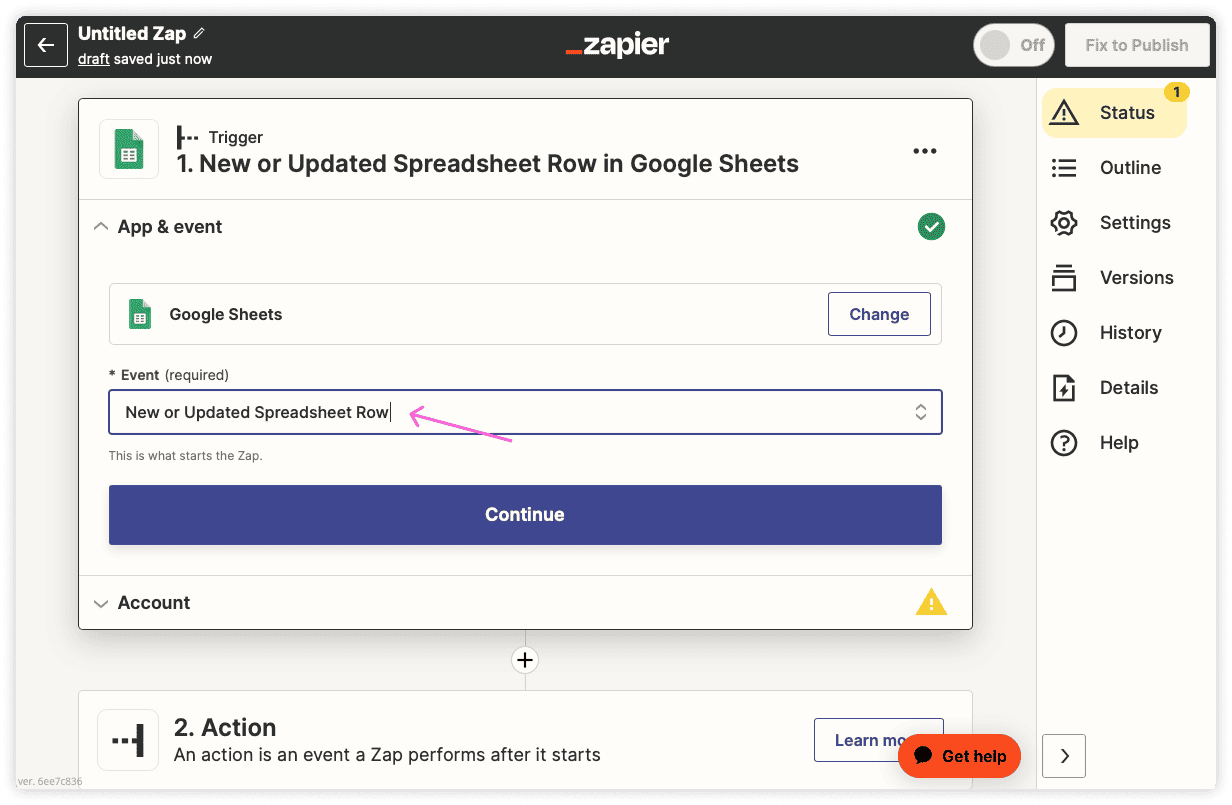
As a basic example, you could set a trigger so that each time a new location is added to a Google Spreadsheet, a new Location is added to the map.

Zapier Intergration Templates
To help you get started, we’ve also created a number of Zapier templates to intergrate with popular applications. You can check them out on our Zapier intergrations profile.
Step 4: Complete Your Zap
Once you’ve set up your triggers and actions, name your Zap and publish it. Zapier will now automatically perform the action whenever the trigger event occurs.
Congratulations! You’ve successfully connected Mapulus to Zapier.