Mapulus Help Centre
- Support >
- Connecting Zapier to Mapulus.
Connecting Zapier to Mapulus.
Learn how to use the Zapier intergration to connect Mapulus to 1000s of other applications.
Zapier is a powerful automation tool that enables seamless integration between various web applications. By connecting Zapier to Mapulus, you can automate tasks and leverage location insights to enhance your business operations. This guide will walk you through the process of connecting Zapier to Mapulus and demonstrate how it can benefit your business.
Prerequisites:
- A Zapier account. If you don’t have an account, you can create one for free at www.zapier.com.
- An active Mapulus account with an API key. If you don’t have a Mapulus account, you can sign up for free at app.mapulus.com.
Steps to Connect Zapier to Mapulus:
Step 1: Generate an API Key in Mapulus
Before you can connect Mapulus to Zapier, you’ll need to generate an API key in your Mapulus account. This API key will provide Zapier with access to your Mapulus data.
- Log into your Mapulus account.
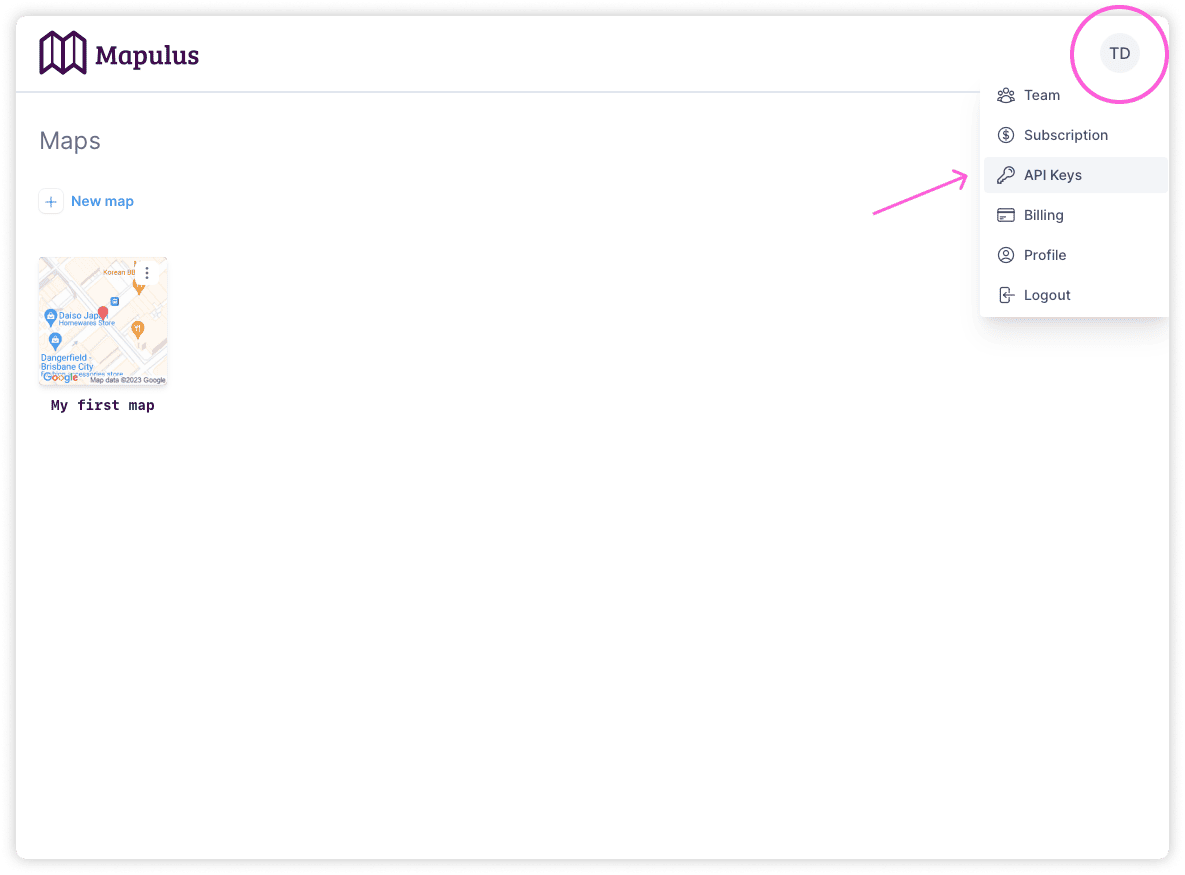
- Click on your profile icon at the top right corner of the screen.
- From the dropdown menu, select API Keys.
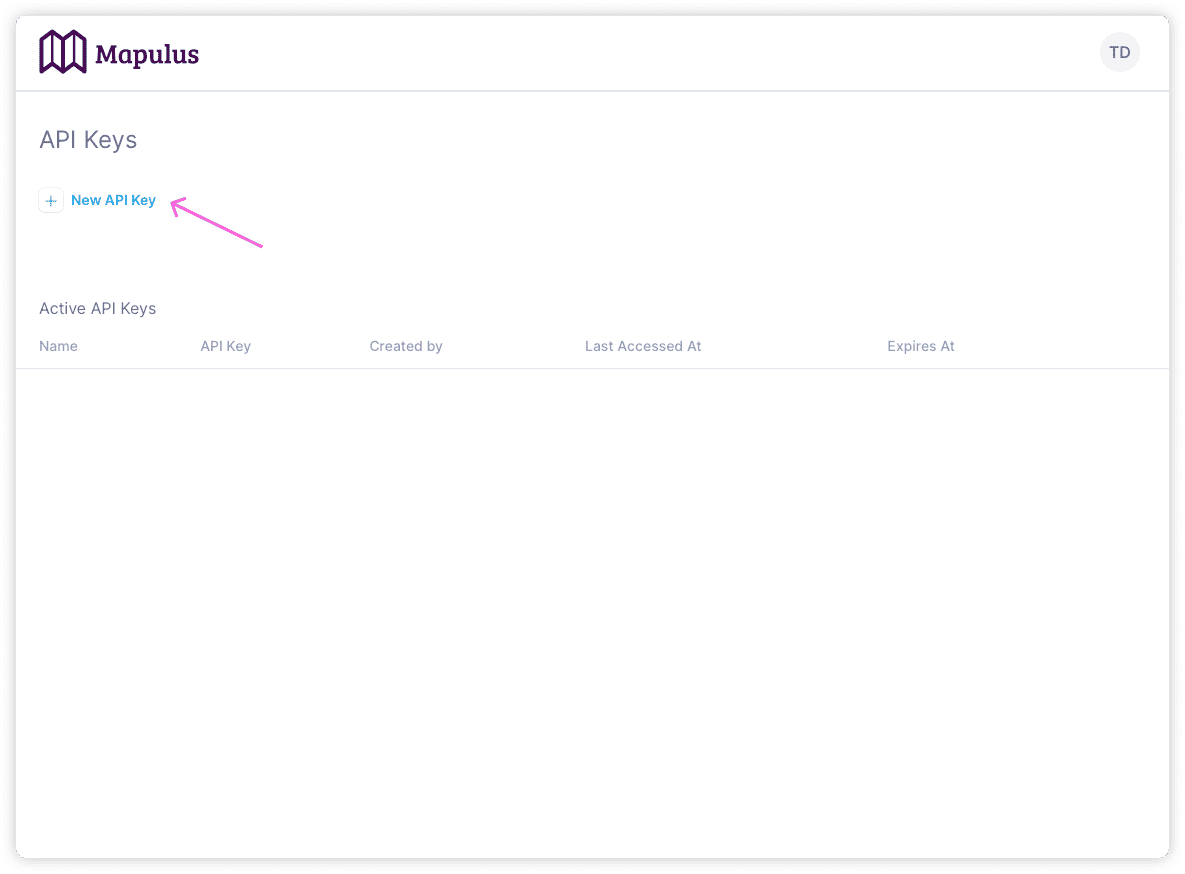
- On the API Keys page, click New API Key.
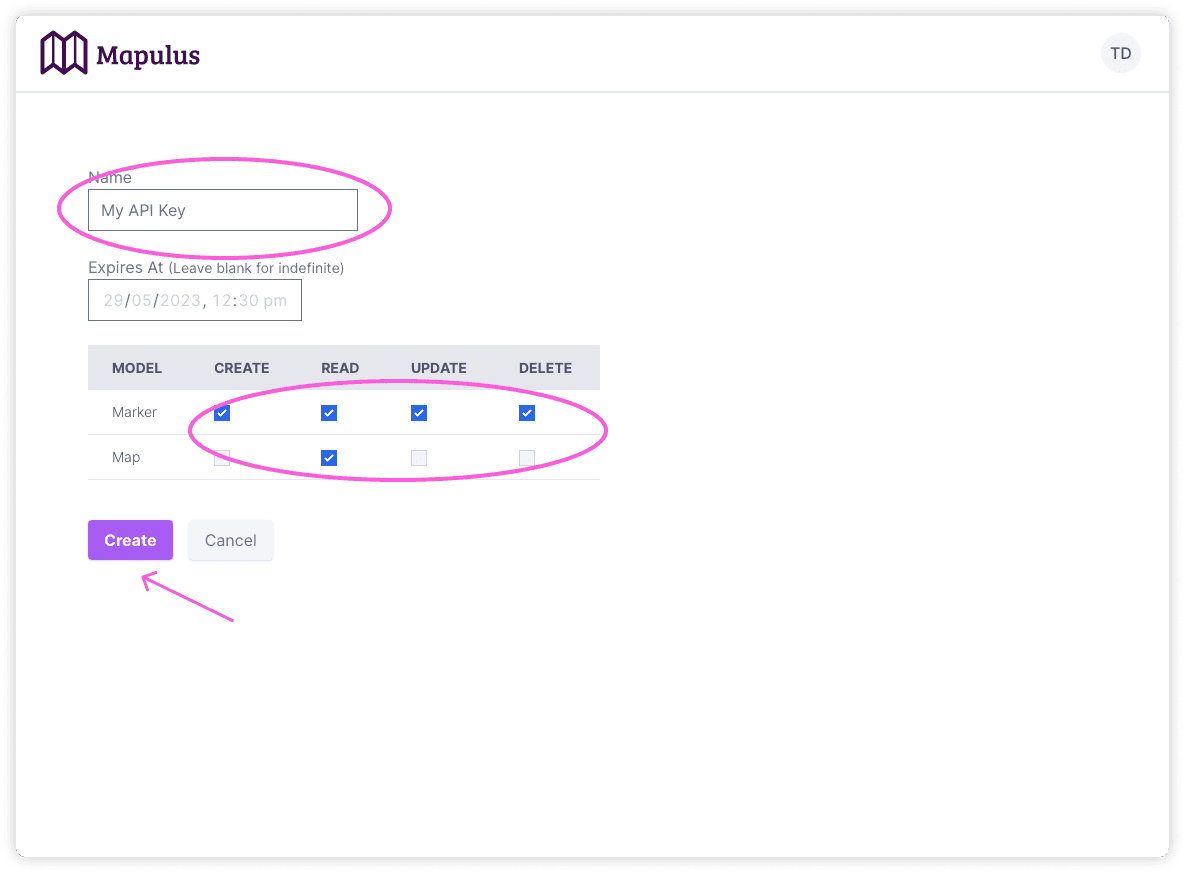
- Name your key to identify its purpose or use case.
- You can optionally set an expiry date for the key or leave it blank for an indefinite active period.
- Select the access privileges for the API key based on the actions it needs to perform within your Mapulus account.
- Choose the appropriate access privileges for creating, reading, updating, or deleting locations and reading maps.
- It is recommended to follow the principle of least privilege (PoLP) and only grant the necessary access to ensure security.
- Click Create to generate the API key.
- Copy and securely store the API key. Treat it with confidentiality and avoid exposing it publicly.
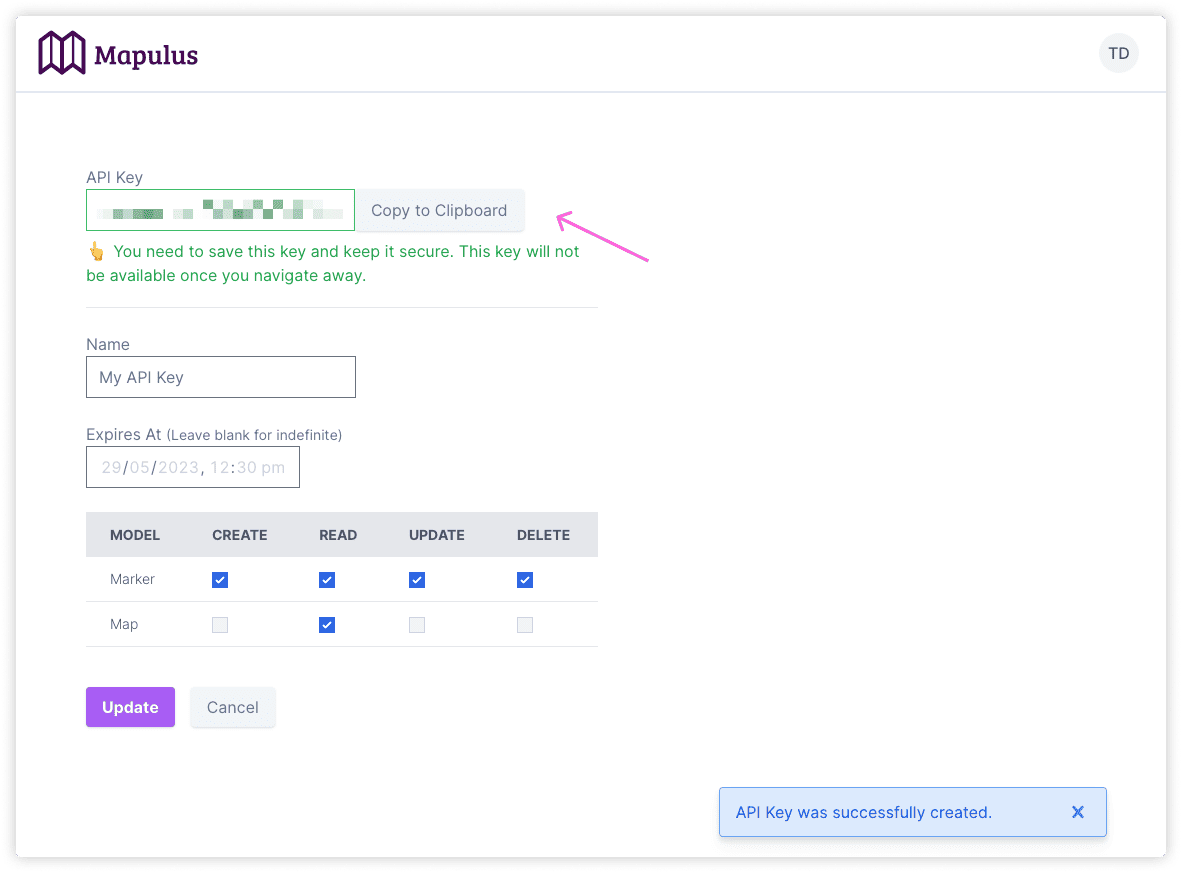
Note: Handle your API Identifier and API Secret with high confidentiality, akin to your password, and never expose them publicly. If you believe your API key has been compromised, revoke and replace it immediately.
Step 2: Connect Mapulus to Zapier
- Log into your Zapier account.
- Click on Make a Zap at the top of the page.
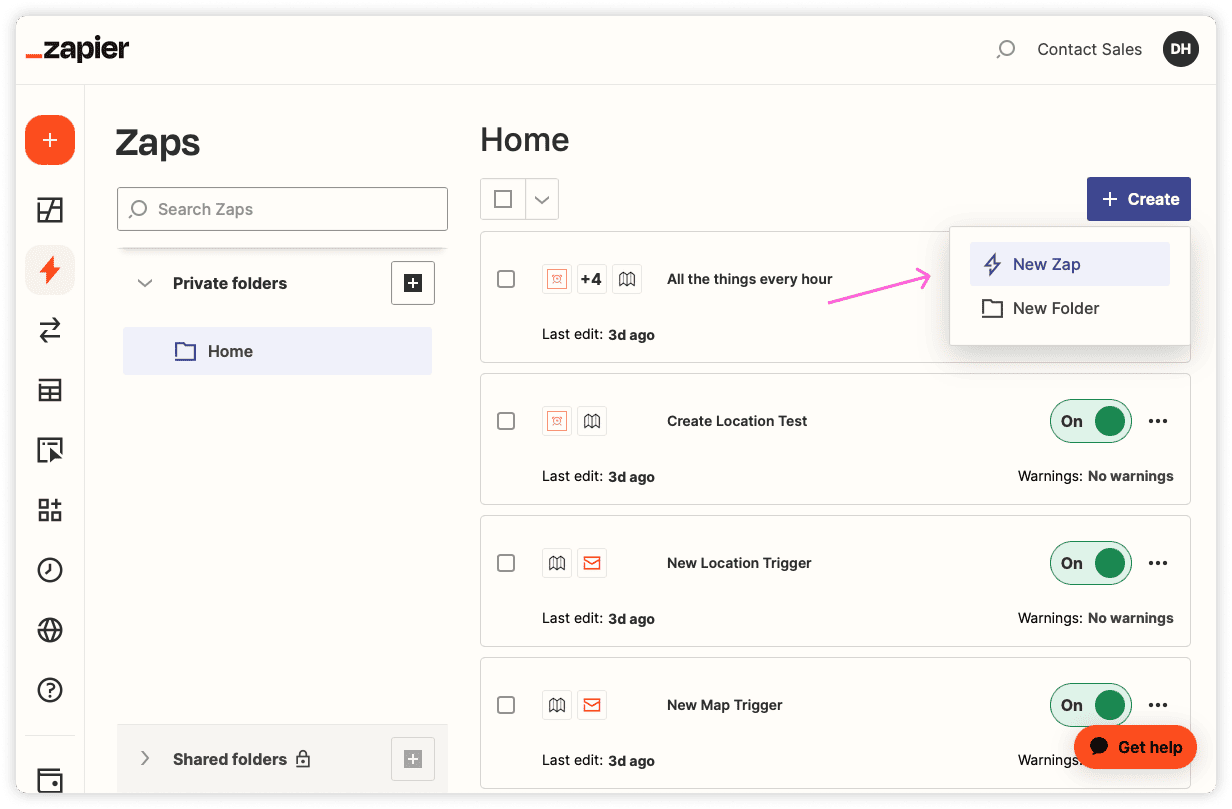
- In the search box under Choose App & Event, search for Mapulus.
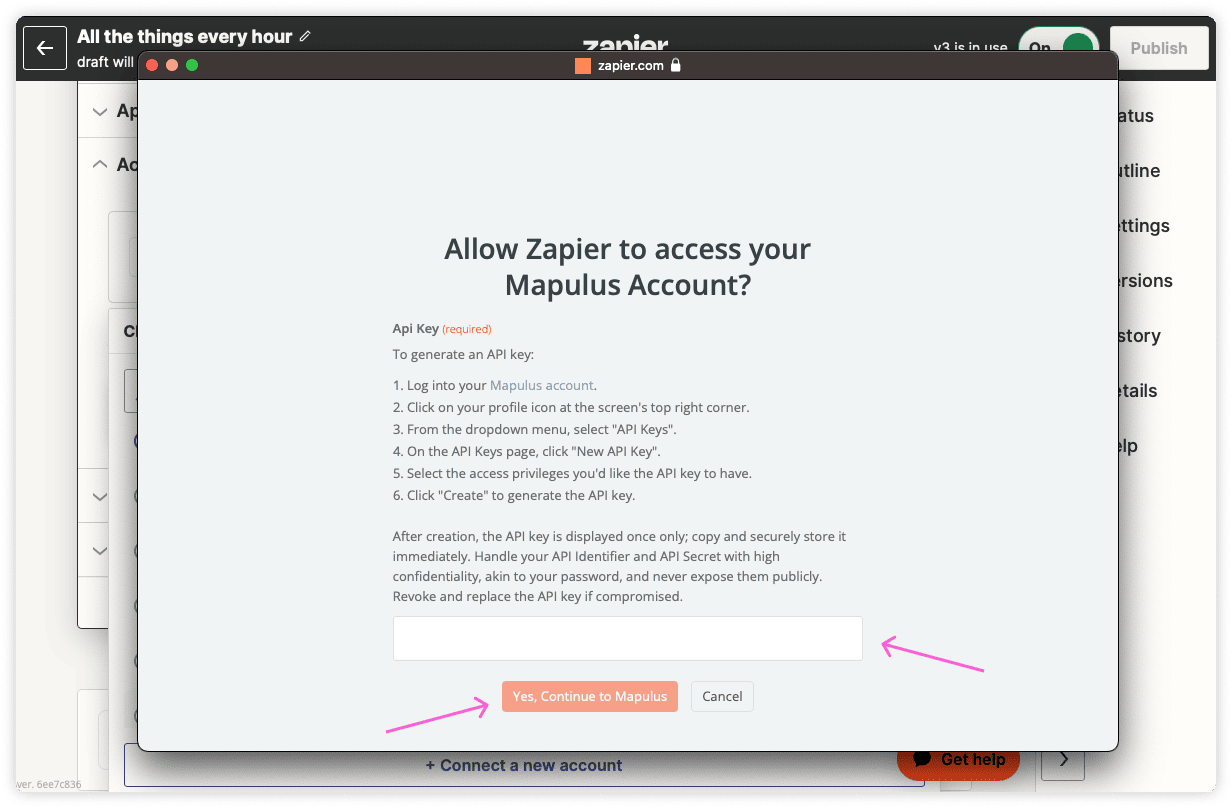
- Select Mapulus when it appears, and sign in to your Mapulus account using the API key generated in Step 1.
- Click Yes, Continue to connect your Mapulus account to Zapier.
Step 3: Set Up Triggers and Actions
Once your accounts are connected, you can configure triggers and actions to automate tasks between Mapulus and other applications.
Triggers:
- New Location: This trigger fires when a new location is added to a map.
- New Map: This trigger fires when a new map is created.
Note: These are polling triggers, so there may be a slight delay before the Zap triggers.
Mapulus Actions:
- Create Location: This action creates a location on a layer.
- Update Location: This action updates a location in the system.
- Delete Location: This action deletes a location from the system.
- Find Map: This action finds a map in the system.
- Find Location: This action finds locations in the system.
For more information about available actions and triggers, refer to the Zapier website.
As an example, you can set up a Zap that creates a new location in Mapulus whenever a new customer is registered in your CRM system.
You can find more ideas on how to set up your location sysncing in the Create Zaps to Sync Locations in Mapulus support article.
Step 4: Complete Your Zap
Once you have configured the triggers and actions according to your desired automation workflow, name your Zap and publish it. Zapier will now automatically perform the specified action whenever the trigger event occurs.
Congratulations! You have successfully connected Mapulus to Zapier, opening up a world of geographic insights for your business. Automating tasks and integrating location data with other applications will enable you to make informed decisions, optimize marketing campaigns, improve logistics planning, and gain deeper customer understanding.