Mapulus Help Centre
- Support >
- How to Add a Location to a Mapulus Map
How to Add a Location to a Mapulus Map
Learn how to use Maplus to pin and plot locations on a map and add travel boundaries (isochrone) to visualise reach and coverage.
Mapulus provides a flexible and convenient interface for adding location markers to its maps. Whether you’re plotting addresses or coordinates or want to place a location directly on the map manually, Mapulus has you covered. This guide will walk you through the steps to add a location marker on a Mapulus map.
Prerequisites:
- An active Mapulus account
- Access to the Mapulus map where you wish to add the location
Steps to Add a Location to a Mapulus Map
-
Log in to your Mapulus account: Start by logging in to your Mapulus account using your username and password.
-
Navigate to Your Map: After logging in, navigate to the map where you want to add the location. This will be under your account dashboard.
-
Add a Location: There are three ways to add a location to a mapping, depending on your preference.
- Search for the location in the top left.
- Via the ‘Add’ button in the sidebar next to the layer to which you wish to add the location.
- By right-clicking on the map and selecting “Add Location.”
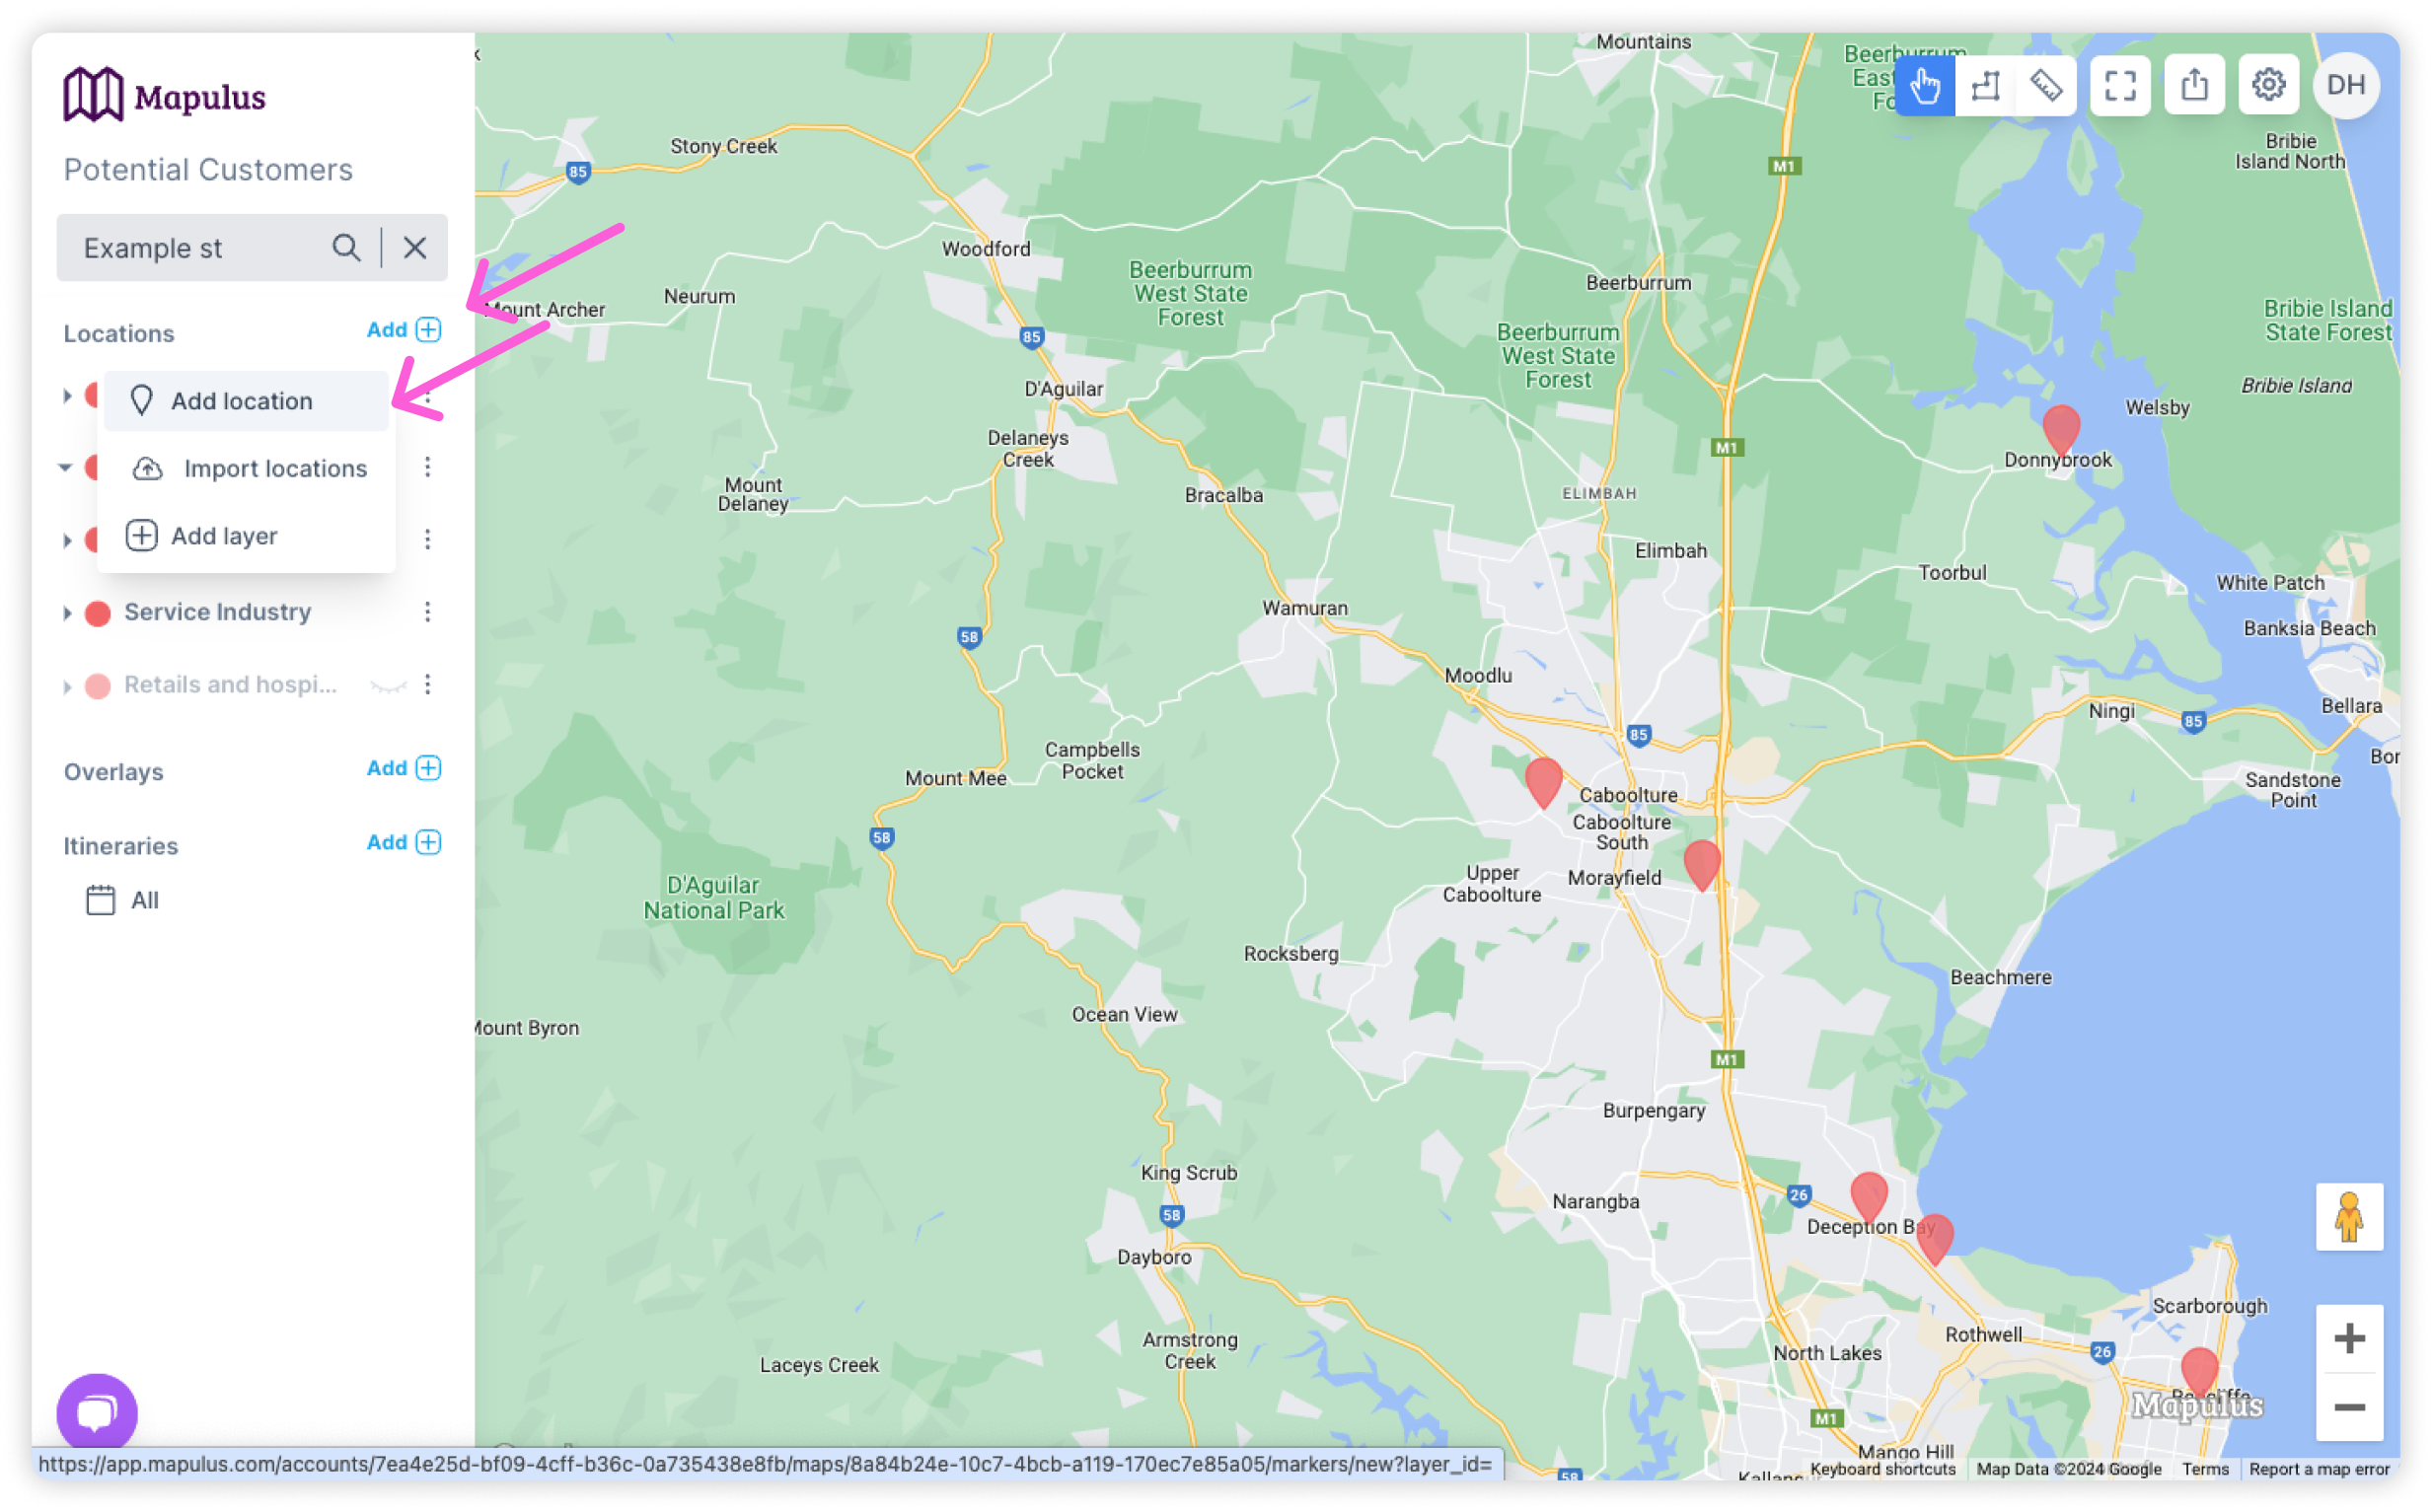
Adding Location via The Sidebar:
-
Open the Map Layers Menu: Locate the map layers menu on the map’s page. This is represented by three vertical dots that, when clicked, expand to show various options related to map layers.
-
Add Location Option: Look for the “Add location” option in the expanded map layers menu. A link with a marker or pin symbol represents this. Click on this “Add location” option.
-
Enter Location Details: A form will open where you can enter the location details. You must provide either a valid latitude and longitude or an address. The fields on this form include:
- Lat: The latitude of the location.
- Lon: The longitude of the location.
- Address: The exact physical address of the location.
- Label: A short label that will appear above the location marker on the map.
- Title: A title for the location.
- Layer: The layer you would like the location to be added to.
- External ID (Optional): If you have an external ID for the location, you can enter it here.
- Confirm and Save: Click the “Add location” button after entering the details. This action will add the location marker to your map.
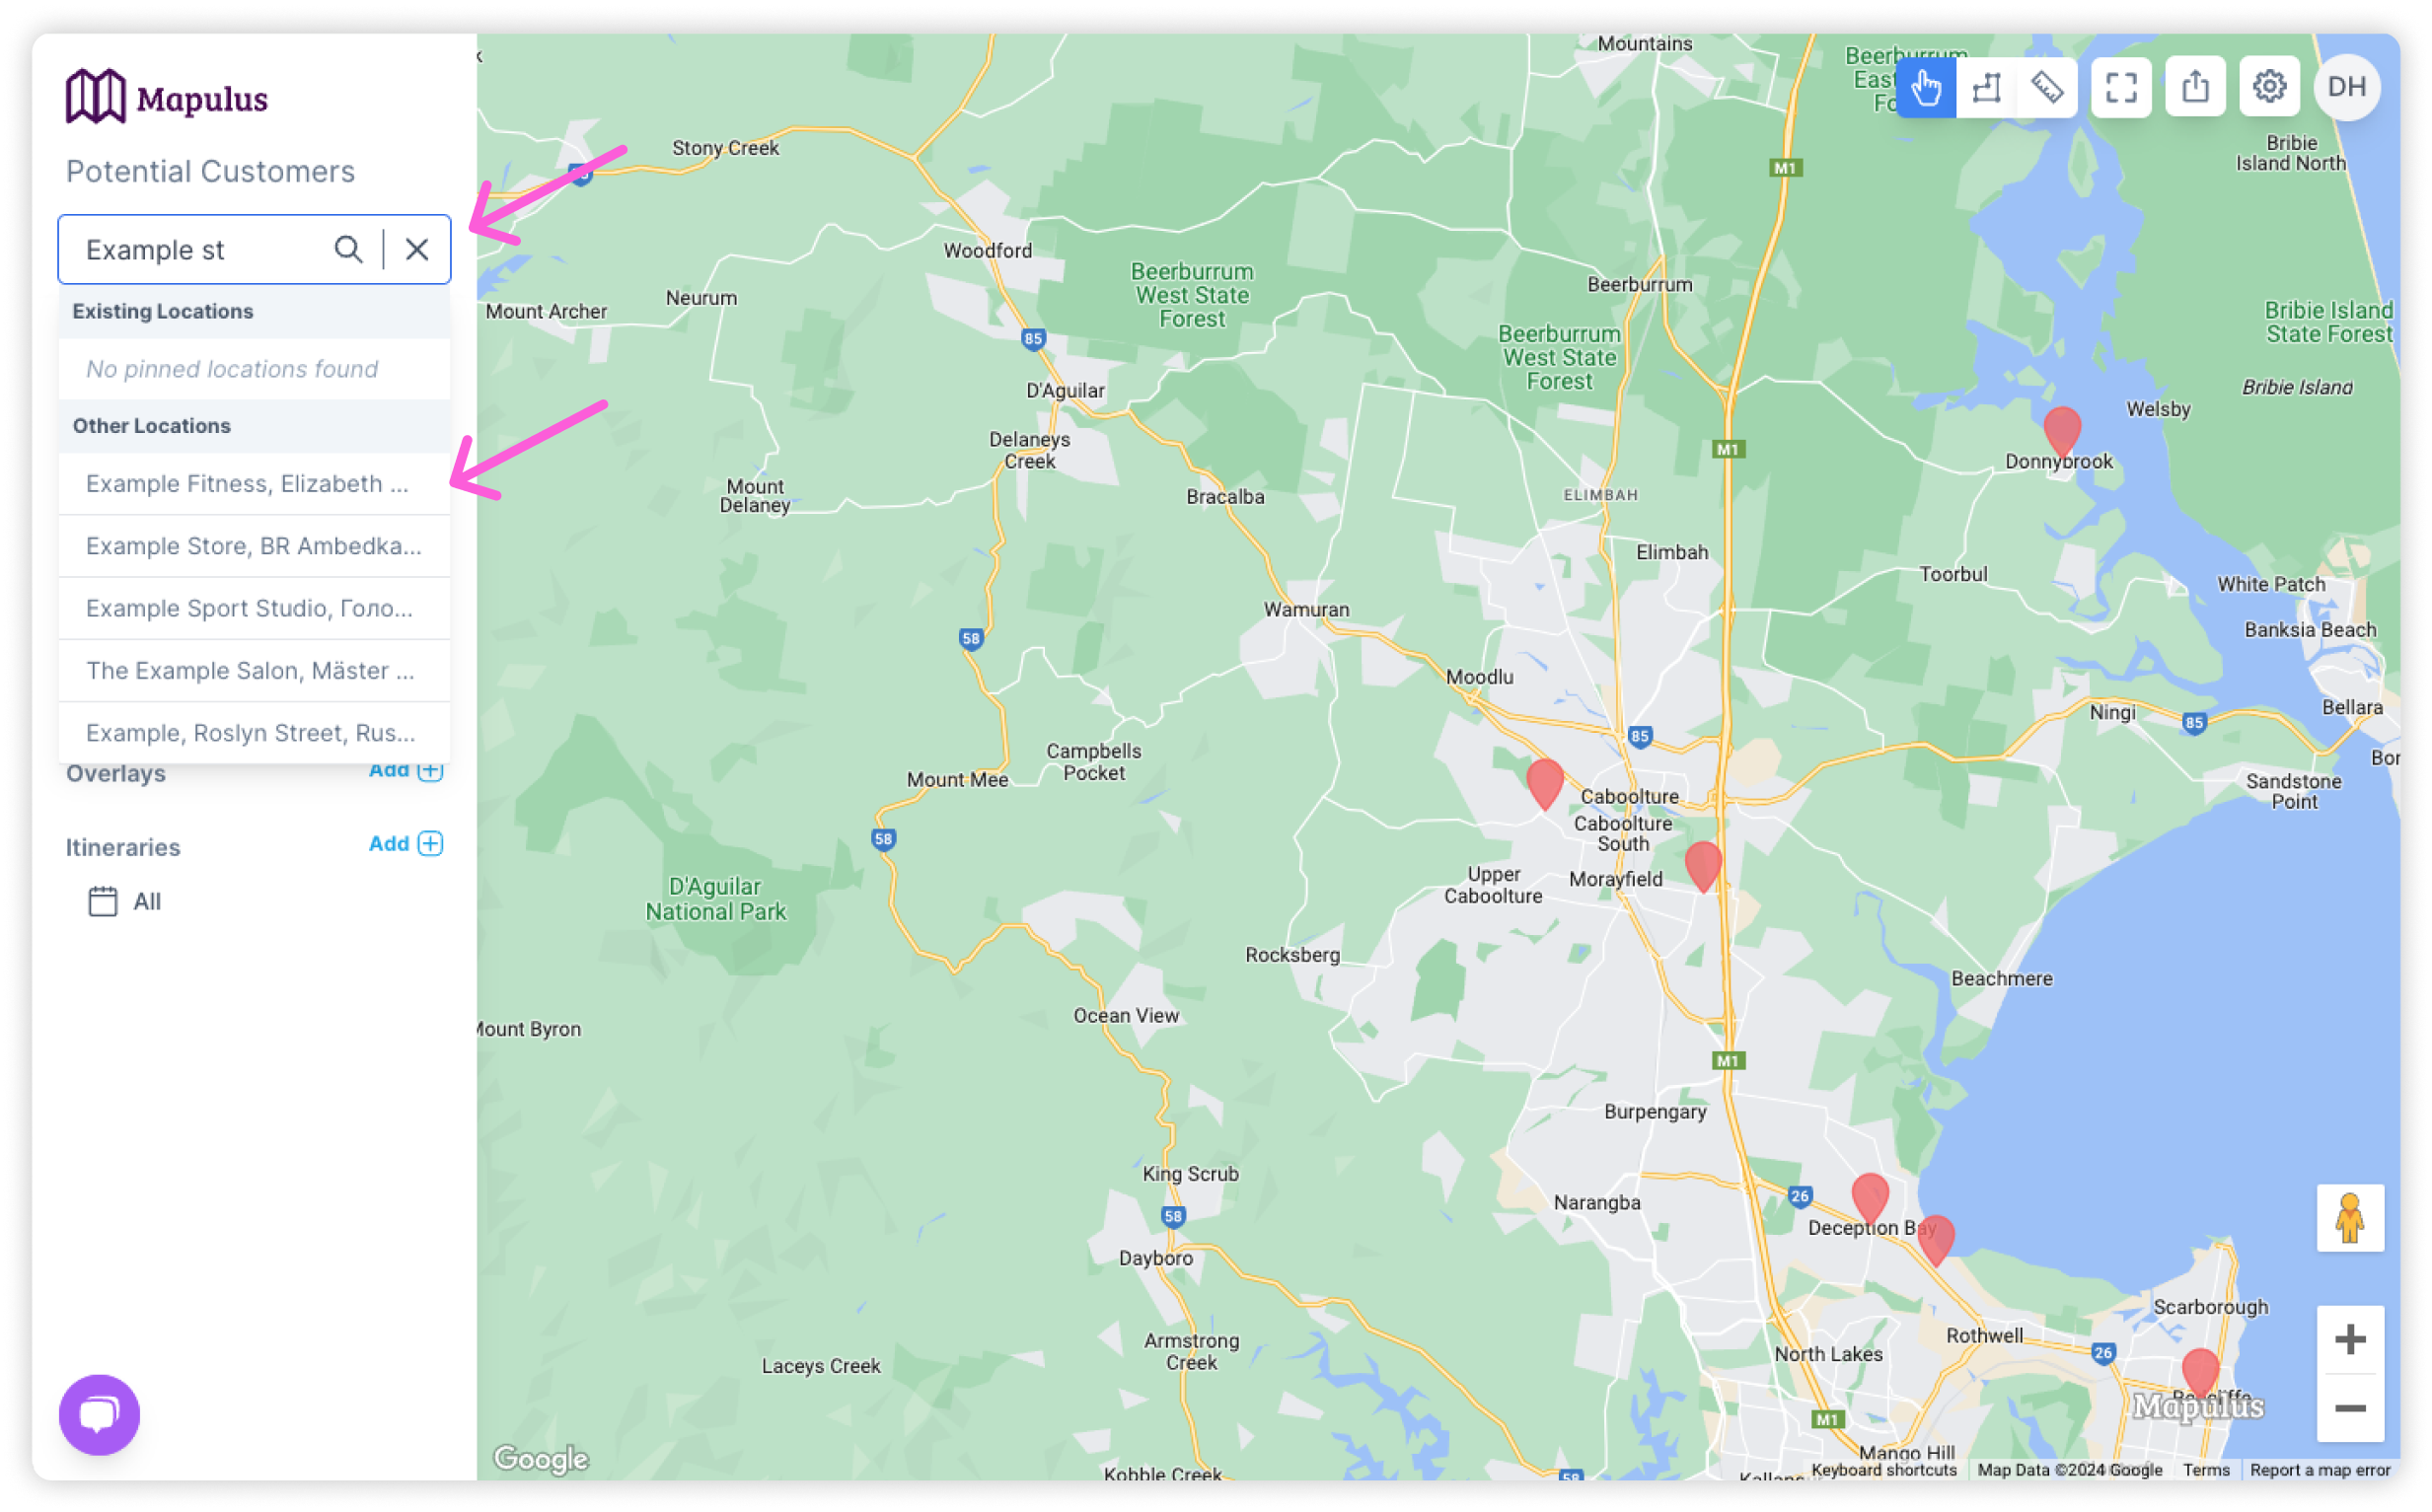
Adding Location via the search:
-
Search for the address or location: Click on the search input and start typing the location address or name you wish to add.
-
Select the location you wish to add: Click on the location in the search results.
-
Select Add Location: A context menu should appear above the point on the map. Select “Add Location”.
-
Enter Location Details: After selecting “Add Location,” a dialogue box will appear for you to enter the location’s details. The fields in this dialogue box are the same as those described above for adding a location via address or coordinates.
-
Confirm and Save: Click the “Add location” button to add the location marker to your map.
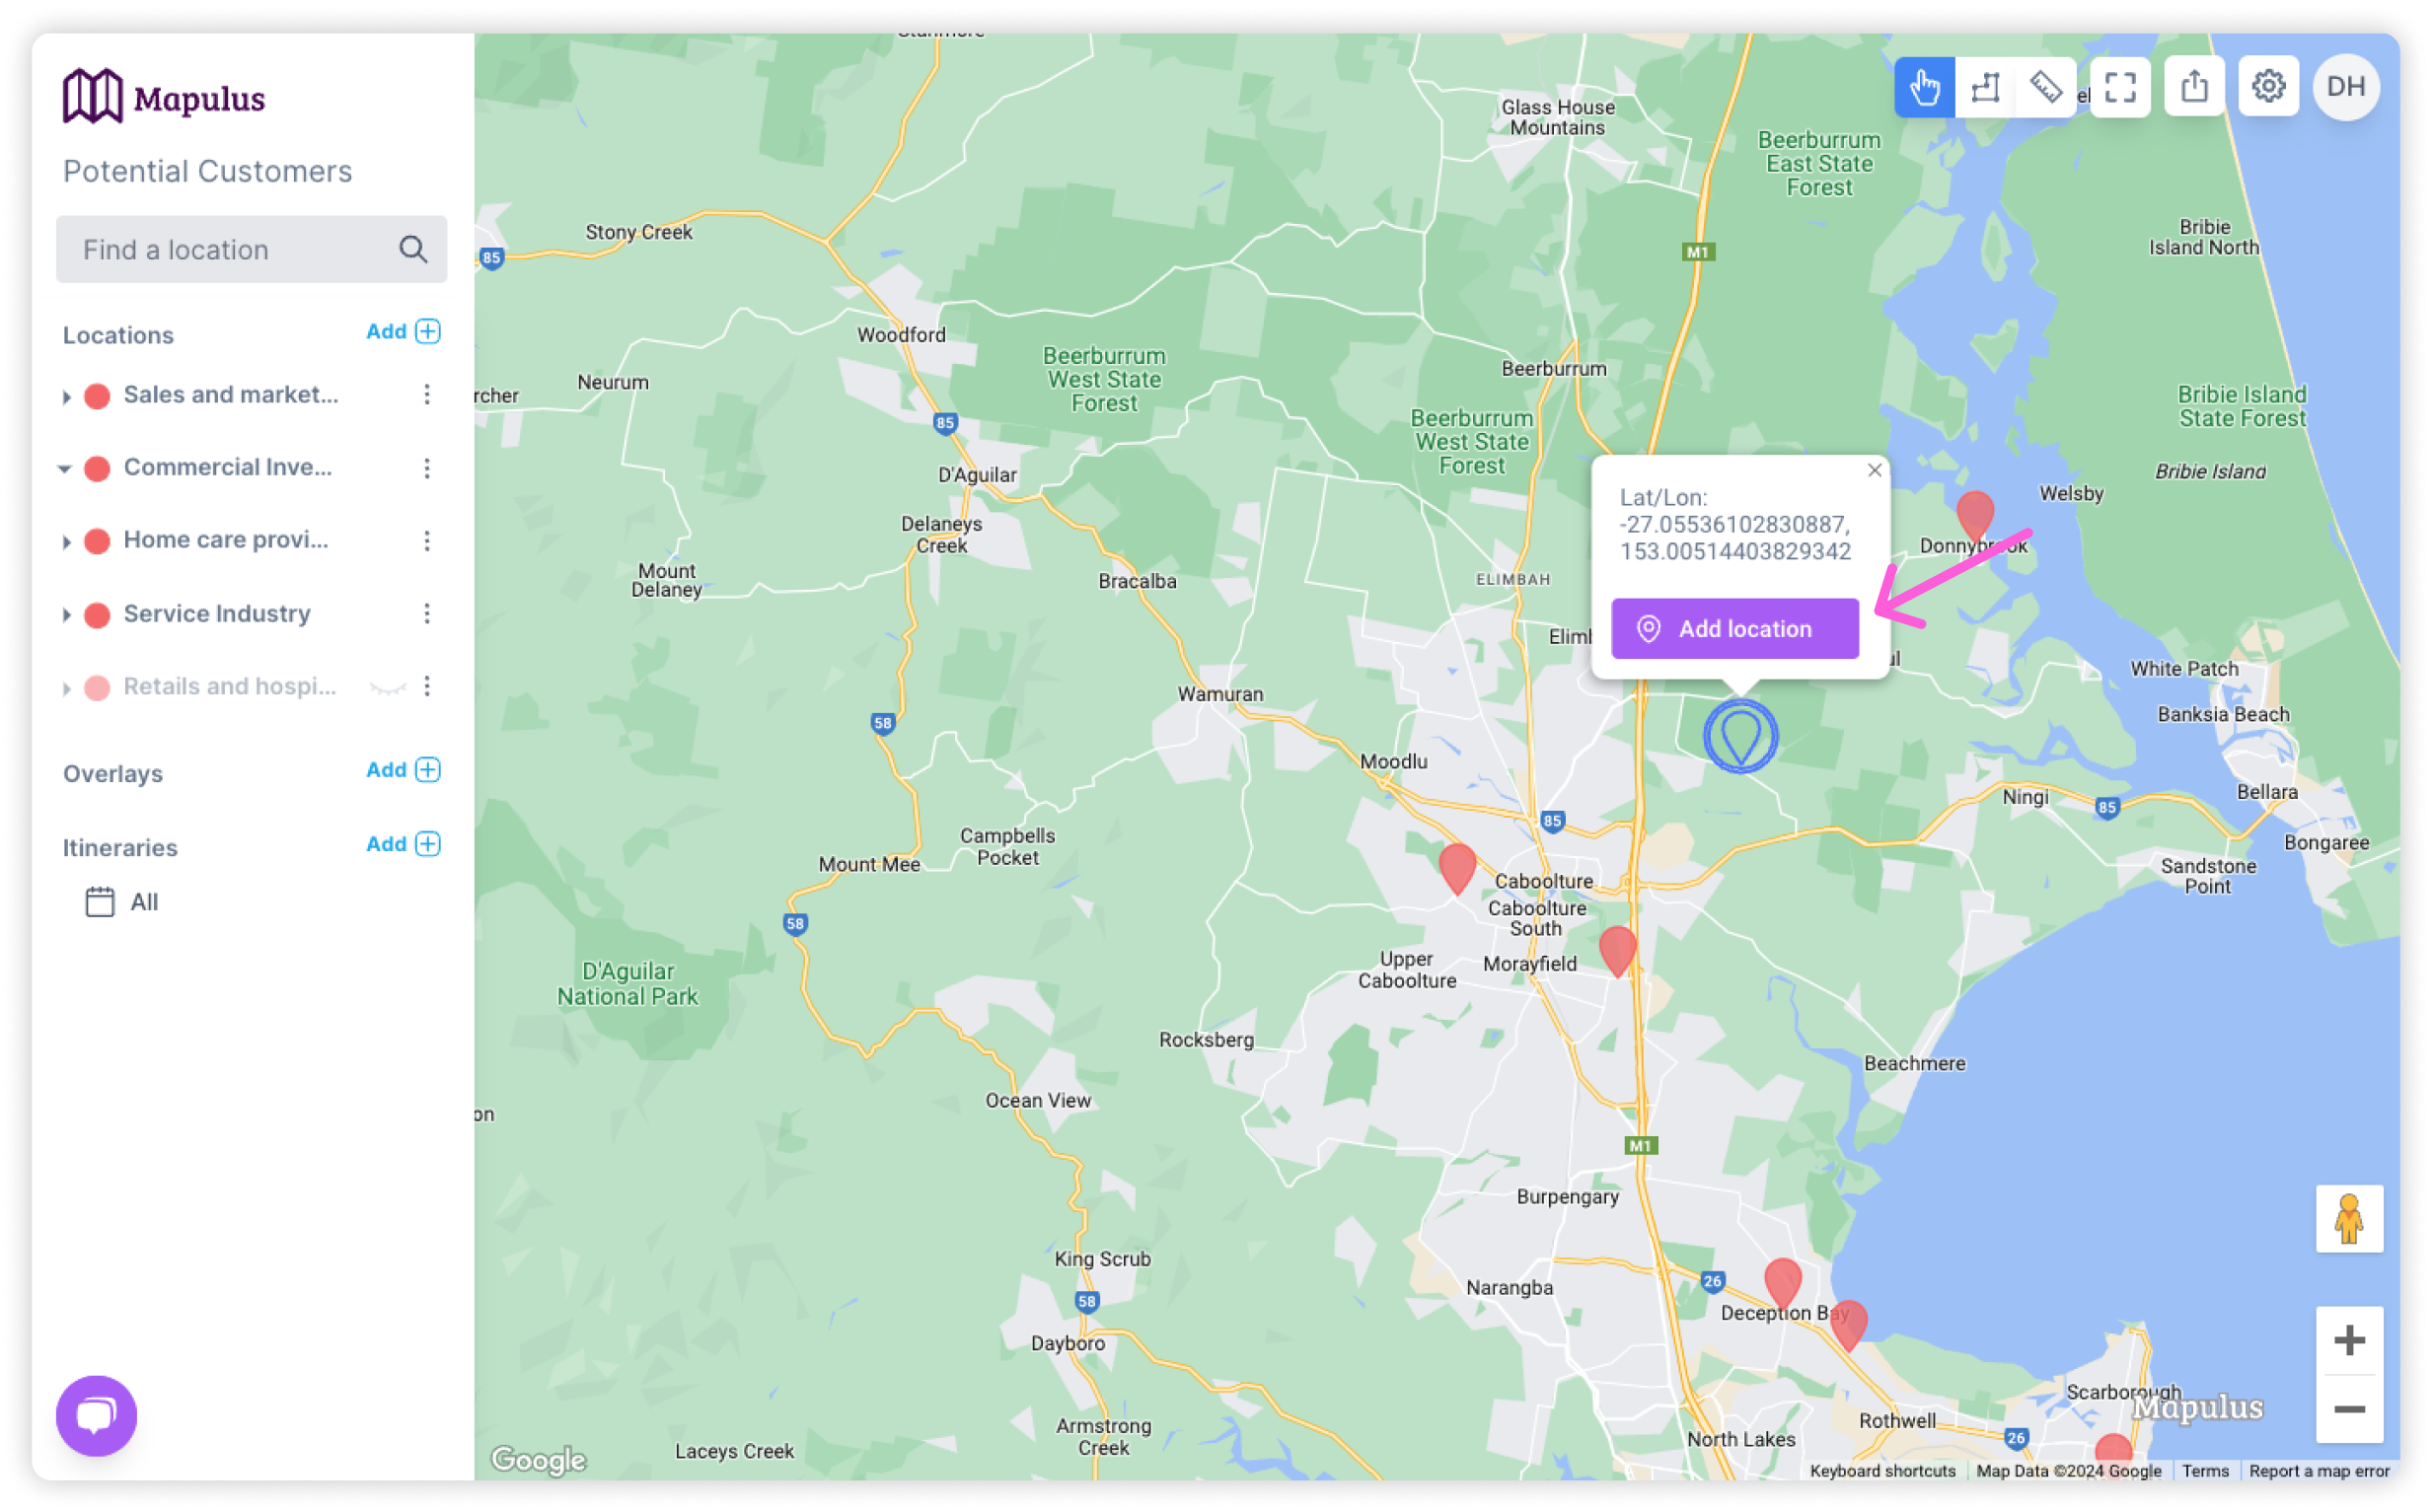
Adding Location via Right-Click or Control-Click:
-
Navigate to Desired Location on the Map: After logging in and accessing your map, navigate to the general area where you wish to add a location.
-
Right-Click or Control-Click on the Map: Position your cursor over the specific spot where you want to add a location and right-click if you’re using a PC or control-click if you’re on a Mac.
-
Select Add Location: A context menu should appear above the point you clicked. Select “Add Location”.
-
Enter Location Details: After selecting “Add Location,” a dialogue box will appear for you to enter the location’s details. The fields in this dialogue box are the same as those described above for adding a location via address or coordinates.
-
Confirm and Save: Click the “Add location” button to add the location marker to your map.
Regardless of your chosen method, the new location should now be visible as a marker on your Mapulus map. You can click on the marker to view the location’s details.
And there you have it! You now know three ways to add a location to your Mapulus map.