Mapulus Help Centre
- Support >
- Adding A Travel Range to a Location in Mapulus.
Adding A Travel Range to a Location in Mapulus.
Learn how to add travel ranges to show drive times and travel times walking or cycling from a location.
Mapulus offers a convenient feature that allows you to add travel ranges (also known as drive time or travel isochrones) to a location on your map. By defining a travel range, you can visualise areas within a certain distance or time from a specific location. This guide will walk you through the steps to add travel ranges to a location in Mapulus.
Prerequisites:
- An active Mapulus account.
- Access to the Mapulus map where you want to add travel range.
Steps to Add a travel range to a Location:
-
Log in to your Mapulus account: Start by logging in to your Mapulus account using your credentials (username and password).
-
Navigate to Your Map: After logging in, navigate to the map where you want to add a travel range. You can find your maps in your account dashboard.
-
Locate the Location Marker: Identify the specific location marker you want to add a travel range to. You can search for it in the top left, find it in the layer on the left, or locate it on the map.
-
Select the Location Marker: Click on the location marker either in the search results, sidebar, or map to open the location details menu. This menu provides various actions and settings related to the location.
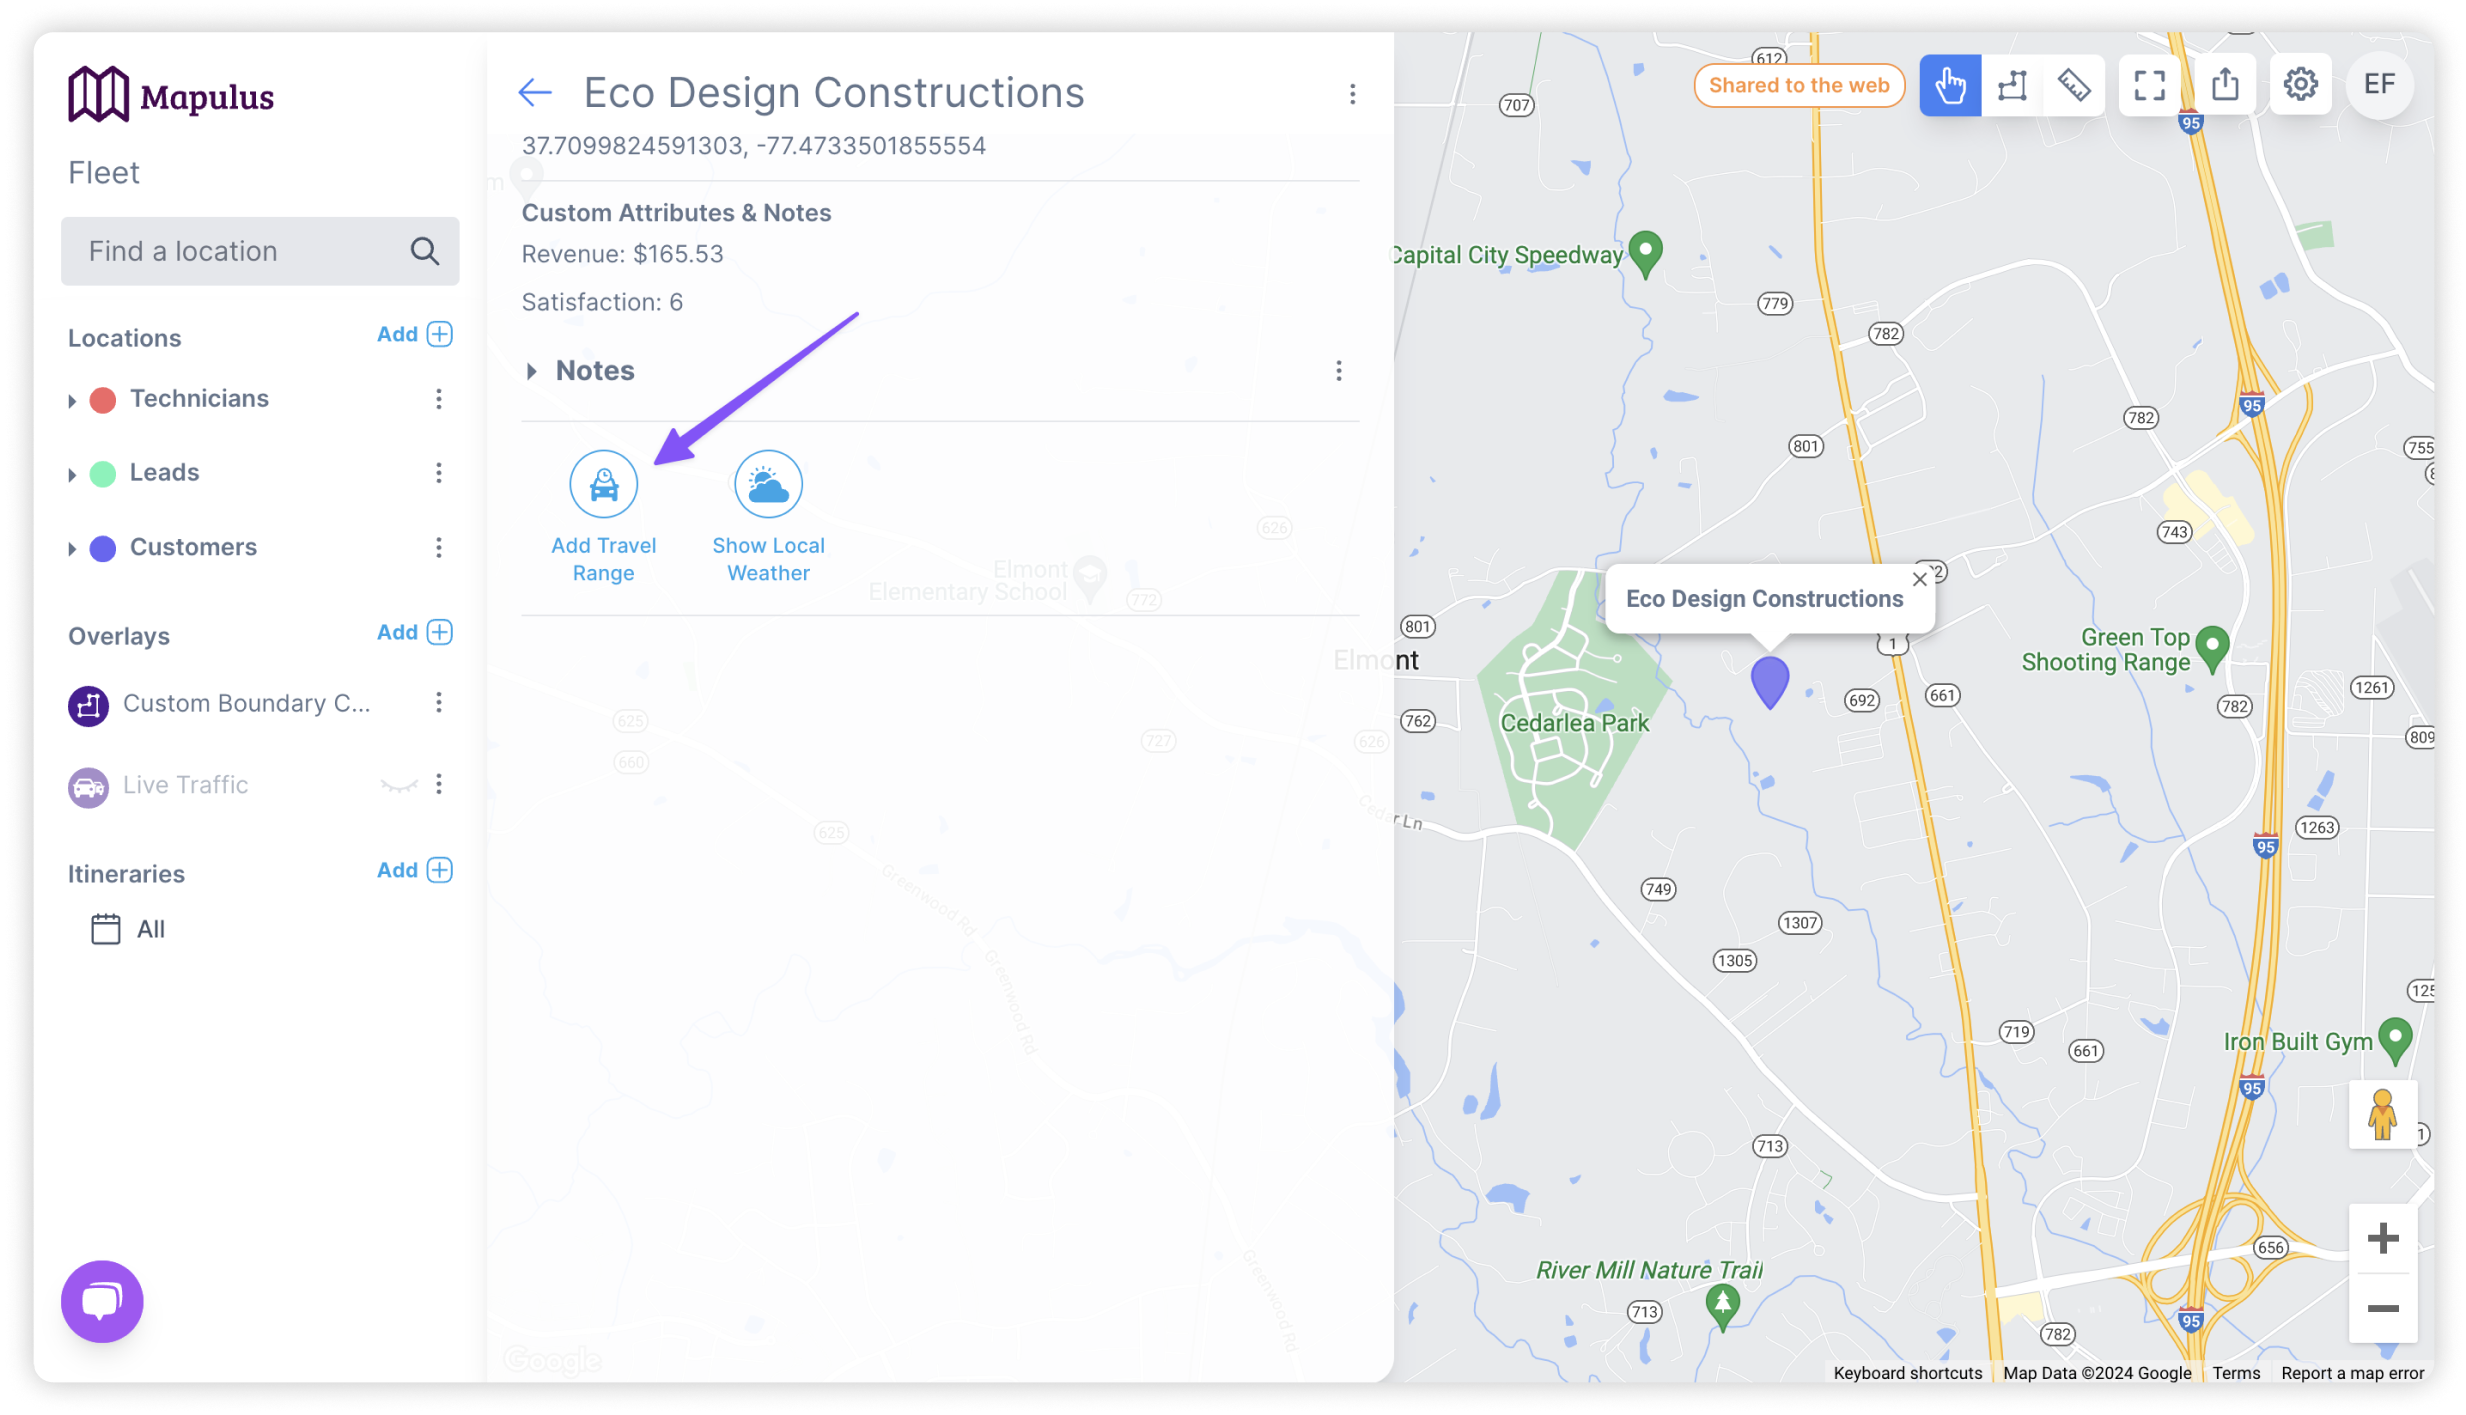
- Add Travel Range Option: In the locations menu, scroll to the “Add Travel Range” icon and click on it.
-
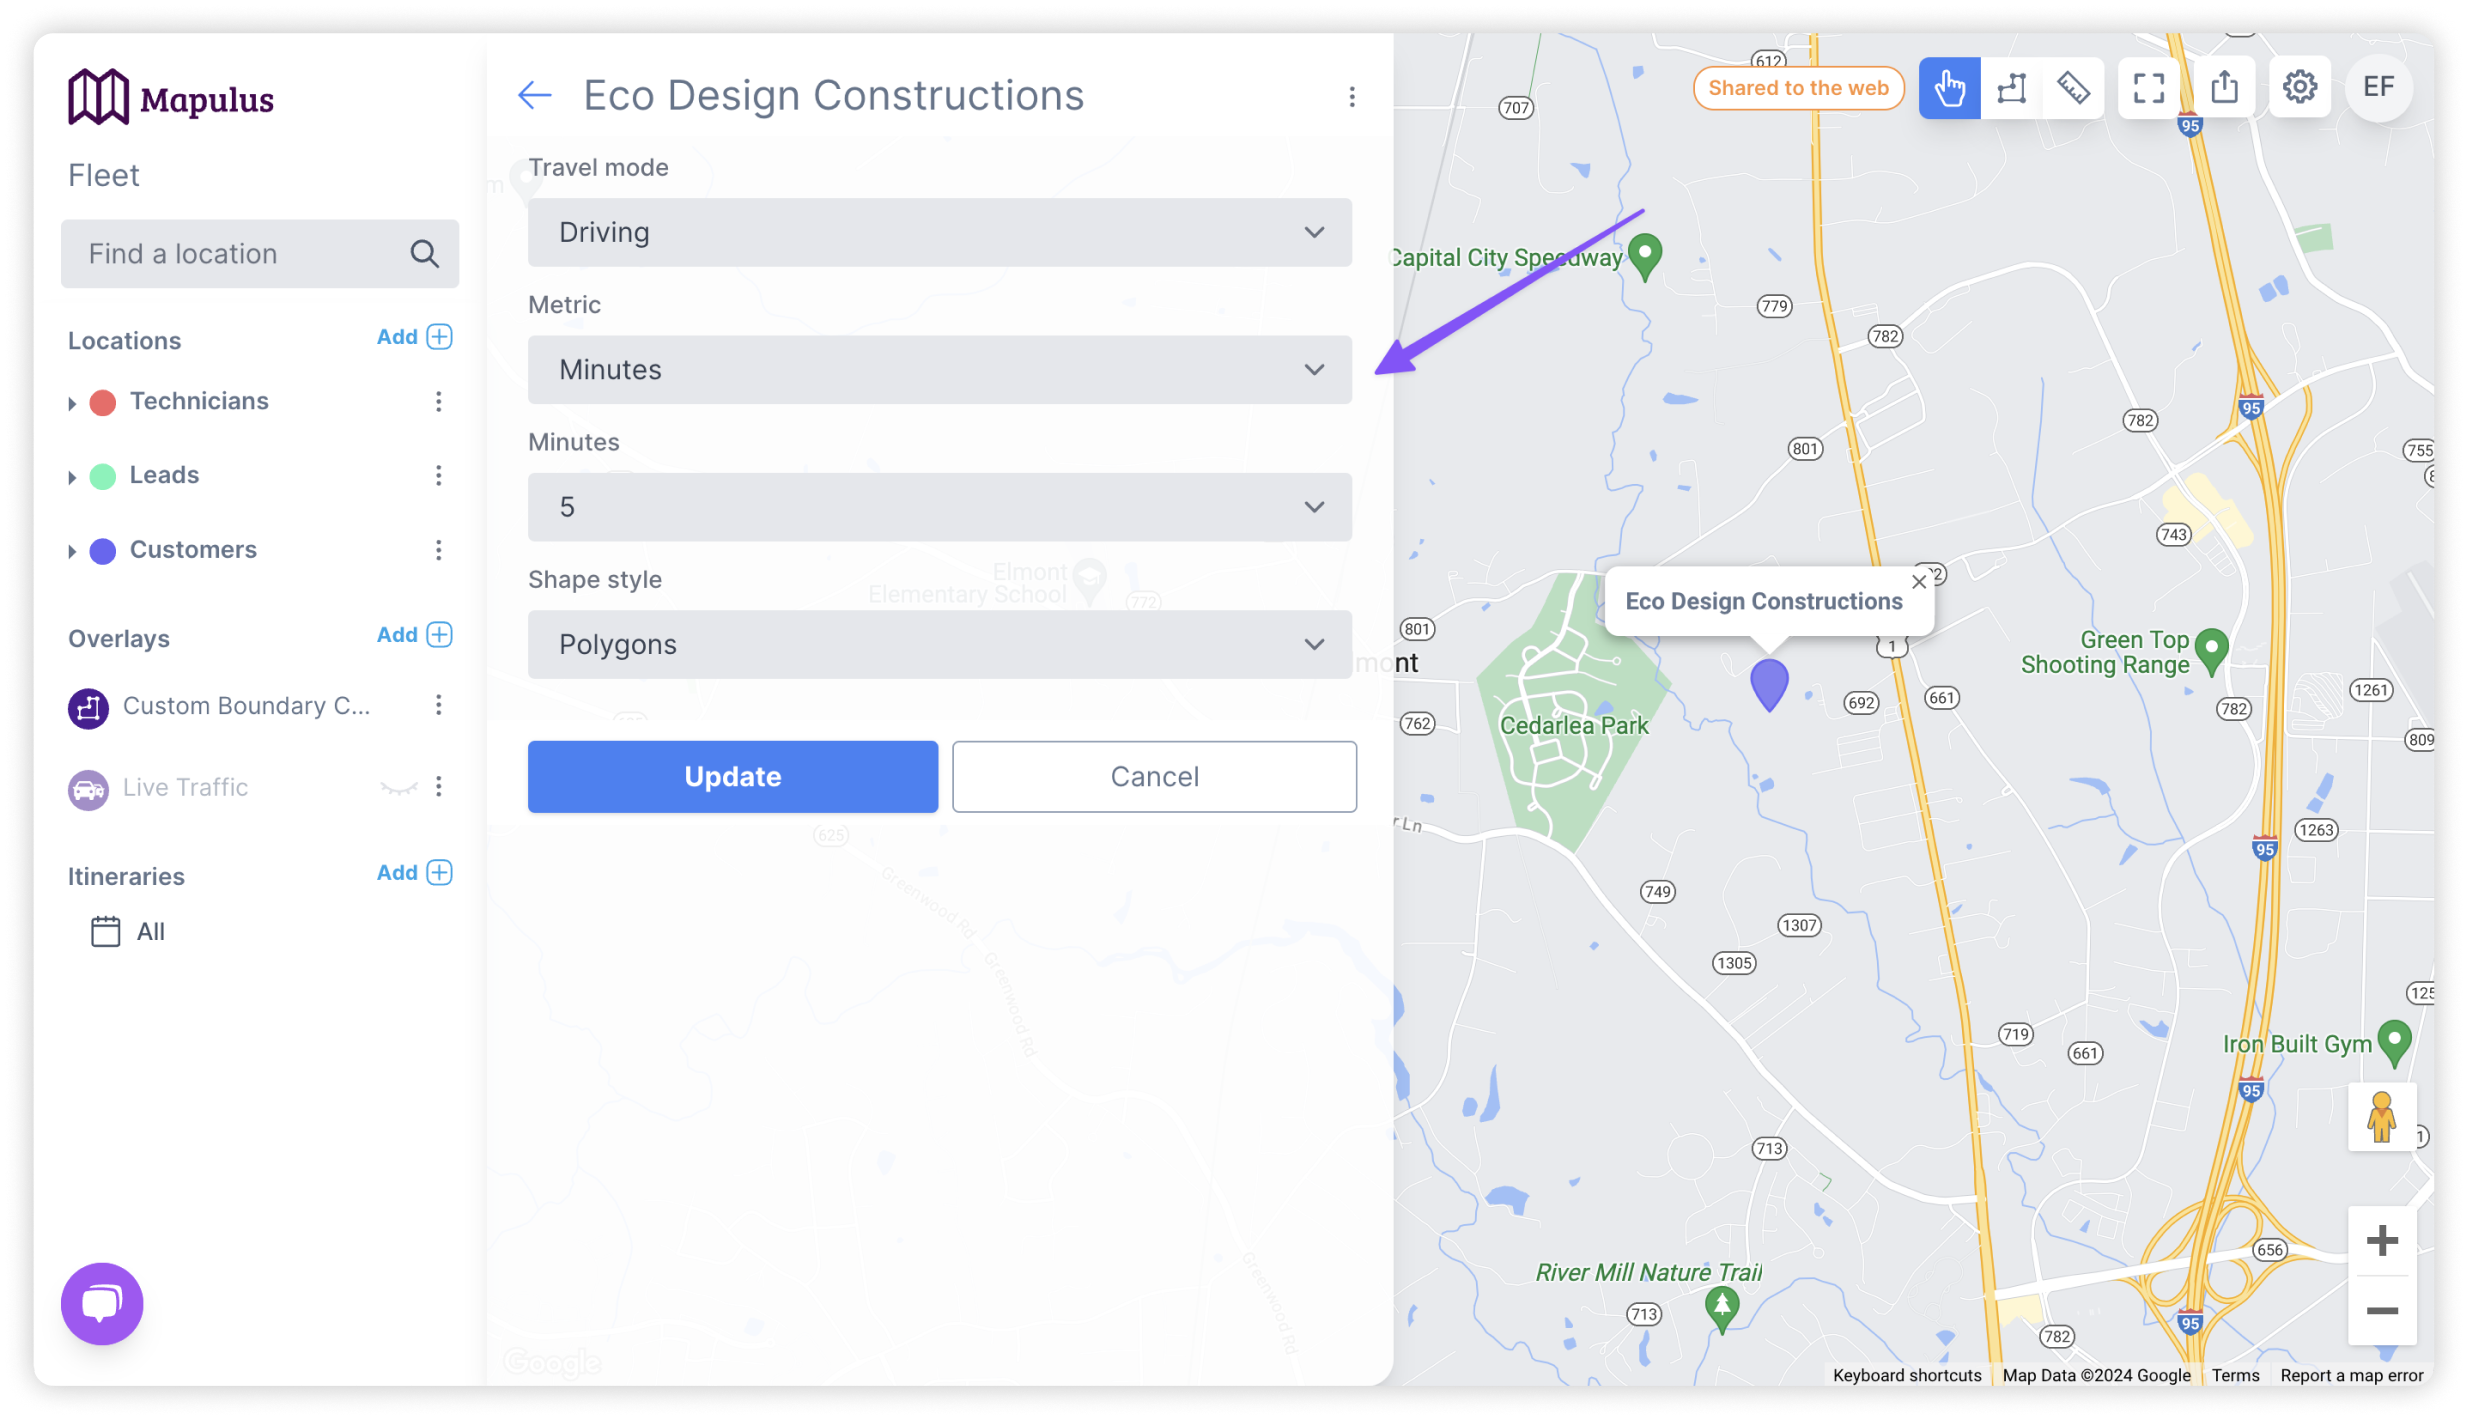
Configure a travel range: After selecting the “Add Travel Range” option, the form will load so you can customise the travel ranges according to your preferences. The available options may include:
-
Travel Mode: Choose the mode of transportation for defining the travel ranges, such as driving, walking, or cycling.
-
Travel Metric: Specify if you want to visualise how far you could travel withing a specific time (Minutes), or where you could travel to withing a certian distance (Metres).
-
Shape Style: Select the visual representation style for the travel ranges, such as filled polygons or outlines.
-
-
Confirm and Save: Once you have configured the travel range, click the “Update” to add the travel range to your location marker on your map.
-
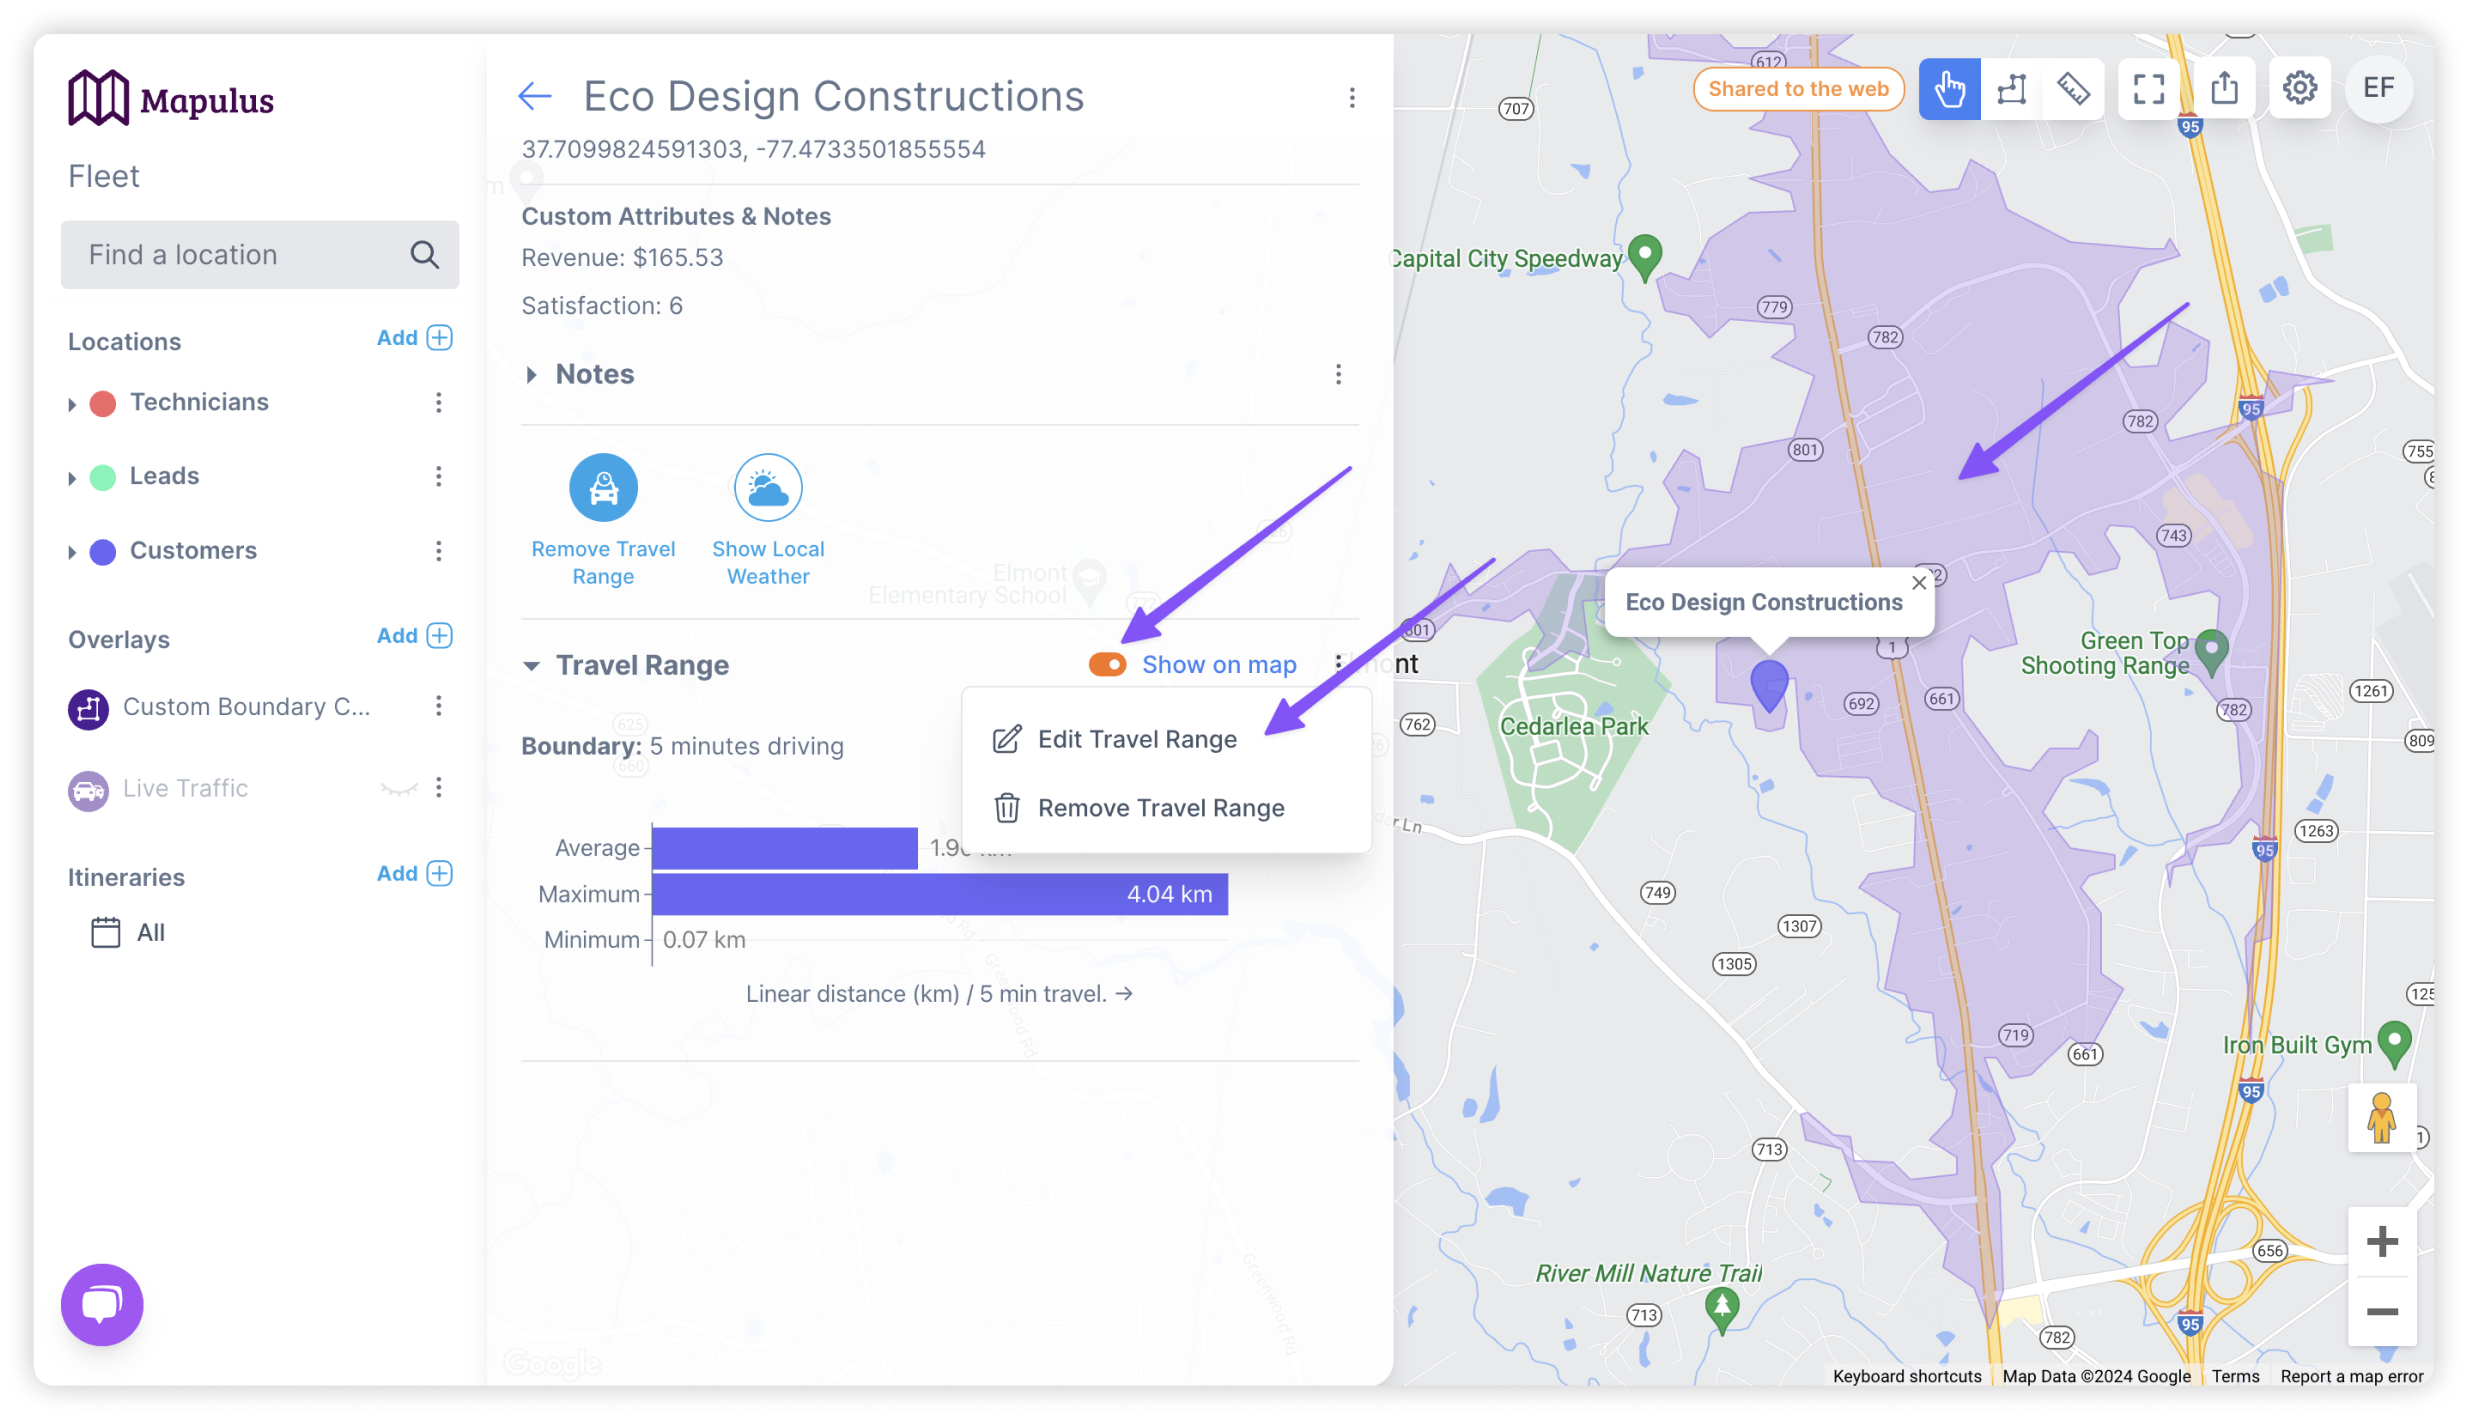
View travel range: The travel range will now be visible around the location marker on your Mapulus map. You can zoom in or out to explore the ranges and analyse the areas within the specified travel distance or time.
-
Customize a travel range: If you want to adjust or modify the travel range, you can access the location options or details menu by clicking on the three verticle dots to the right of the travel range section header and clicking on “Edit Travel Range”. You can also toggle the visibility of the range on the map by clicking on the “Show on a map” switch and close by closing the Travel Range accordion section in the details menu.
Congratulations! You have successfully added travel ranges to a location in Mapulus. This feature can help visualise service areas, planning logistics, or analysing proximity to specific locations.
Mapulus empowers you to create meaningful maps with advanced features like travel ranges. Start leveraging this functionality to enhance your mapping experience and gain valuable insights from your geographic data.